
Main Courses
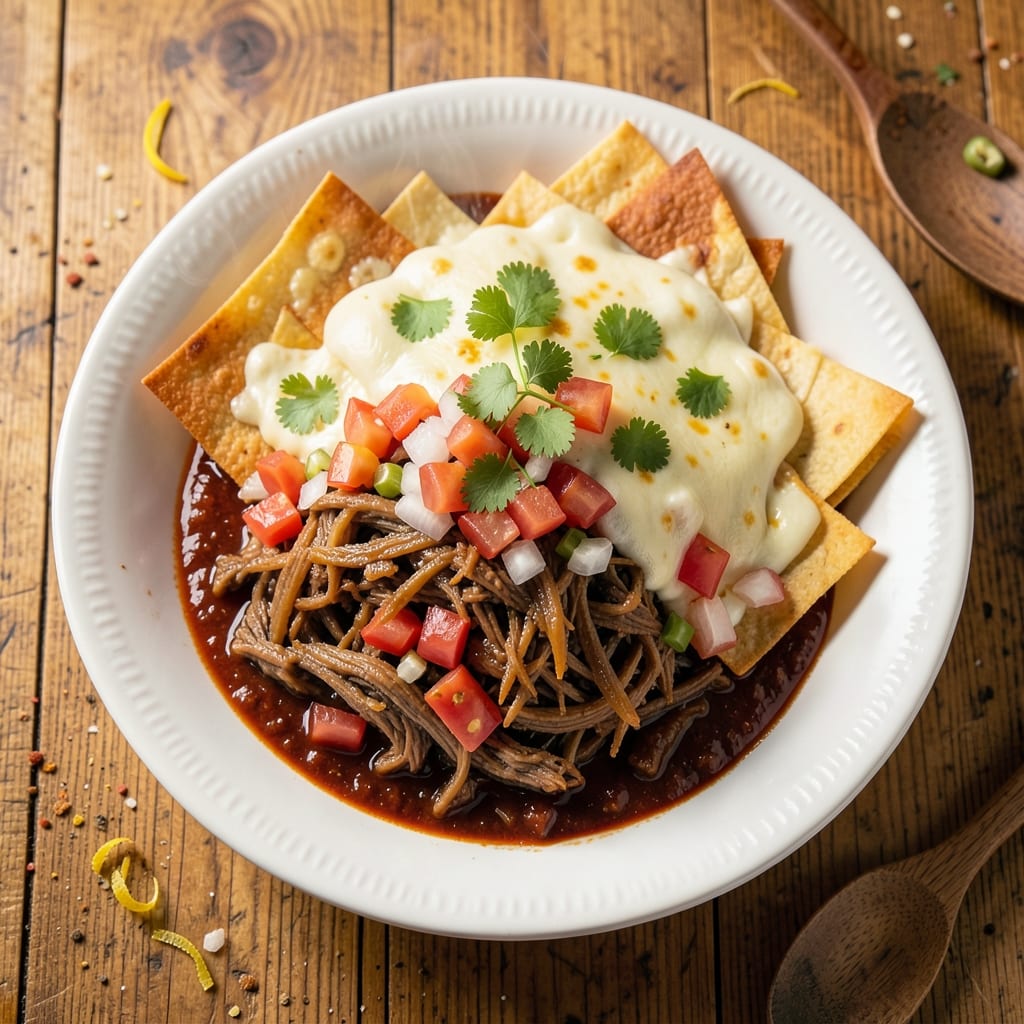
This authentic Mexican shredded beef chimichanga delivers the perfect balance of tender, spiced beef wrapped in crispy tortillas—just like your favorite taqueria makes. The secret lies in slow-braising the beef with traditional spices like cumin and chili powder, then rolling it tightly in warm flour tortillas before achieving that signature golden-brown crunch through deep-frying. I’ve perfected this recipe over years of testing, ensuring every bite delivers authentic Mexican flavors with restaurant-quality texture.
The process starts with a rich, flavorful beef filling that’s cooked low and slow until fork-tender, then shredded and mixed with just the right amount of seasoning. Warm flour tortillas are key—they hold up better during frying than corn tortillas and create that satisfying crispy exterior. Once assembled, the chimichangas are fried until golden and crispy, then served with classic sides like refried beans, Mexican rice, and a dollop of sour cream or pico de gallo for that authentic touch.
What makes this recipe truly special is the combination of tender, seasoned beef and the satisfying crunch of the tortilla. The filling stays moist and flavorful while the outside achieves that perfect golden-brown finish. This isn’t just a dish—it’s a taste of Mexico that’s easy to recreate at home, whether you’re feeding a crowd or treating yourself to a delicious weeknight meal.
Serve these chimichangas with all the classic toppings—sour cream, guacamole, shredded lettuce, and a side of salsa—for the full experience. The crispy tortillas will hold up perfectly, and the beef filling will stay juicy and packed with flavor. Ready to make this authentic Mexican favorite? Let’s get started!
Ingredients for authentic mexican shredded beef chimichanga
Sixteen ingredients, all packed with authentic Mexican flavor for chimichangas that taste like a taqueria classic.
| Ingredient | Amount | Notes |
|---|---|---|
| Chuck Roast 🥩 | 3 lb | Cut into 2-inch chunks, trim excess fat |
| Yellow Onions 🧅 | 2 whole | Medium size, sliced into half-moons |
| Garlic Cloves 🧄 | 6 cloves | Fresh, peeled and minced |
| Ground Cumin 🌿 | 2 tbsp | Freshly toasted for depth |
| Chili Powder 🌶️ | 2 tbsp | Medium heat, not hot |
| Smoked Paprika 🌶️ | 1 tbsp | For authentic smoky flavor |
| Bay Leaves 🌿 | 2 whole | Fresh if possible, dried works |
| Beef Broth 💧 | 3 cups | Low-sodium, homemade preferred |
| Tomato Paste 🍅 | ½ cup | Squeeze tube or canned |
| Flour Tortillas 🌯 | 12 whole | Medium size, 10-inch diameter |
| Vegetable Oil 🫒 | 4 cups | For deep-frying, high smoke point |
| Salt 🧂 | 1 ½ tsp | Kosher salt, adjust to taste |
| Black Pepper 🌶️ | 1 tsp | Freshly ground, medium grind |
| Lime 🍋 | 1 whole | Juiced for brightness, plus wedges |
The chuck roast is non-negotiable here—it's the only cut that delivers that signature fork-tender texture. Costco or Walmart usually have it pre-cut into chunks, which saves time, but if you're buying a whole roast, ask the butcher to cube it for you. Look for good marbling—it's what keeps the meat juicy during the long braise. The onions and garlic are the flavor foundation, so don't skimp on freshness. Trader Joe's or your local Mexican market will have the best selection of vibrant, flavorful onions. Toast your cumin and chili powder in a dry pan for 30 seconds before adding to the beef—this simple step unlocks so much more depth of flavor.
No smoked paprika? Regular paprika plus a pinch of liquid smoke works in a pinch, though it won't be quite the same. Running out of beef broth? Water plus a bouillon cube gets you close, but homemade is always better. The tomato paste can be any brand, but San Marzano is worth the splurge if you're using canned. For the tortillas, Mission or La Tortilla Factory are the gold standards—avoid the pre-shredded kind from the canned goods aisle. They're tough and dry. If you're frying, keep the oil temperature steady at 350°F—too hot and they'll burn before crisping up properly.
The beef filling keeps beautifully in the fridge for 4 days, making this a perfect make-ahead meal. Portion it into containers with a layer of oil on top to preserve moisture. The tortillas, meanwhile, are best used fresh, but you can warm them in a dry skillet for 30 seconds per side if you're prepping ahead. These chimichangas reheat beautifully—just pop them in a 350°F oven for 10 minutes to restore that crispy exterior. Freeze extras between layers of parchment paper for up to 3 months—they're perfect for lazy weeknight dinners.
Why You'll Love This Recipe
- Here’s what sold me: these chimichangas reheat like a dream for packed lunches or school dinners. My kids (yes, even the picky one) actually finish them, and I’ve sent leftovers to work without a single complaint.
- One-Pot Magic: I swear by this recipe because it’s all about minimal cleanup—just one pot for the beef, onions, and garlic, then straight into the fryer or oven. No messy skillets, no extra bowls, and honestly? That’s my kind of cooking.
- Deep, Smoky Richness: The chuck roast gets so tender it falls apart at the touch, while the cumin and chili powder work their magic—earthy, warm, and just spicy enough to linger. Between us, this isn’t your basic beef dish; it’s ridiculously flavorful.
- Lunchbox Hero: Here’s what sold me: these chimichangas reheat like a dream for packed lunches or school dinners. My kids (yes, even the picky one) actually finish them, and I’ve sent leftovers to work without a single complaint.
Step-by-step instructions for authentic Mexican shredded beef chimichangas
Here's how to bring authentic Mexican flavors to life with perfectly crispy chimichangas stuffed with tender beef.
Prepare the Spiced Chuck Roast
Trim excess fat from the 3 lb chuck roast and cut it into 2-inch chunks. In a large bowl, combine the beef with 2 whole yellow onions (sliced into half-moons), 6 cloves minced garlic, 2 tbsp ground cumin, 2 tbsp chili powder, 1 tbsp smoked paprika, 1.5 tsp salt, and 1 tsp black pepper. Massage the spices into the meat until evenly coated—this ensures deep flavor penetration.
Heat 2 tbsp vegetable oil in a heavy Dutch oven over medium-high heat. Working in batches, sear the beef mixture for 3-4 minutes per side until deeply browned. This step develops the rich, caramelized flavors that form the base of your chimichangas. Transfer the seared beef to a plate and set aside.
Build the Zesty Braising Liquid
In the same Dutch oven, add 0.5 cup tomato paste and cook for 1-2 minutes, stirring constantly, until it darkens slightly. Pour in 3 cups beef broth and add the 2 whole bay leaves. Return the beef mixture to the pot, stirring to combine. Bring to a simmer, then reduce heat to low, cover, and let it braise for 2.5-3 hours until the beef is fork-tender and easily shreds.
Real talk: This is where patience pays off. The beef should pull apart with minimal resistance, and the liquid should have reduced enough to coat the back of a spoon. If it's not quite there, add ½ cup water and continue cooking for another 20-30 minutes. Once tender, remove the bay leaves and discard them.
Shred and Season the Beef
Using two forks, shred the beef directly in the Dutch oven, breaking it into fine, even strands. Stir in the juice from the whole lime (about 2 tbsp) and mix well. Taste and adjust seasoning with additional salt or chili powder if needed. The filling should be vibrant, flavorful, and ready to stuff into tortillas. Let it cool slightly while you prepare the chimichangas.
Here's the thing—don't skip the lime juice. It brightens the deep, earthy flavors of the beef and spices, giving your chimichangas that authentic Mexican zing. The filling should be moist but not soupy—if it's too wet, drain off any excess liquid before proceeding.
Assemble and Fry the Chimichangas
Warm the 12 whole flour tortillas in a dry skillet for 30 seconds per side to make them pliable. Spoon about ½ cup of the beef mixture onto the center of each tortilla, leaving a 1-inch border around the edges. Fold the sides of the tortilla inward, then roll it tightly from the bottom up, sealing the filling inside. Press the edges firmly to ensure a good seal.
Heat 2 cups vegetable oil in a deep skillet or Dutch oven to 350°F. Fry the chimichangas in batches for 2-3 minutes per side until they're deep golden brown and crispy. Drain on a wire rack or paper towels to remove excess oil. The key here is even frying—don't overcrowd the pan, or the oil temperature will drop, and your chimichangas won't crisp up properly.
Serve with Fresh Lime and Smoky Flair
Serve the chimichangas immediately, cut into 1-inch slices for easy sharing. Garnish each serving with a lime wedge and a sprinkle of smoked paprika for that authentic touch. The contrast of the crispy, golden tortilla with the tender, spiced beef inside is what makes these chimichangas unforgettable.
For extra authenticity, serve with a side of refried beans, pico de gallo, or Mexican rice. The lime wedge isn't just for garnish—squeeze it over the top of each chimichanga right before serving to wake up all those smoky, spicy flavors. This is the moment that matters: where all your hard work comes together in a dish that tastes like a true taste of Mexico.
Pro Tips For Making Authentic Mexican Shredded Beef Chimichanga
- SEAR THE ROAST FIRST: Hit that chuck roast with a screaming-hot pan—no oil needed, just let the natural fats render and brown for 3-4 minutes per side. I learned this the hard way: skipping the sear means your shredded beef will taste like it simmered in its own juices instead of developing that deep, caramelized flavor that holds up in chimichangas.
- TOAST THE SPICES: Bloom your cumin and chili powder in the same pan you seared the roast—just 30 seconds over medium heat until fragrant. Sounds weird, but it works: this step cuts through the raw flour taste in flour tortillas and makes the spices sing when the beef gets wrapped. (Yes, even if you’re impatient like me.)
- SHRED WHEN COOL ENOUGH: Let the roast rest 5 minutes after pulling it from the pot before shredding—this guarantees tender, pull-apart meat, not a mushy mess. I used to rush this, and the beef would fall apart in the chimichanga filling, making a soggy disaster. Patience here saves cleanup later.
- USE DRY TORTILLAS: Warm your flour tortillas in a dry skillet for 10 seconds per side until pliable, then stuff with beef while still hot—this keeps them crispy when fried, not limp. (Skip the oil spray; the residual fat from the beef is enough.) My grandmother swore by this, and she was right: the texture difference is night and day.
Perfect pairings for this recipe
Classic Mexican Sides
Serve your chimichangas with refried beans—creamy, smoky, and essential for soaking up any extra sauce. I like to use homemade refried beans made with pork fat and epazote for that authentic touch, but canned beans in a pinch work too. Mexican rice with tomato, garlic, and cumin completes the classic trio—it’s the perfect balance of textures and flavors. 🌟
For extra freshness, add pico de gallo—a bright mix of diced tomatoes, red onion, jalapeño, cilantro, and lime juice. The acidity cuts through the richness of the beef, while the crunch adds a satisfying contrast. If you want to go all out, a side of elote-style corn (grilled corn with mayo, cotija cheese, and chili powder) adds a fun, interactive element.
Toppings & Garnishes
Don’t forget the sour cream—it’s a must for cooling down the heat and adding creaminess. I like to dollop it on top just before serving so it stays cool. A sprinkle of crumbled cotija cheese or queso fresco adds a salty, tangy bite that elevates every bite. For a pop of color and freshness, shredded lettuce or pickled red onions work beautifully. 💛
For a smoky finish, dust the chimichangas with extra smoked paprika right before serving—it ties all the flavors together and gives that restaurant-quality look. A squeeze of lime juice over the top isn’t just for show; it brightens the dish and balances the richness. If you’re feeling adventurous, add a drizzle of chipotle crema (blend sour cream with adobo sauce and lime) for a creamy, spicy kick.
Beverage Pairings
A Mexican lager like Modelo Especial or Corona is the perfect beer pairing—its crisp, clean finish cleanses the palate between bites. For a non-alcoholic option, horchata (a sweet, cinnamon-infused rice milk drink) balances the spice beautifully. The natural sweetness contrasts the smoky, savory flavors of the chimichangas. 🍺
If you’re serving this as a main course, a bold margarita—made with tequila, lime juice, and triple sec—adds a refreshing, tangy contrast. For a non-alcoholic twist, try a sparkling limeade with a touch of agave syrup. The effervescence cuts through the richness, making each bite feel lighter. Pro tip: Serve the margarita in a salt-rimmed glass for that authentic taqueria vibe.
Nutrition facts
Frequently asked questions
Can I use corn tortillas instead of flour tortillas for chimichangas?
Flour tortillas are the traditional choice for chimichangas—they're more pliable and hold up better during frying, creating that signature crispy texture. Corn tortillas will crumble too easily and won't get as crispy. If you must use corn, try large, soft corn tortillas (like those used for enchiladas) and fry them at 375°F for an extra 30 seconds per side.
How do I make the beef filling ahead of time?
The beef filling keeps beautifully in the fridge for 4 days or freezes for 3 months. Store it in an airtight container with a layer of oil on top to preserve moisture. Reheat gently in a skillet until warmed through before using. Pro tip: Let it cool completely before refrigerating to prevent condensation from making it soggy.
Why did my chimichangas turn out greasy instead of crispy?
Greasy chimichangas usually mean the oil temperature was too low or the tortillas weren't sealed properly. Keep oil at 350°F and fry in batches—overcrowding drops the temperature. Also, press the edges firmly when rolling to seal in juices. For extra crispiness, pat the tortillas dry before frying and use a wire rack to drain excess oil.
What's the best way to reheat leftover chimichangas?
For best results, reheat in a 350°F oven for 10-12 minutes on a wire rack to restore crispiness. Avoid microwaving—they'll get soggy. If you must use the microwave, cover with a damp paper towel for 20-30 seconds to revive the texture, then finish under the broiler for 1 minute to crisp up the exterior.
Can I make chimichangas without deep-frying?
For a lighter version, bake at 400°F for 15-18 minutes on a wire rack (sprayed with oil) until golden. Or try air-frying at 375°F for 8-10 minutes, flipping halfway. Brush with oil first for better browning. The texture will be different but still delicious—just less crispy than fried.