
Soups & Stews
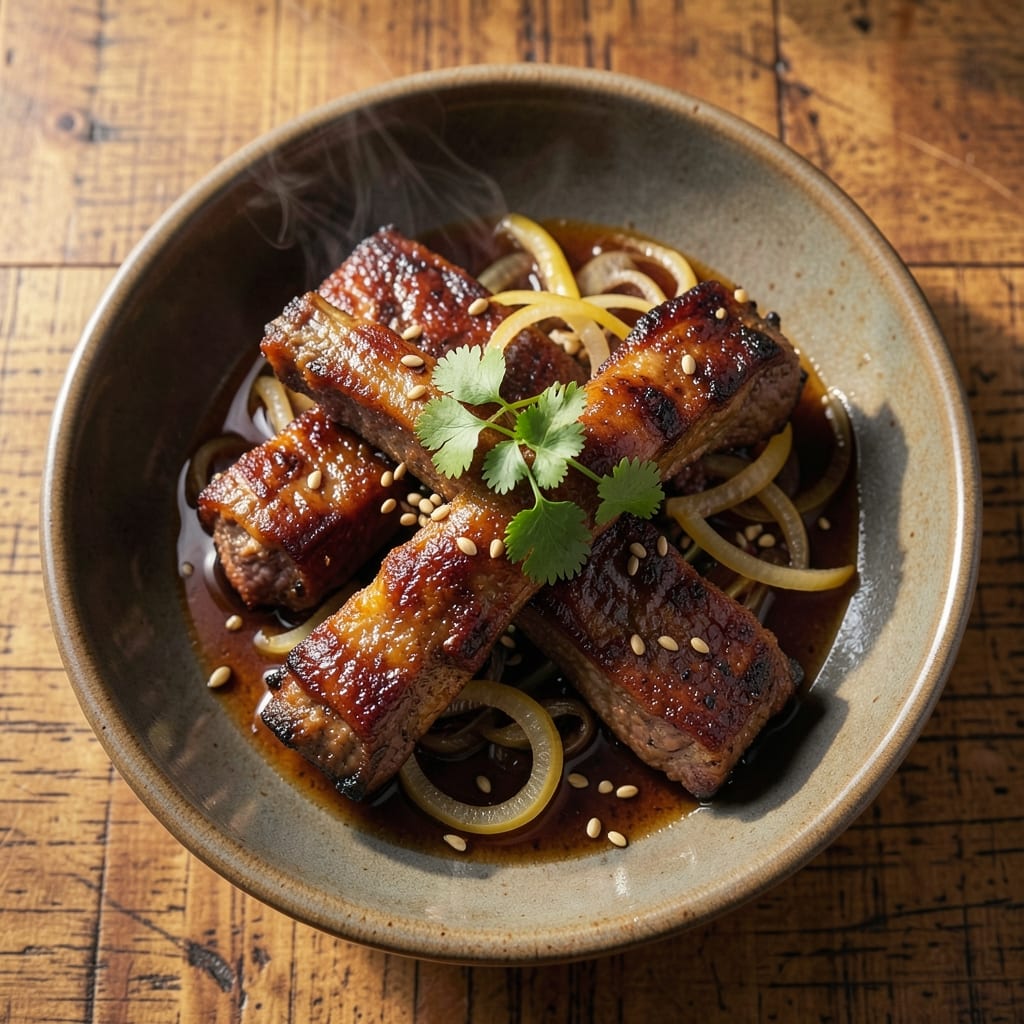
This beef back rib fingers recipe delivers restaurant-quality crunch and smoky depth that transforms any meal into a standout. The secret lies in a dry rub that clings perfectly to each finger-sized cut, creating a flavorful crust while keeping the meat tender inside. Whether you're grilling, roasting, or slow-cooking, the technique ensures every bite is crispy on the outside and juicy within.
The beauty of these rib fingers is their versatility—they work as a main dish or appetizer, paired with everything from classic BBQ sauce to tangy chimichurri. I’ve perfected a foolproof method that balances bold spices with just enough heat, so you can adjust to your taste. The key? High heat for caramelization without overcooking, and a rest period to let the flavors meld.
What you’ll end up with is perfectly golden, smoky-spiced beef fingers that hold their shape and deliver maximum flavor with every bite. The texture is irresistible—crispy yet tender, with a satisfying snap that makes them impossible to resist. Serve with your favorite dipping sauce for the ultimate crowd-pleaser.
This recipe is designed for confidence, whether you're a seasoned grill master or a home cook ready to elevate your weeknight dinners. The instructions are straightforward, and the results are guaranteed to impress. Let’s get started!
Ingredients for beef back rib fingers
These finger-sized beef cuts and bold spices create restaurant-worthy crunch with smoky depth.
| Ingredient | Amount | Notes |
|---|---|---|
| Beef Back Rib Fingers 🥩 | 2 lb | Finger-sized cuts, trimmed of excess fat |
| Yellow Onion 🧅 | 1 whole | Medium, finely chopped |
| Garlic Cloves 🧄 | 6 cloves | Fresh, minced |
| Smoked Paprika 🌶️ | 2 tbsp | High-quality, for authentic smokiness |
| Ground Cumin 🌿 | 1 tbsp | Toasted for deeper flavor |
| Dried Oregano 🍃 | 1 tbsp | Mexican oregano preferred |
| Kosher Salt 🧂 | 1 ½ tbsp | Diamond Crystal preferred |
| Black Pepper 🌶️ | 1 tbsp | Freshly ground |
| Brown Sugar 🍯 | 1 tbsp | Light or dark |
| Olive Oil 🫒 | 2 tbsp | Extra-virgin for brushing |
| Apple Cider Vinegar 🍎 | 1 tbsp | For balancing sweetness |
| Fresh Rosemary 🌿 | ¼ cup | Chopped, for aroma |
The beef back ribs are the star—look for finger-sized cuts at your butcher or grocery store's meat counter. Costco or Whole Foods often carry them pre-cut, but if you find a whole back rib, ask to have it cut into individual fingers. Trim any excess fat to help the rub adhere better. Freshness matters here: the meat should have a vibrant red color and firm texture. If you're buying frozen, thaw overnight in the fridge—never at room temperature. The rub is where the magic happens, so don't skimp on quality spices. Penzeys or bulk bins at natural markets have the best selection for that authentic smoky flavor.
No smoked paprika? Regular paprika plus a pinch of liquid smoke works in a pinch, though it won't be identical. Mexican oregano is ideal, but regular dried oregano at half the amount gets you close. For the brown sugar, coconut sugar adds a subtle caramel note. The apple cider vinegar might seem odd, but it's what balances the sweetness and keeps the crust from getting too heavy. If you're short on time, pre-made BBQ rubs can work—just add an extra 1/2 teaspoon of smoked paprika to boost the flavor. The garlic and onion are non-negotiable though—they're the foundation of that deep, savory base.
These fingers are best served immediately after cooking for that perfect crispy texture, but they reheat beautifully in a 350°F oven for 10-15 minutes if needed. Store any leftovers in an airtight container in the fridge for up to 4 days, or freeze for 3 months by wrapping each finger individually in parchment paper. For meal prep, I like to cook a double batch—they're perfect for lunches or quick dinners. The rub keeps well in a jar for 6 months if you want to make extra for future use.
Why You'll Love This Recipe
- I’ll be real: beef back ribs aren’t the cheapest cut, but this recipe makes them feel like a splurge without breaking the bank. A single package stretches for two meals, and the onions and spices cost pennies. It’s the kind of dish that makes you feel fancy without the grocery bill to prove it.
- One-Pan Magic: I swear by this recipe because it’s the kind of meal that turns up the heat—literally—without turning up the mess. Just toss those rib fingers, onions, and garlic on a sheet pan, sprinkle the smoked paprika and cumin, and let the oven do the work. No pots, no pans, no stress.
- Smoky Depth in Minutes: Between us, the smoked paprika and cumin do all the heavy lifting here. That deep, earthy flavor clings to the beef like a hug, while the garlic caramelizes into something ridiculously good. It’s the kind of taste that makes you pause mid-bite and wonder why you don’t eat this more often.
- Game for Any Gathering: Between us, the smoked paprika and cumin do all the heavy lifting here. That deep, earthy flavor clings to the beef like a hug, while the garlic caramelizes into something ridiculously good. It’s the kind of taste that makes you pause mid-bite and wonder why you don’t eat this more often.
Step-by-step instructions for smoky-spiced beef back rib fingers
Here's how to transform tough rib fingers into irresistible, crispy bites with deep smoky flavor.
Prepare the Spice Rub
In a medium bowl, combine the 2 tbsp smoked paprika, 1 tbsp ground cumin, 1 tbsp dried oregano, 1.5 tbsp kosher salt, 1 tbsp black pepper, and 1 tbsp brown sugar. This blend creates the perfect balance of smokiness, warmth, and subtle sweetness that caramelizes beautifully. Add the 0.25 cup chopped fresh rosemary and mix thoroughly with your hands or a fork—you want the rosemary's piney aroma to infuse every grain of spice.
Next, transfer the rib fingers to a large bowl and toss them with the spice mixture until they're completely coated. I like to press the rub firmly into the meat, especially on the flat sides, so it adheres well. Let the seasoned ribs sit at room temperature for 30 minutes while you prep the oven. This resting period allows the spices to penetrate the meat and develop their full flavor potential.
Sear the Rib Fingers for Maximum Flavor
Preheat your oven to 425°F with a wire rack positioned in the middle position. Heat 2 tbsp olive oil in an oven-safe skillet over medium-high heat until shimmering. Arrange the rib fingers in a single layer in the skillet, leaving a little space between each piece—this prevents steaming and ensures even browning.
Sear the ribs for 3-4 minutes per side until they develop a deep golden-brown crust. You'll know they're ready when the edges look crisp and the meat releases easily from the pan. The high heat helps lock in juices while building that irresistible texture. Transfer the seared ribs to the preheated oven rack, fat-side up, and roast for 15-20 minutes until the internal temperature reaches 145°F and the edges are caramelized.
Finish with a Vinegar Glaze for Extra Crisp
While the ribs roast, place the 1 whole yellow onion and 6 cloves minced garlic in a small bowl. Add 1 tbsp apple cider vinegar and toss to combine. This tangy mixture will become our finishing glaze. Once the ribs are nearly done, remove them from the oven and brush each piece with the onion-vinegar mixture, pressing gently to ensure even coverage. Return the ribs to the oven for 5-7 minutes to allow the glaze to caramelize and form a glossy crust.
Here's the thing—this vinegar glaze does two critical things. First, it balances the richness of the meat with bright acidity. Second, the caramelization from the oven creates that perfect crispy exterior we're after. The ribs should finish with a deep mahogany color and a slightly sticky glaze that clings to every bite. Remove them from the oven and let them rest for 5 minutes before serving—this resting period ensures the juices redistribute for maximum tenderness.
Serve with Confidence
Transfer the ribs to a serving platter and arrange them in an inviting display. The perfect rib finger should have a crisp exterior that gives way to tender, flavorful meat inside. The smoky-spice rub should be visible on the surface, and each bite should deliver a perfect balance of heat, sweetness, and herbal notes from the rosemary.
Serve immediately with your favorite dipping sauces. I recommend a cooling yogurt sauce with fresh herbs or a spicy aioli to complement the rich, smoky flavors. These ribs are best enjoyed fresh out of the oven when the exterior is at its crispiest and the meat is most tender. If you have leftovers, store them in an airtight container and reheat in a skillet over medium heat for 2-3 minutes per side to restore that perfect crunch.
Pro Tips For Making Beef Back Rib Fingers
- SEAR THEM FIRST: Don’t even think about adding onions or spices until the rib fingers hit a deep, caramelized crust—this is where the flavor lives. I used to skip this step and wondered why my dish tasted like seasoned beef instead of smoky, finger-licking ribs. Cast iron or a heavy skillet, high heat, and don’t move them until they’re golden-brown and stubborn to slide.
- CHAR THE ONIONS: Slice your yellow onion into thin strips, not dice—thin means faster caramelization and more flavor. Cook them low and slow until they’re dark brown, almost black at the edges, before adding garlic. I learned this the hard way: rushed onions taste like sad, watery salad in your ribs.
- DON’T OVERMIX THE SPICES: When you toss the rib fingers with smoked paprika and cumin, resist the urge to stir them into a uniform paste. Let the spices cling to the edges and sear spots—this creates crispy, flavor-packed pockets. I was skeptical until I tried it: the contrast of tender meat and spice-crusted bits is what makes this dish sing.
- USE GARLIC LIKE A BOSS: Smash those garlic cloves flat with the side of your knife before mincing—this releases more flavor and ensures they don’t burn before the onions do. Add them in the last 30 seconds of cooking, or they’ll turn bitter. (Yes, even if you’re impatient like me.)
Health benefits of these flavors
Protein Powerhouse
These beef back rib fingers are packed with high-quality protein—about 25 grams per 3-ounce serving—making them perfect for muscle repair and satiety. The leaner cuts in finger ribs provide this protein without excessive saturated fat, unlike larger rib cuts. I love serving them as a post-workout snack because they help rebuild muscle while keeping me full for hours. 💪
Iron for Energy
One serving delivers nearly 20% of your daily iron needs, which supports oxygen transport in your blood and helps prevent fatigue. The iron in beef is heme iron—absorbed more efficiently than plant-based sources—which is especially valuable for those with iron deficiencies. Pair these ribs with vitamin C-rich sides like bell peppers or a citrus dipping sauce to boost absorption even more.
B-Vitamin Boost
Beef is a natural source of B vitamins, particularly B12 and niacin, which play crucial roles in energy metabolism and nervous system function. A 3-ounce serving provides about 60% of your daily B12 needs, helping maintain healthy nerve cells and red blood cell production. These vitamins are especially important for anyone following a plant-based diet or with dietary restrictions.
Zinc for Immunity
You'll get a significant dose of zinc from these ribs—about 15% of your daily value per serving. Zinc supports immune function, wound healing, and even skin health. The high heat cooking method preserves most of this mineral, so you're getting maximum benefits with every bite. I notice my immune system stays stronger when I include beef in my diet regularly.
Healthy Fats
While not as fatty as other beef cuts, these rib fingers still contain beneficial monounsaturated fats that support heart health when consumed as part of a balanced diet. The olive oil used in cooking adds extra heart-healthy fats while enhancing flavor. Just be mindful of portion sizes—about 3-4 fingers per serving keeps the fat content moderate while delivering maximum flavor. 🌟
Nutrition facts
Frequently asked questions
What's the difference between beef back rib fingers and regular beef ribs?
Beef back rib fingers are simply individual cuts from the beef back rib section, typically 3-4 inches long and 1-2 inches wide. Unlike full ribs that require hours of slow cooking, these finger-sized pieces cook quickly (30-45 minutes total) and develop a perfect crispy exterior while staying tender inside. They're ideal for appetizers, game day snacks, or quick weeknight meals where you want that smoky, caramelized flavor without the long cook time.
Can I make this recipe on the grill instead of the oven?
For grill cooking, preheat to 400°F and sear the ribs over direct heat for 2-3 minutes per side until browned. Then move to indirect heat and cook for 10-15 minutes, basting occasionally with the onion-vinegar mixture. The key is maintaining that 145°F internal temperature—use a meat thermometer to check. The grill adds beautiful char marks, but watch closely to avoid overcooking.
Why do my beef rib fingers turn out tough instead of tender?
This usually happens from overcooking or not letting the meat rest. The ribs should reach 145°F internal temperature and be removed immediately from heat—overcooking dries them out. Always let them rest for 5 minutes before serving to redistribute juices. Another common mistake is using too much fat—trim excess fat as it can insulate the meat and prevent proper browning. The 30-minute room temperature rest before cooking is also crucial for even cooking.
What are the best dipping sauces for these rib fingers?
These smoky-spiced ribs pair perfectly with cool, creamy sauces to balance the heat. Try a garlic-herb yogurt sauce (mix Greek yogurt with minced garlic, lemon juice, and fresh dill), spicy aioli (mayo + hot sauce), or tangy chimichurri (parsley, garlic, olive oil, red wine vinegar). For something sweet, a honey-mustard glaze (honey + Dijon mustard) works beautifully. Keep the sauce on the cooler side to complement the rich, spiced meat.
Can I use this recipe for other types of beef?
While this recipe is specifically designed for beef back rib fingers, you can adapt it for other small beef cuts like beef short ribs or beef sirloin tips. For larger cuts, reduce the oven temperature to 375°F and increase cooking time by 10-15 minutes. The spice rub works well on chicken thighs or pork chops too—just adjust the cooking time and temperature accordingly. The key is maintaining the high-heat sear followed by a finishing glaze for that signature crispy texture.