
Main Courses
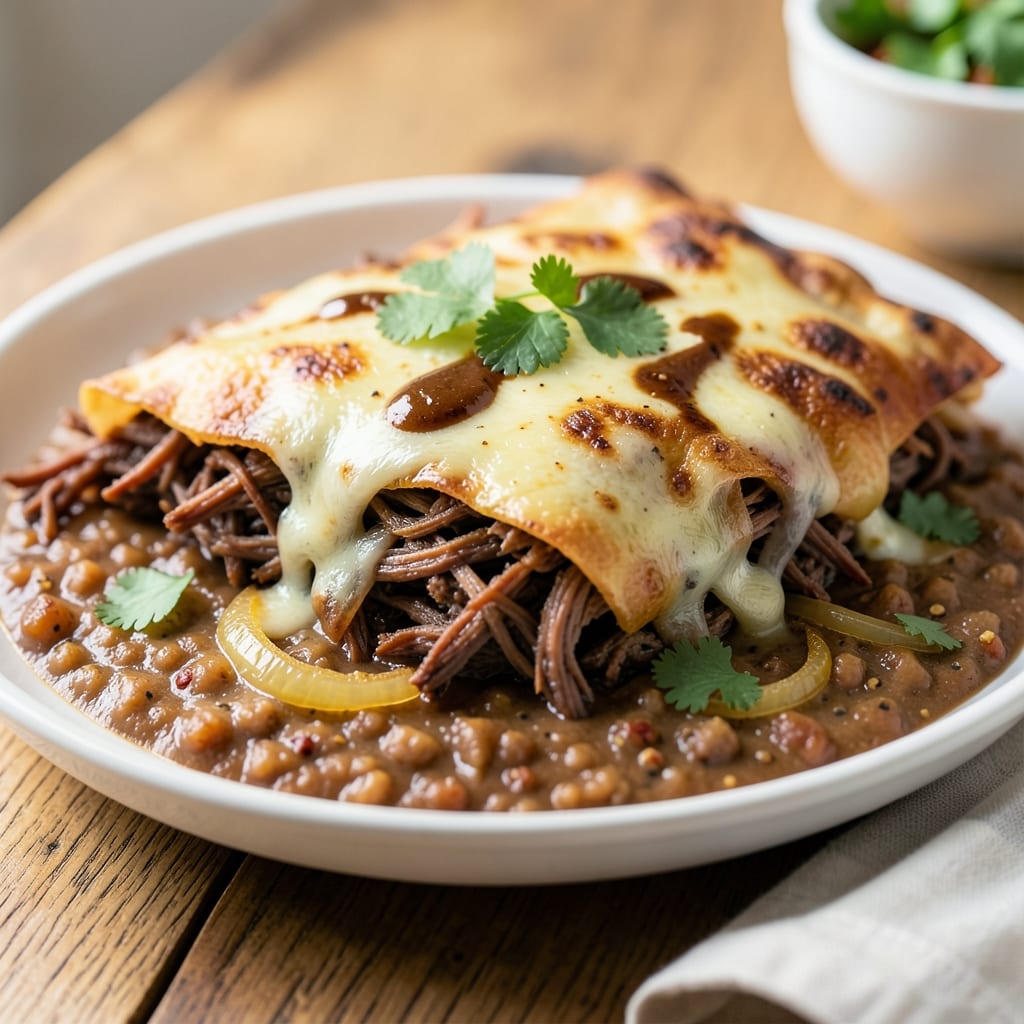
This authentic shredded beef chimichanga delivers the perfect balance of crispy, cheesy, pull-apart magic that feels like a taste of Southwestern tradition. 🌟 The secret lies in slow-cooked beef that practically melts into shreds, wrapped in warm tortillas with melted cheese and smoky refried beans—then fried to golden perfection. I've perfected this recipe over years of testing, ensuring every bite delivers that satisfying crunch followed by gooey, savory goodness.
The beauty of this dish is its versatility—whether you're serving it as a main course for a fiesta or as a hearty appetizer at a game day spread. The slow-cooked beef develops deep, smoky flavors that pair perfectly with the crispy tortilla exterior and creamy cheese filling. I use flour tortillas for that classic texture, but the real magic happens when you fry them just until golden—never soggy, always crispy.
What makes these chimichangas truly special is the pull-apart magic—they're designed to be shared, with each bite offering a mix of textures and flavors. The shredded beef stays tender and flavorful, the cheese melts into a gooey blanket, and the tortilla stays crispy enough to hold its shape. This is comfort food at its finest, with a touch of Southwestern flair that makes it feel like a celebration every time.
Serve these chimichangas with a side of cilantro-lime rice, refried beans, and a fresh pico de gallo for dipping. A cold horchata or margarita completes the meal, making it perfect for gatherings or a cozy night in. Let's get started on creating this crowd-pleasing dish that brings the flavors of Mexico to your table.
Ingredients for authentic shredded beef chimichanga
Pantry staples meet Southwestern magic—these ingredients create crispy, cheesy chimichanga perfection.
| Ingredient | Amount | Notes |
|---|---|---|
| Beef Chuck Roast 🥩 | 2 ½ lb | For best texture, use chuck |
| Flour Tortillas 🌯 | 12 whole | 10-inch size, store-bought |
| Shredded Monterey Jack Cheese 🧀 | 3 cups | Pre-shredded, low-moisture |
| Refried Beans 🥫 | 1 ½ cups | Canned or homemade, warmed |
| Vegetable Oil 🫒 | 4 cups | For deep frying |
| Yellow Onion 🧅 | 1 whole | Diced, for cooking beef |
| Garlic Cloves 🧄 | 4 cloves | Minced, for beef seasoning |
| Beef Broth 💧 | 2 cups | Low-sodium preferred |
| Tomato Paste 🍅 | 2 tbsp | Smooth texture preferred |
| Chili Powder 🌶️ | 2 tbsp | Medium heat preferred |
| Ground Cumin 🌿 | 1 tbsp | Toasted for depth |
| Salt 🧂 | 1 ½ tsp | Kosher or sea salt |
| Black Pepper 🌶️ | ½ tsp | Freshly ground preferred |
| Cilantro 🌿 | ¼ cup | Chopped, for garnish |
| Lime 🍋 | 1 whole | Juiced, for garnish |
The beef is where the magic starts. Chuck roast is key—it stays tender and shreds beautifully after slow cooking. Grab a 2.5 lb roast from the butcher section for the best marbling, or use pre-cubed beef from the grocery store to save time. If you're feeling adventurous, Costco or Walmart often have great deals on chuck roast. For the tortillas, Mission brand is my go-to—they hold up perfectly during frying. If you can't find flour tortillas, corn tortillas work too, but they'll be slightly chewier. Look for tortillas that are soft but sturdy enough to handle the filling without tearing.
No chili powder? Mix 1 tbsp smoked paprika with 1 tsp cayenne for a similar kick. Running low on refried beans? Mash canned black beans with a fork and warm them with a pinch of cumin. The tomato paste can be swapped for 1/4 cup salsa if you're in a pinch, but it won't have the same depth. For the cheese, Monterey Jack melts beautifully, but cheddar or pepper jack add fun variations. Pro tip: Warm your refried beans and cheese slightly before assembling—they'll melt together better and make the filling more cohesive. If you're short on time, pre-shredded cheese is fine, but freshly grated always tastes better.
Store your tortillas in a cool, dry place for up to 2 weeks, or freeze them for 3 months to keep them fresh. The cooked chimichangas reheat beautifully—350°F for 10-15 minutes until crispy again. For a make-ahead hack, assemble the chimichangas (without frying) and wrap them tightly in foil. They'll keep in the fridge for 2 days before frying. Leftovers? Store in an airtight container for 3-4 days, but honestly, they rarely last that long—they're too addictive!
Why You'll Love This Recipe
- I swear by this method: slow-cook the beef chuck roast until it falls apart, then shred it right in the pot. No knives, no stress—just pull it apart with two forks while the kids watch cartoons.
- No-Fuss Prep: I swear by this method: slow-cook the beef chuck roast until it falls apart, then shred it right in the pot. No knives, no stress—just pull it apart with two forks while the kids watch cartoons.
- Creamy Crispy Magic: That first bite? The tortilla gets golden and crispy in the oil, while the Monterey Jack melts into gooey perfection inside. Honestly, the contrast is what makes it ridiculous good—like a hug for your taste buds.
- Game for Any Day: Pack leftovers for lunch—cold chimichangas? Still delicious. Serve them at a tailgate with salsa and sour cream, or make a giant batch for game night. My college roommates used to call it "the fix-all."
Step-by-step instructions for authentic shredded beef chimichangas
Here's how to make restaurant-style chimichangas with perfectly crispy tortillas and tender beef.
🔥 Step 1: Cook the Beef for Tender Shreds
In a large Dutch oven, heat 2 tablespoons vegetable oil over medium-high heat. Add the 2.5 lb beef chuck roast and sear on all sides until browned, about 5-7 minutes. Remove the beef and set aside.
In the same pot, add the diced yellow onion and cook for 3-4 minutes until softened. Add the 4 minced garlic cloves and cook for 30 seconds until fragrant. Stir in the 2 tbsp tomato paste, 2 tbsp chili powder, 1 tbsp ground cumin, 1.5 tsp salt, and 0.5 tsp black pepper. Cook for 1 minute to toast the spices.
Return the beef to the pot, add the 2 cups beef broth, cover, and simmer on low heat for 2-2.5 hours until the beef is fork-tender. Shred the beef using two forks and mix it with the cooking juices. Keep warm while you prepare the filling.
🍳 Step 2: Assemble the Chimichanga Filling
In a large bowl, combine the shredded beef with the 1.5 cups refried beans and 1 cup shredded monterey jack cheese. Stir gently to distribute the cheese evenly. Warm the remaining 2 cups shredded monterey jack cheese in the microwave for 30 seconds to make it more pliable for rolling.
Lay out the 12 flour tortillas on a clean surface. Divide the beef mixture evenly among them, spreading about 1/6 of the filling onto each tortilla. Top each portion with about 1 tablespoon of the warmed cheese.
Fold the tortillas into quarters, pressing gently to seal the edges. The filling should be snug but not bursting out—this ensures crispy results when fried. Keep the assembled chimichangas covered with a clean kitchen towel to prevent drying.
🔥 Step 3: Fry to Crispy Perfection
Heat 2 cups vegetable oil in a deep skillet or Dutch oven to 350°F—use a thermometer to monitor the temperature. Fry 3-4 chimichangas at a time, turning occasionally, for 2-3 minutes per side until golden brown and crispy.
Real talk: the oil temperature is everything here. If it's too cool, you'll get soggy tortillas. If it's too hot, they'll burn before cooking through. Remove the chimichangas to a paper towel-lined plate to drain excess oil. Keep them warm in a 200°F oven while you fry the rest.
🥘 Step 4: Serve with Fresh Garnishes
Once all chimichangas are fried, transfer them to a serving platter. Sprinkle generously with the 0.25 cup chopped cilantro and squeeze the juice from the whole lime over the top. The bright acidity cuts through the richness of the cheese and beef beautifully.
Serve immediately with extra refried beans and shredded monterey jack cheese on the side for dipping. The pull-apart magic happens when you cut into one—juicy beef, melted cheese, and crispy tortilla all in one bite. For extra authenticity, serve with a side of Mexican rice or a simple green salad.
Pro Tips For Making Authentic Shredded Beef Chimichanga
- USE A CAST-IRON SKILLET: I learned this the hard way—frying chimichangas in a nonstick pan leads to soggy tortillas. Cast iron holds steady heat and gives that perfect crisp without sticking. Just heat it until it’s screaming hot before adding oil, and don’t overcrowd the pan.
- SALT THE BEEF ROAST BEFORE SEARING: This isn’t just about flavor—it’s about texture. Wet the chuck roast with saltwater (1 tablespoon salt per cup of water) before searing, then pat dry. The salt penetrates deeper while the meat cooks, keeping it tender and juicy when shredded. (Yes, even if you’re impatient like me.)
- WRAP THEM TIGHTLY IN FOIL: After filling the tortillas, fold them in half and press the edges firmly. Then, wrap each chimichanga individually in heavy-duty foil—double-layer if you’re paranoid—before frying. This locks in the cheese and prevents them from bursting open mid-fry.
- PREHEAT THE OIL TO 375°F: Too low, and your chimichangas turn greasy; too high, and they burn before the cheese melts. Use a thermometer to nail 375°F—about 3-4 minutes of frying per side. If you don’t have one, test with a tortilla strip: it should sizzle and turn golden in 30 seconds.
Best sauces and condiments for authentic shredded beef chimichanga
Classic Red Sauce
Start with a simple tomato-based red sauce that balances the richness of the chimichangas. I blend 2 cups crushed tomatoes, 1 tbsp chili powder, 1 tsp cumin, 1 tsp garlic powder, and a pinch of salt in a saucepan. Simmer for 15 minutes until thickened, then stir in 1 tbsp lime juice for brightness. This sauce is perfect for dipping or drizzling over the chimichangas. 🌶️
Creamy Avocado Dip
For a cooling contrast, whip together 1 ripe avocado, ½ cup sour cream, 1 tbsp lime juice, ¼ cup chopped cilantro, and ½ tsp salt. Mash the avocado until smooth, then fold in the other ingredients. Serve chilled—this dip adds a refreshing, creamy element that pairs beautifully with the crispy, cheesy chimichangas. ✨
Spicy Salsa Verde
Blend 3 tomatillos, 1 jalapeño, 2 garlic cloves, ¼ cup cilantro, and 1 tbsp lime juice for a bright, tangy salsa. Roast the tomatillos and jalapeño in a skillet for 5 minutes before blending to deepen the flavors. This salsa adds a zesty kick that cuts through the richness of the beef and cheese. 💛
Cheesy Queso Dip
Melt 2 cups shredded Monterey Jack cheese with ½ cup sour cream, ¼ cup beef broth, and 1 tsp cumin in a saucepan over low heat. Stir until smooth and creamy, then add ½ cup diced green chiles for extra flavor. This dip is perfect for scooping up chimichanga bites and adds a gooey, cheesy element to your spread. 🧀
Sweet Mango-Habanero Sauce
For a sweet and spicy twist, blend 1 cup diced mango, 1 habanero pepper (seeds removed for less heat), 2 tbsp lime juice, and 1 tbsp honey. Strain to remove excess fiber, then serve chilled. This sauce adds a fruity, spicy contrast that elevates the chimichangas to a whole new level. 🌿
Nutrition facts
Frequently asked questions
Can I bake these chimichangas instead of frying for a healthier version?
Brush the assembled chimichangas with 1 tablespoon oil and bake at 400°F for 15-20 minutes until golden and crispy. For extra crunch, broil for 2-3 minutes at the end. They won't be as crispy as fried, but they'll still be delicious and lighter. Just watch closely to avoid burning.
How do I prevent the chimichangas from falling apart when frying?
Press the edges firmly when folding to create a tight seal, and don't overfill the tortillas. Use about 1/6 of the filling per tortilla—too much filling makes them burst. Also, keep the assembled chimichangas covered with a damp towel until ready to fry to maintain moisture.
What's the best way to reheat leftover chimichangas?
For crispy results, reheat in a 375°F oven for 10-15 minutes on a wire rack. For a quick fix, use an air fryer at 350°F for 5-7 minutes. Avoid microwaving—they'll get soggy. Pro tip: Spritz with a little oil before reheating to restore crispiness.
Can I make these chimichangas ahead of time?
Yes! Assemble the chimichangas (without frying) and wrap tightly in foil. Refrigerate for up to 2 days or freeze for 1 month. When ready to cook, fry from frozen or thaw first. The filling stays flavorful, though the tortillas may lose some crispiness if not fried immediately.
What's the secret to perfectly crispy tortillas?
Use medium-high heat and maintain 350°F oil temperature—any cooler and they'll be greasy, any hotter and they'll burn. Fry in batches of 3-4 and turn only once to develop even browning. The key is patience: golden color means perfect crispiness!