
Appetizers
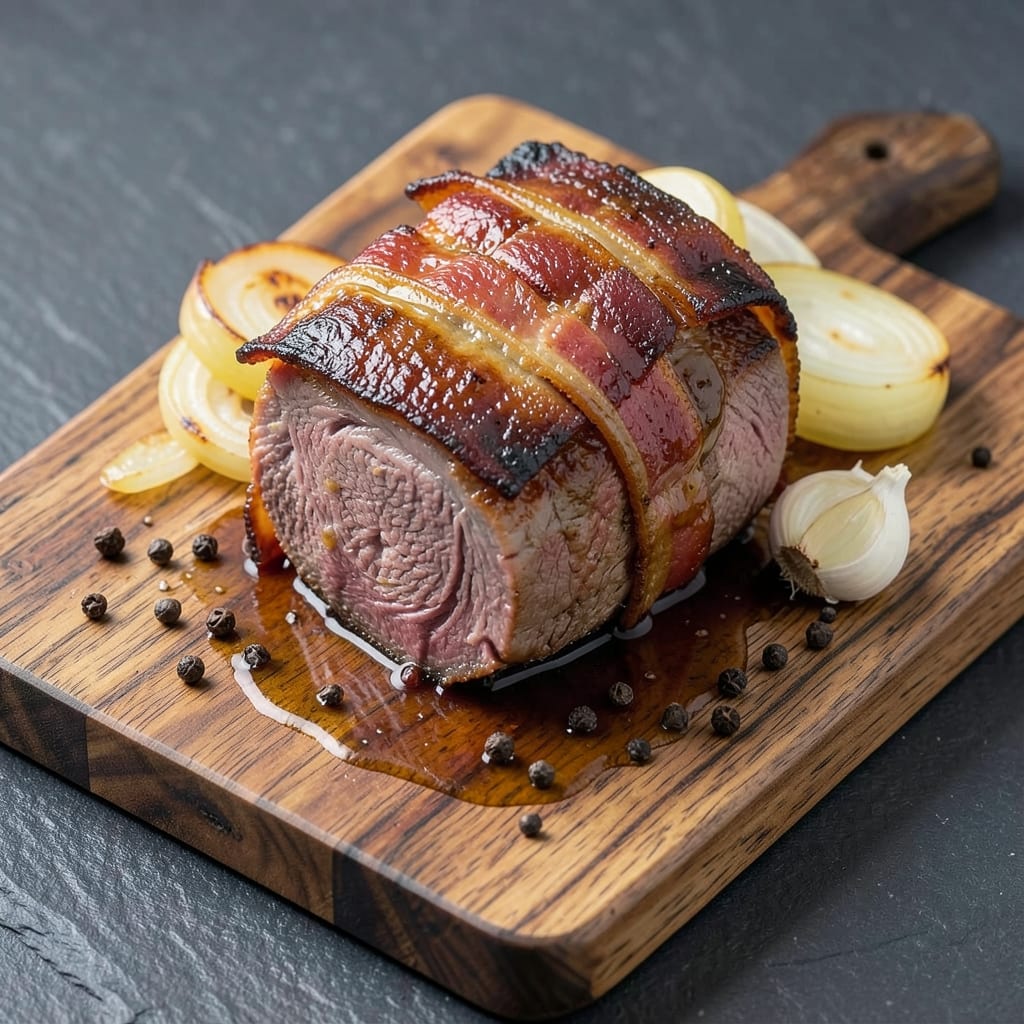
This bacon-wrapped roast beef recipe transforms a simple roast into a showstopping centerpiece with smoky crispy edges and juicy centers that'll have everyone asking for seconds. The secret lies in the perfect balance of high-heat searing and slow cooking—where tender beef meets crisp bacon for an irresistible combination. I've perfected this technique over years of holiday feasts and Sunday dinners, ensuring restaurant-quality results at home without the fuss.
The process starts with a simple yet flavorful marinade that penetrates the beef, followed by wrapping it in bacon for that signature crispy texture. Cooking at the right temperature—325°F—guarantees a tender interior while the bacon achieves that coveted crunch. What you end up with is a roast so flavorful and visually stunning, it becomes the star of any meal. The aroma alone will have guests gathering around your table before the meal even begins.
Pair this showstopper with classic sides like roasted garlic mashed potatoes or caramelized Brussels sprouts to complete the meal. The bacon-wrapped beef holds its shape beautifully, making it perfect for slicing and serving with confidence. Every bite delivers a perfect harmony of smoky, savory, and tender—proof that even weeknight dinners can feel like a special occasion.
Whether you're hosting a holiday gathering or simply craving something extraordinary, this recipe delivers foolproof results. The key is patience—letting the beef rest after cooking ensures maximum juiciness, while the bacon wrapping adds a luxurious touch that elevates the dish from ordinary to unforgettable. Let's get started on creating a roast that'll impress even the most discerning palates.
Ingredients for bacon wrapped roast beef
Six ingredients transform ordinary beef into a showstopping centerpiece with crispy bacon edges and melt-in-your-mouth tenderness.
| Ingredient | Amount | Notes |
|---|---|---|
| Beef Top Round Roast 🥩 | 4 lb | Center-cut for even cooking |
| Thick-Cut Bacon 🥓 | 12 oz | Applewood smoked preferred |
| Yellow Onion 🧅 | 1 whole | Quartered, for marinade |
| Garlic Cloves 🧄 | 6 cloves | Minced for marinade |
| Worcestershire Sauce 🍶 | 2 tbsp | High-quality, anchovy-free |
| Dijon Mustard 🌶️ | 1 tbsp | For depth of flavor |
| Black Peppercorns 🌶️ | 1 tbsp | Freshly cracked |
| Kosher Salt 🧂 | 1 ½ tbsp | Diamond Crystal preferred |
| Extra-Virgin Olive Oil 🫒 | 2 tbsp | For searing |
| Fresh Rosemary 🌿 | ½ oz | Sprigs for aromatics |
| Fresh Thyme 🌿 | ¼ oz | Sprigs for aromatics |
| Beef Broth 🥫 | 1 cup | Homemade or high-quality |
The beef is everything here—center-cut top round delivers that perfect balance of tenderness and structure. Costco or local butchers often carry pre-trimmed roasts, but if you're buying whole, ask for a roast with good marbling. I always go for 4 pounds—big enough to impress but manageable for a home oven. For the bacon, thick-cut applewood smoked from Oscar Mayer or local delis gives that perfect smoky crunch. Fresh herbs? Whole Foods or Trader Joe's have the best selection—just grab a few sprigs of rosemary and thyme, stems and all. The Worcestershire sauce should be high-quality, anchovy-free—Lea & Perrins is my go-to, but check the label if you're avoiding fish products. This marinade is where the magic happens, so don't skimp on the fresh garlic and onion.
No thick-cut bacon? Regular bacon cut in half lengthwise works in a pinch, but it won't crisp as dramatically. Running short on time? Pre-cook the bacon at 400°F for 10 minutes before wrapping—it'll still crisp up beautifully. The Dijon mustard can be swapped for whole-grain mustard if you prefer a grainier texture. For a deeper flavor, add 1 tsp smoked paprika to the marinade. The beef broth? Homemade is ideal, but a good-quality low-sodium store brand like Kitchen Basics works too. If you're feeling fancy, add 1 tsp fish sauce (if allowed) or soy sauce for umami. The key is letting the marinade work its magic—at least 4 hours, overnight is best—so plan ahead!
This roast is a make-ahead masterpiece—marinate overnight for maximum flavor penetration. The bacon-wrapped beef keeps beautifully in the fridge for up to 3 days before cooking, wrapped tightly in plastic. After roasting, let it rest for at least 30 minutes before slicing—this is non-negotiable for juicy results. Leftovers? Reheat gently at 300°F to maintain crispiness, or slice and freeze portions for up to 3 months. Pro tip: Wrap individual slices in fresh bacon before freezing for crispy bacon-wrapped beef sandwiches later. The aromatics from the rosemary and thyme intensify after cooking, so don't be shy about adding extra sprigs to the pan!
Why You'll Love This Recipe
- One-Pan Magic: I swear by this recipe because it’s that simple—just slice the roast, wrap it in bacon, and let the oven do the work. No chopping mountains of veggies or fussing with multiple pans; the onions and garlic nestle right into the bacon layers as it cooks.
- Crispy-Creamy Perfection: That first bite? The bacon’s smoky crunch gives way to tender beef so juicy it melts in your mouth, all thanks to the Worcestershire sauce keeping it impossibly moist. Honestly, it’s the kind of flavor combo that makes you want to skip dinner and just eat straight from the pan.
- Game for Any Night: Between us, this is my go-to for game days, lazy Sundays, or when I’m too tired to think. The leftovers? Just as good cold the next day—perfect for sandwiches or a quick lunch. And if you’re feeding a crowd? Double the bacon, double the wins.
- Budget-Friendly Feast: Top round is affordable, bacon adds luxury without breaking the bank, and a single onion/garlic head stretches across multiple meals. I’ll be real: this recipe stretches my grocery dollars while still feeling like a splurge-worthy dish. Plus, it’s one of those meals where the cost per serving feels criminally low.
Step-by-step instructions for bacon-wrapped roast beef
Here's how to transform a simple roast into showstopping, smoky perfection with crispy bacon edges and melt-in-your-mouth tenderness.
Prepare the Marinade and Season the Beef
In a food processor, combine the quartered yellow onion, minced garlic cloves, Worcestershire sauce, Dijon mustard, freshly cracked black peppercorns, 1 tablespoon of the kosher salt, and the beef broth. Pulse until smooth but still slightly textured—this will create a flavor-packed marinade that penetrates every inch of the beef. Transfer this marinade to a large resealable bag.
Pat the 4 lb beef top round roast dry with paper towels—this is non-negotiable for crispy bacon. Place the roast in the marinade bag, seal tightly, and massage the marinade over the beef to ensure even coating. Refrigerate for at least 4 hours, preferably overnight. The acidity in the Worcestershire and Dijon will tenderize the meat while the aromatics infuse deeply. Pro tip: If you're short on time, let it marinate for at least 2 hours at room temperature before cooking.
Wrap the Beef with Bacon and Sear
Preheat your oven to 325°F. Remove the beef from the marinade (reserve the marinade for later) and pat it dry again. Cut the 12 oz thick-cut bacon into 6 even strips, each about 2 inches wide. Wrap each strip tightly around the roast, overlapping slightly at the seams. Secure with toothpicks if needed—this ensures the bacon stays put during cooking.
Heat a Dutch oven or heavy oven-safe skillet over medium-high heat. Add the 2 tablespoons extra-virgin olive oil and let it shimmer. Place the bacon-wrapped roast in the pan, searing on all sides until the bacon is golden brown and the beef develops a deep crust—about 3-4 minutes per side. This step is crucial for building flavor and texture. Once seared, transfer the roast to a plate and tent loosely with foil.
Roast to Perfect Doneness
Pour the reserved marinade into the skillet, scraping up any browned bits from the bottom—this creates a rich, flavorful pan sauce. Return the roast to the skillet, bacon-side up, and transfer everything to the preheated oven. Roast for 2 hours, then carefully add the sprigs of fresh rosemary and thyme to the pan. Continue roasting for another 30-45 minutes, or until the internal temperature reaches 130-135°F for medium-rare (use a meat thermometer for accuracy).
Here's the thing—beef continues cooking after removal from the oven, so pull it out when it's just shy of your desired doneness. The residual heat will carry it to perfection. The bacon should be crispy and slightly caramelized, while the beef will be juicy with a pink center. If the bacon starts to brown too quickly, tent it loosely with foil to prevent burning.
Rest and Create the Sauce
Transfer the roast to a cutting board and let it rest for 20-30 minutes. This resting period is where the magic happens—juices redistribute throughout the meat, ensuring every slice is moist and flavorful. While it rests, place the skillet with the pan sauce over medium heat. Simmer for 5-7 minutes until the sauce thickens slightly and coats the back of a spoon. If it reduces too quickly, add 1-2 tablespoons of beef broth to loosen it.
Slice the roast against the grain into ½-inch thick slices, fanning them out on a platter. Drizzle the pan sauce generously over the top and serve immediately. The contrast of crispy bacon, smoky beef, and rich sauce will have everyone asking for seconds. For an extra touch, garnish with additional cracked black pepper and a sprinkle of the remaining kosher salt.
Pro Tips For Making Bacon Wrapped Roast Beef
- Trim the Bacon Evenly: Uneven bacon thickness means uneven cooking—some crispy, some raw. Use kitchen shears to slice the fat cap off thick-cut bacon first, then cut strips about ½-inch wide. This guarantees crisp edges and juicy beef underneath.
- Sear the Beef First: Skipping the sear means flavorless edges. Pat the top round dry, then hit it with a hot cast-iron or heavy skillet for 3-4 minutes per side before wrapping it in bacon. The crust locks in moisture and adds depth.
- Don’t Overstuff the Onions: I learned this the hard way—stuffing too many garlic cloves and onion chunks into the roast makes them steam instead of caramelize. Use 3-4 cloves max and 2 thin onion slices per roast. Less is more for flavor.
- Rest Before Slicing: Cutting into the roast too soon sends juices pooling on the plate instead of staying in the meat. Tent it with foil and let it rest for 10-15 minutes—yes, even if you’re starving. The bacon stays crisp longer too.
Essential equipment for this dish
Dutch Oven Essentials
Your Dutch oven is the hero of this recipe—it conducts heat evenly and creates a self-basting environment for that perfect crust. I swear by a Lodge 5.5-quart cast iron Dutch oven for its durability and heat retention, but any heavy-duty Dutch oven (like All-Clad or Le Creuset) will work. Preheat it on the stove for 10 minutes before searing to ensure even heat distribution. The deep sides help trap moisture while roasting, keeping your beef juicy. 🔥
Meat Thermometer Must-Have
Never guess the doneness—use a Thermoworks Smoke or Meater digital thermometer for precision. These probes give instant internal temperature reads, preventing overcooking. Insert the probe into the thickest part of the beef, avoiding fat pockets. Aim for 130-135°F for medium-rare, but pull it out 5°F early since residual heat finishes cooking. I keep mine in my oven drawer for quick access during holidays.
Bacon Wrapping Tools
Toothpicks are your best friend for securing bacon wraps—plastic or wooden skewers work equally well. I recommend 2-inch kitchen toothpicks from OXO for their sturdy grip. For extra security, wrap the bacon strips around the roast in a spiral pattern, overlapping slightly. If you're feeling fancy, use butcher's twine to tie the bacon in place, but toothpicks are foolproof for home cooks. 💡
Oven Thermometer Check
Ovens run hot or cold—verify yours with an oven thermometer (like Taylor Precision Products). Place it on the middle rack while preheating to 325°F. If it reads 350°F, adjust your oven's temperature down by 25°F for accuracy. This small step prevents overcooking or undercooked beef. I check mine annually and recalibrate as needed—trust me, it's worth the 5-minute setup.
Resting Rack Setup
For perfect resting, use a wire cooling rack placed over a baking sheet. This elevates the roast, allowing air circulation that keeps the bacon crispy. I like OXO Good Grips racks—they're sturdy and easy to clean. Tent loosely with foil if your kitchen is chilly (65°F or below) to prevent the beef from cooling too quickly. The rack prevents soggy bacon while maintaining that beautiful presentation. ✨
Sauce Reduction Tools
For thickening the pan sauce, keep a whisk and wooden spoon nearby. A silicon spatula helps scrape up browned bits from the Dutch oven's bottom. If your sauce reduces too quickly, have beef broth ready to deglaze. I also keep a fine-mesh strainer handy to remove herb stems if needed. The goal is a glossy, velvety sauce that clings beautifully to each slice. 💫
Nutrition facts
Frequently asked questions
Can I use a different cut of beef for this recipe?
While top round is ideal for its tenderness and lean structure, you can use top sirloin or ribeye roast for richer flavor. Avoid tougher cuts like chuck—they need longer marinating. For best results, stick with cuts that are 1-1.5 inches thick to ensure even cooking and that perfect medium-rare center.
How do I prevent the bacon from burning while roasting?
Tent the roast loosely with foil after the first 30 minutes of cooking to protect the bacon. If it starts to brown too quickly, reduce oven temp to 300°F for the final 15-20 minutes. The key is patience—the bacon will crisp up beautifully during resting. For extra insurance, use thick-cut bacon (½ inch or more).
What's the best way to reheat leftovers?
Slice the roast first, then reheat portions in a skillet with 1 tablespoon butter over medium-low heat for 3-4 minutes per side. For crispy bacon, wrap slices in fresh bacon strips and bake at 400°F for 10-12 minutes. Never microwave—it turns the bacon soggy and beef dry. Leftovers keep for 3 days in the fridge or 3 months frozen.
Can I make this recipe in a slow cooker?
Not recommended—the bacon won't get crispy, and the beef may become too tender. However, you can try a hybrid approach: Sear the bacon-wrapped roast on the stovetop, then finish in a 300°F slow cooker on "High" for 2-2.5 hours until 130°F internal. The bacon will be softer but still flavorful. For best texture, stick with the oven method.
What sides pair best with this dish?
Classic pairings include creamy mashed potatoes, roasted garlic Brussels sprouts, or caramelized onions. For a lighter option, try sautéed green beans with almonds or a crisp apple salad with walnuts and balsamic**. The rich, smoky beef balances perfectly with sweet or earthy sides—just avoid heavy sauces that compete with the pan sauce.