
Main Courses
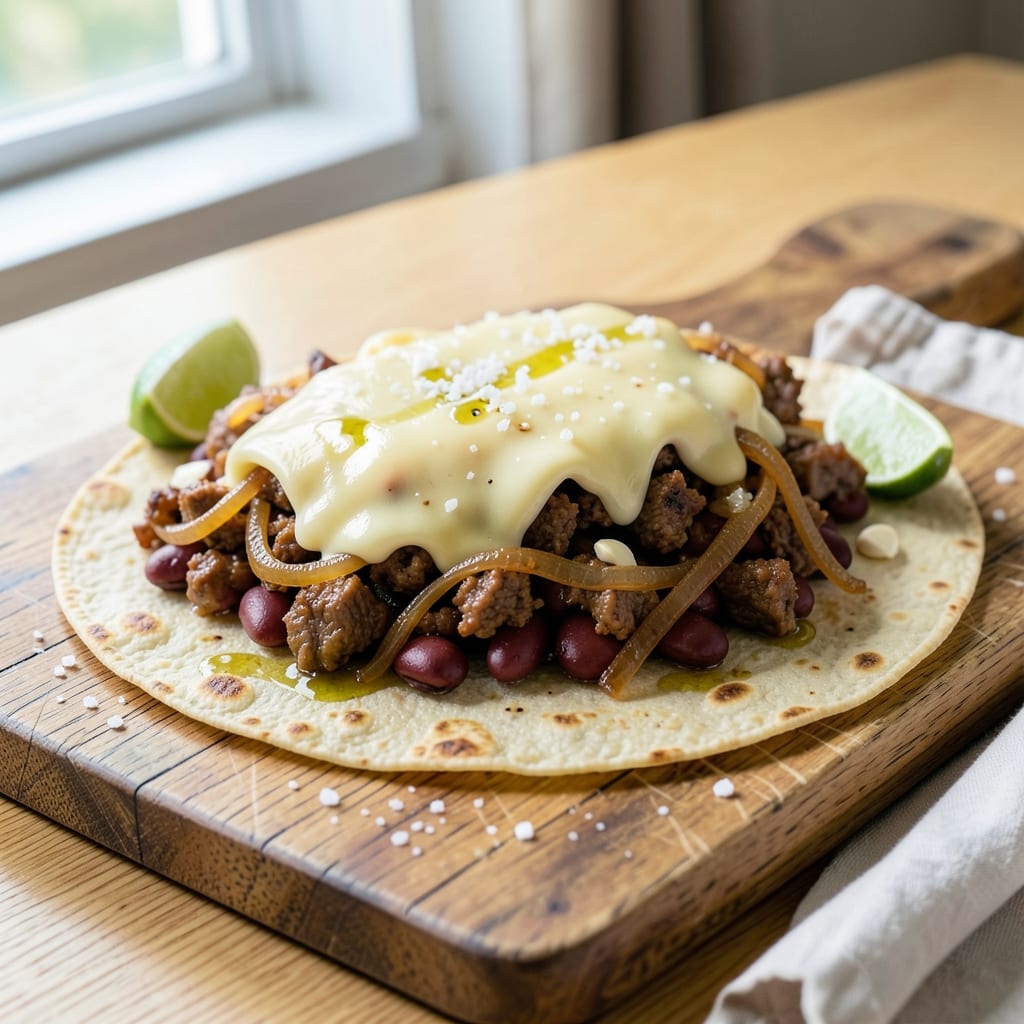
This baked beef and bean burrito recipe delivers crispy tortilla shells packed with hearty, flavorful filling—no frying required. The secret lies in baking the burritos until the edges are golden and the cheese melts into a gooey blanket, creating that perfect texture contrast between crispy and tender. I've perfected this method over years of testing, ensuring every bite is satisfying without the mess of deep-frying.
The beauty of this recipe is its balance of simplicity and bold flavors. You'll start with seasoned ground beef and tender beans, then layer everything between sturdy flour tortillas before baking until the shells achieve that coveted crispy edge. The filling stays warm and flavorful, while the tortillas develop a satisfying crunch that holds up even when you cut into them. No special equipment needed—just a baking sheet and oven.
What makes these burritos truly special is how they transform a simple meal into something restaurant-worthy. The combination of savory beef, hearty beans, melted cheese, and crispy tortillas creates a dish that's filling enough for dinner but easy enough for a weeknight. Serve with a side of avocado, sour cream, or salsa to round out the meal. This recipe delivers on every promise—crispy shells, rich filling, and a satisfying bite.
Perfect for meal prep or feeding a crowd, these burritos reheat beautifully and taste even better the next day. The key is assembling them properly and baking until the edges are golden and the cheese is fully melted. Let's get started on creating your next favorite comfort meal!
Ingredients for baked beef and bean burrito
Sixteen ingredients, zero complicated steps. Crispy shells meet hearty filling in this crowd-pleasing baked burrito feast.
| Ingredient | Amount | Notes |
|---|---|---|
| Ground Beef (80/20) 🥩 | 1 ½ lb | Lean but flavorful for best texture |
| Yellow Onion 🧅 | 1 whole | Diced, medium size preferred |
| Garlic Cloves 🧄 | 4 cloves | Minced for even distribution |
| Canned Black Beans 🌿 | 1 can | Drained and rinsed thoroughly |
| Flour Tortillas 🌯 | 12 whole | Large, 10-inch size preferred |
| Shredded Cheddar Cheese 🧀 | 4 cups | Sharp or medium cheddar works best |
| Taco Seasoning 🌶️ | 2 tbsp | Homemade or quality store-bought |
| Olive Oil 🫒 | 2 tbsp | For tortilla crisping |
| Salt 🧂 | 1 tsp | Kosher or sea salt preferred |
| Black Pepper 🌶️ | ½ tsp | Freshly ground for best flavor |
| Sour Cream 🥛 | ½ cup | For serving, optional garnish |
| Salsa 🍅 | ½ cup | For serving, any variety |
| Avocado 🥑 | 1 whole | Sliced, for serving |
The beef and beans form the foundation—80/20 ground chuck gives you the best texture and flavor. Trader Joe's or Costco usually have the best prices for bulk ground beef, and the 80/20 ratio keeps it juicy. For the beans, no-salt-added canned black beans save time and control the seasoning. The flour tortillas are non-negotiable—corn tortillas won't crisp up the same way. Look for the thickest ones you can find, around 10 inches in diameter. I always buy a double batch and freeze half for later—burritos reheat beautifully.
No taco seasoning packet? Mix 1 tbsp chili powder, 1 tsp cumin, 1 tsp paprika, ½ tsp garlic powder, ½ tsp onion powder, and ¼ tsp cayenne for a homemade version. The cheddar cheese should be freshly shredded—pre-shredded gets clumpy and doesn't melt as smoothly. Short on time? Cotija cheese adds a nice salty kick. The avocado can be swapped for guacamole if you prefer—just add lime juice to keep it fresh. For extra crunch, sprinkle crushed tortilla chips on top before baking.
Assemble burritos and store them unbaked in the fridge for up to 2 days, or freeze assembled burritos for 3 months. To bake from frozen, add 10-15 minutes to the cooking time. The sour cream and salsa keep for 1 week in the fridge, while avocado is best used within 2 days. For meal prep, bake a big batch and reheat individual burritos in the oven at 350°F for 10-12 minutes—they'll stay crispy and delicious.
Why You'll Love This Recipe
- No-Fuss Assembly: I swear, I’ve made this while scrolling through my phone—just brown the beef with onions and garlic, mix in the beans, stuff the tortillas, and bake. The hardest part is deciding whether to add cheese or not.
- Umami Bomb: That 80/20 ground beef? Chef’s kiss. The fat renders down while the onions caramelize, and the black beans add just enough smoky depth. Honestly, I’ve skipped the seasoning packet before—it’s still solid.
- Meal Prep MVP: Wrap them up, pop them in the fridge, and reheat straight from the oven or air fryer. My lunchbox gets packed with these all week, and they’re just as good cold as they are hot. (Yes, even on a Tuesday night.)
- Budget Win: Ground beef and canned beans? That’s a $10 dinner for four. I’ll be real: I’ve made this when I was broke in college, and I’m making it now. It’s the kind of recipe that stretches without stretching your wallet.
Step-by-step instructions for baked beef and bean burritos
Here's how to create perfectly crispy tortilla shells with a hearty, flavorful filling.
Cook the Ground Beef and Aromatics
Heat a large skillet over medium-high heat and add 2 tablespoons olive oil. Once the oil shimmers, add the 1.5 lb ground beef (80/20) and cook, breaking it apart with a wooden spoon, until it loses its raw color and begins to brown. This should take about 5-7 minutes.
Push the beef to one side of the pan and add the diced yellow onion and minced garlic cloves. Sauté for 3-4 minutes until the onions become translucent and the garlic releases its fragrant aroma. Stir the beef back into the pan and sprinkle with 2 tablespoons taco seasoning, 1 teaspoon salt, and ½ teaspoon black pepper.
Cook for another 2-3 minutes until the seasoning blends evenly and the beef reaches 160°F on an instant-read thermometer. Remove from heat and stir in the drained and rinsed canned black beans, mixing until everything is well combined. Let the mixture cool slightly for 5 minutes before assembling the burritos.
Assemble the Burritos with Cheese
Lay out the 12 large flour tortillas on a clean work surface. Divide the beef and bean mixture evenly among them, spreading about ⅙ cup of filling onto each tortilla. Top each portion with about ⅓ cup of the shredded cheddar cheese, pressing it gently into the filling.
Fold the bottom third of each tortilla up over the filling, then fold in the left and right sides, tucking them in firmly. Finally, roll the tortilla tightly from the bottom up, pressing gently to seal. Place the completed burritos seam-side down on a baking sheet lined with parchment paper.
Here's the thing—don't overstuff them. If the filling bulges out, the tortilla will tear when baking. You want them snug but not bursting at the seams. This ensures they hold together during baking and achieve that perfect crispy texture.
Bake Until Crispy and Golden
Preheat your oven to 375°F. Brush the tops of the burritos lightly with a bit of the remaining olive oil using a pastry brush. This step is crucial for achieving that crispy exterior. Place the baking sheet on the middle rack and bake for 20-25 minutes.
You'll know they're done when the tortillas are deep golden brown and crispy to the touch. The cheese should be fully melted, and you should hear a satisfying crackling sound when you tap the sides. If they're browning too quickly, tent them loosely with aluminum foil to prevent burning while they finish cooking.
For extra crispiness, I like to broil for 1-2 minutes at the end, watching closely to avoid burning. The broiler gives that final crispy snap that takes these burritos from good to restaurant-quality.
Serve with Toppings and Enjoy
Remove the burritos from the oven and let them rest for 5 minutes before serving. This resting period allows the filling to set slightly, making them easier to handle. Cut each burrito in half if desired, though I prefer serving them whole for that satisfying first bite.
Serve immediately with the ½ cup sour cream, ½ cup salsa, and sliced avocado on the side. The contrast of cool sour cream, fresh avocado, and tangy salsa against the warm, crispy burritos creates the perfect balance of textures and flavors. Don't skip the avocado—its creamy texture and rich flavor elevate every bite.
Real talk: these burritos are best served fresh from the oven. The crispy shells soften quickly, so enjoy them while they're at their peak. Leftovers can be reheated in a 350°F oven for 10-15 minutes to restore some crispiness, but they won't be quite as satisfying as the first serving.
Pro Tips For Making Baked Beef And Bean Burrito
- CRISP THE ONIONS FIRST: I used to sauté onions and garlic together, but they’d just steam into mush. Instead, cook the onions in the dry skillet for 5-6 minutes until they’re golden and slightly caramelized—then add the garlic. The beef will pick up that deep, sweet flavor instead of tasting like a sad, watery stew.
- DRAIN AND RINSE BEANS: Canned beans are packed in saltwater, and nobody wants a salty burrito that tastes like a pickle. Drain them, then rinse under cold water twice—this also removes that weird metallic can taste. Pat them dry with a towel if you’re feeling fancy (they’ll brown better).
- USE A SPATULA, NOT A SPOON: I learned this the hard way—mashing the beef with a spoon turns it into a paste. Break up the beef with a wooden spoon just until it’s crumbly, then use a spatula to scrape up those browned bits from the bottom. Those bits are flavor gold, and you don’t want to miss them.
- BAKE TORTILLAS SEPARATED: Stacking tortillas in the oven? Big mistake. They’ll steam and turn soggy. Wrap each one individually in foil and bake them separately for 5 minutes at 350°F—just until pliable. This keeps them flexible for rolling and prevents a sad, limp burrito collapse. (Yes, even if you’re impatient like me.)
Make-ahead tips for this dish
Prep Ahead
Assemble your burritos up to 2 days in advance and store them in an airtight container in the fridge. Just brush with oil and bake straight from the fridge at 375°F for 25-30 minutes—they'll still get crispy! For even better results, freeze unbaked burritos on a tray, then transfer to a bag. Thaw overnight in the fridge before baking. 💫
Batch Baking
Double the recipe and bake two sheets at once by using the top and bottom oven racks. Space them 1 inch apart to allow air circulation. Rotate the pans halfway through baking for even browning. I like to bake 12 burritos at a time—perfect for a family of four with leftovers!
Freezer-Friendly
Fully baked burritos freeze beautifully for up to 3 months. Wrap individually in foil, then place in a freezer bag. To reheat, bake at 375°F for 15-20 minutes until crispy again. The texture won't be perfect, but they're still delicious—ideal for busy weeknights. 🍽️
Reheating Leftovers
For best results, reheat burritos in a 350°F oven for 10-12 minutes on a baking sheet. Avoid microwaving—they'll get soggy. A quick broil for 1-2 minutes at the end restores some crispiness. I often reheat just one or two at a time to keep them fresh.
Meal Prep Hack
Make a big batch and store components separately: cook the beef mixture, shred the cheese, and keep tortillas wrapped. Assemble and bake only what you need each day. This keeps your burritos fresh and crispy without making a mountain of leftovers. Perfect for office lunches or quick dinners! ⏰
Portion Control
For individual servings, wrap each burrito in foil before freezing. This prevents freezer burn and makes reheating a breeze. When ready to eat, bake straight from frozen at 375°F for 25-30 minutes. No need to thaw—just pop them in the oven and enjoy a restaurant-quality meal in minutes.
Nutrition facts
Frequently asked questions
Can I use corn tortillas instead of flour tortillas?
Corn tortillas won't crisp up the same way flour tortillas do, so they're not ideal for this recipe. Flour tortillas have a higher starch content that creates that perfect golden, crispy shell when baked. If you must use corn, they'll be softer and more like traditional burritos—better for frying or steaming.
How do I prevent my burritos from falling apart when baking?
Don't overstuff them! Use about ⅙ cup of filling per tortilla and roll tightly. Press the edges firmly as you roll, and place them seam-side down on the baking sheet. If they start to unravel, brush with a little extra olive oil to help the tortilla hold together during baking.
Can I make these burritos ahead of time?
Assemble them up to 2 days ahead and store in an airtight container in the fridge. Bake straight from the fridge at 375°F for 25-30 minutes. For freezing, wrap unbaked burritos in foil and freeze for up to 3 months. Bake from frozen, adding 10-15 extra minutes at 375°F.
What's the best way to reheat leftover burritos?
Never microwave—they'll get soggy! Instead, place burritos on a baking sheet and reheat at 350°F for 10-12 minutes. For extra crispiness, broil for 1-2 minutes at the end. Reheating in the oven keeps the shells from getting rubbery and restores that satisfying crunch.
Can I make this recipe with ground turkey or chicken?
Yes, but use 93% lean ground turkey to prevent dryness. Turkey or chicken will be leaner than beef, so add 1 tablespoon olive oil to the pan and cook over slightly lower heat (medium) to avoid overcooking. The texture will be slightly different but still delicious!