
Main Courses
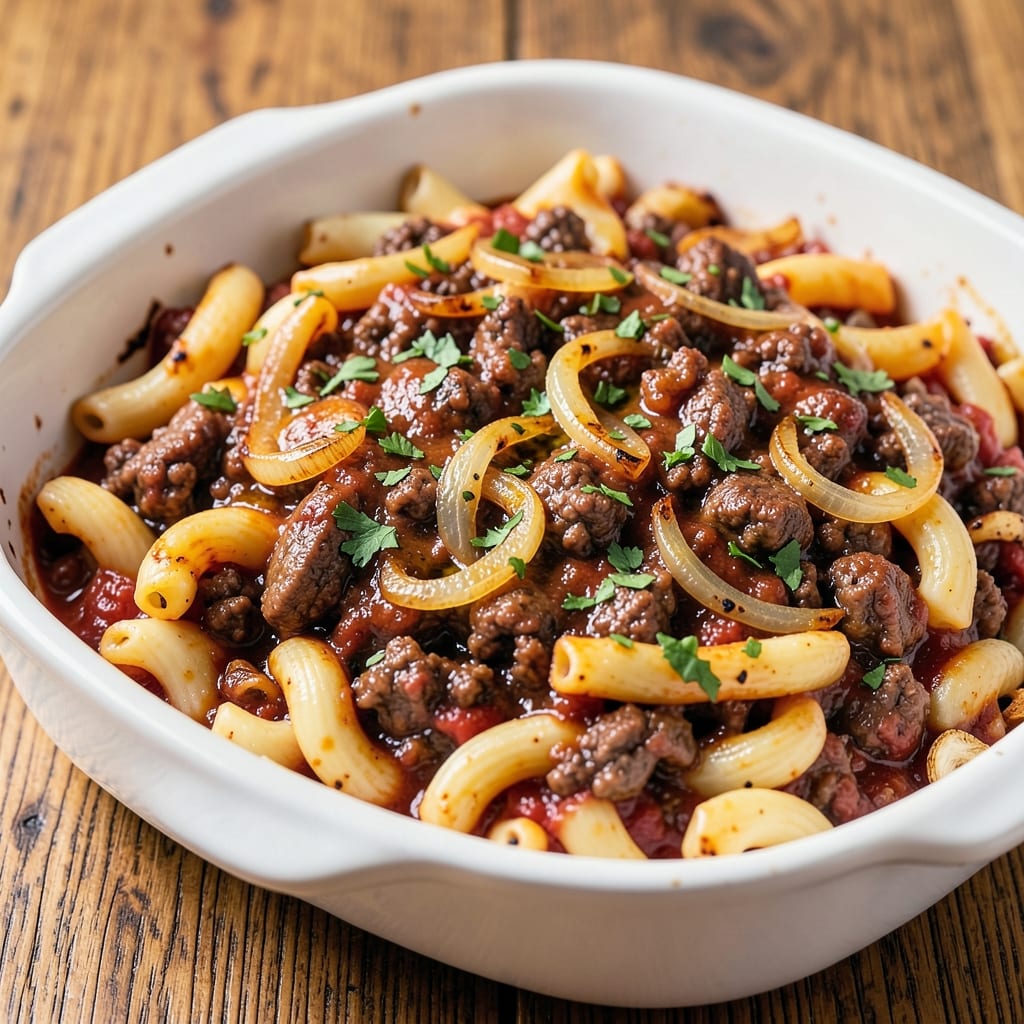
This baked beef macaroni recipe delivers the ultimate comfort food experience—crispy, cheesy layers that pull apart with every bite, all baked to golden perfection. The secret lies in balancing tender ground beef with al dente pasta and a rich, velvety cheese sauce that creates that signature crispy top. After years of testing variations, this method guarantees restaurant-quality results without the fuss.
What sets this dish apart is the technique: beef browned first for deep flavor, then combined with pasta and sauce in a single casserole. Baking at 350°F for 25-30 minutes transforms the top into a golden, pull-apart crust while keeping the center creamy and satisfying. The combination of ground beef, elbow macaroni, and a blend of cheeses creates a dish that’s hearty enough for a family dinner but simple enough for a weeknight.
By the time it emerges from the oven, you’ll have a dish that’s impossible to resist—crispy edges, tender beef, and al dente pasta all coated in a rich, cheesy sauce. The aroma alone will have everyone gathering around the table, and the first bite delivers that perfect balance of textures and flavors. This is the kind of meal that feels like a hug in food form.
Perfect for feeding a crowd or meal prepping for the week, this baked beef macaroni is a classic that never goes out of style. The recipe scales easily, and leftovers reheat beautifully, making it a go-to for busy families and comfort food lovers alike. Let’s get started on creating this timeless dish!
Ingredients for baked beef macaroni
Six ingredients make the base—ground beef, pasta, and cheeses—but the magic happens in the technique.
| Ingredient | Amount | Notes |
|---|---|---|
| Ground Beef 🥩 | 1 ½ lb | 85% lean for best flavor |
| Elbow Macaroni 🍝 | 12 oz | Uncooked, al dente preferred |
| Yellow Onion 🧅 | 1 whole | Medium size, diced small |
| Garlic Cloves 🧄 | 4 cloves | Fresh, minced fine |
| Canned Tomato Sauce 🍅 | 1 cup | No salt added preferred |
| Beef Broth 💧 | 1 cup | Low sodium preferred |
| Shredded Cheddar Cheese 🧀 | 2 cups | Medium sharp, freshly grated |
| Milk 🥛 | ½ cup | Whole milk for creaminess |
| All-Purpose Flour 🌾 | 2 tbsp | For thickening sauce |
| Worcestershire Sauce 🍶 | 1 tbsp | For umami depth |
| Dried Oregano 🍃 | 1 tsp | Italian preferred |
| Ground Black Pepper 🌶️ | ½ tsp | Freshly cracked |
| Kosher Salt 🧂 | 1 ½ tsp | Adjust to taste |
| Butter 🧈 | 2 tbsp | Unsalted, melted |
The beef is non-negotiable here—85% lean gives you that perfect balance of flavor and texture. Costco or Walmart usually have it pre-packaged in 1.5 lb bags, which is perfect for this recipe. If you're buying a whole pack, grab the chuck blend—it's cheaper and works just as well. The elbow macaroni should be al dente dry when cooked; Barilla or De Cecco are my go-tos. For the onion and garlic, yellow onions have the best flavor, and fresh garlic (not the jarred minced stuff) makes all the difference—it's worth the 30 seconds to mince it yourself.
No tomato sauce? Crushed tomatoes with a pinch of sugar works in a pinch, but honestly, Rao's or Muir Glen no-salt-added sauce is worth the shelf space. Running low on beef broth? Chicken broth with a dash of soy sauce mimics the umami. The cheddar? Freshly grated is a game-changer—pre-shredded gets clumpy and lacks that melty goodness. No milk? Half-and-half or heavy cream works too, but whole milk keeps it simple. The Worcestershire sauce might be in your spice rack already—it's the secret weapon for that deep, savory flavor. If you're out, soy sauce at half the amount gets you close.
This dish reheats like a dream—3-5 minutes at 350°F in the oven with a splash of milk to revive that crispy top. Leftovers keep for 4-5 days in the fridge, but honestly, it's even better the next day. For meal prep, portion into glass containers—they reheat more evenly. Freezing? Wrap tightly in foil and it'll keep for 3 months. Pro tip: Make a double batch. It disappears faster than you think.
Why You'll Love This Recipe
- One-Pan Magic: I swear by this recipe—just brown the beef, toss in the onions and garlic, dump in the macaroni and sauce, and bake. No boiling pasta separately, no extra pots to wash. That’s my kind of dinner.
- Savory-Sweet Balance: The caramelized onions and garlic make every bite sing, while the tomato sauce adds just enough tang to cut through the richness. Honestly, it’s the kind of flavor that lingers—even my picky eaters ask for seconds.
- Meal Prep MVP: Double the recipe, bake it once, and you’ve got lunches for days. The macaroni stays tender, the beef stays juicy, and it reheats like a dream. (Yes, even on a Tuesday night.)
- Budget-Friendly Powerhouse: Ground beef, pasta, and canned sauce? This dish costs me less than takeout but feels like a restaurant meal. Plus, leftovers stretch across the week without breaking the bank. My wallet thanks me.
Step-by-step instructions for baked beef macaroni
Here's how to build that irresistible cheesy pull-apart crust and tender beef filling.
Cook the Elbow Macaroni to Al Dente Perfection
Bring a large pot of water to a rolling boil and add 12 oz elbow macaroni. Cook until just 1 minute shy of package directions for al dente texture—you want it firm enough to hold its shape when baked but still tender. Drain immediately and set aside. I like to rinse it briefly under cold water to stop the cooking process completely, then drain again in a colander.
This step is critical—overcooked pasta becomes mushy when baked. The slight undercooking ensures it finishes cooking in the oven while absorbing all that delicious sauce. Spread the drained pasta on a baking sheet to cool slightly while you prepare the filling—this prevents steam from making your casserole soggy.
Brown the Ground Beef and Build the Sauce Base
In a large skillet over medium-high heat, break apart 1.5 lb ground beef with a wooden spoon, stirring occasionally until it's fully browned and cooked through. This should take about 5-7 minutes. Once browned, drain most of the fat but leave about 1 tablespoon in the pan—this adds flavor to the sauce.
Add the 2 tbsp butter to the skillet and melt it completely. Then stir in the 1 whole yellow onion (finely diced) and cook for 3-4 minutes until softened. Add the 4 cloves garlic cloves (minced) and cook for another 30 seconds until fragrant. This aromatic base forms the flavor foundation for your entire dish.
Create the Rich Beef Sauce
Pour in the 1 cup canned tomato sauce, 1 cup beef broth, 1 tbsp Worcestershire sauce, 1 tsp dried oregano, 0.5 tsp ground black pepper, and 1.5 tsp kosher salt. Stir well to combine, then sprinkle the 2 tbsp all-purpose flour over the mixture. Cook for 2-3 minutes, stirring constantly, until the sauce thickens slightly.
Remove from heat and stir in the 0.5 cup milk to create a creamy, velvety sauce. The milk helps balance the richness of the beef and cheese while adding a smooth texture. Taste and adjust seasoning—you might need a bit more salt or pepper to complement the flavors. Let this sauce cool slightly before combining with the pasta.
Assemble the Baked Macaroni
In a large mixing bowl, combine the cooked elbow macaroni with the beef sauce mixture. Stir gently but thoroughly to coat every strand of pasta with the rich, cheesy sauce. The mixture should look moist but not soupy—if it's too dry, add a splash of milk or beef broth to loosen it.
Transfer the macaroni mixture to a greased 9x13-inch baking dish, spreading it evenly into the pan. Sprinkle the 2 cups shredded cheddar cheese evenly over the top, pressing down gently with your fingers to help it melt into the pasta. The cheese will create that magical crispy pull-apart crust we're all craving.
Bake to Golden, Crispy Perfection
Preheat your oven to 375°F. Bake the macaroni for 25-30 minutes until the top is golden brown and bubbly, and the edges are crispy. You'll know it's ready when the cheese has melted completely and formed that beautiful crusty layer on top.
For the best results, I recommend broiling for the last 1-2 minutes to get an extra crispy top. Keep a close eye on it during this time—broilers can be intense and burn quickly. Remove from the oven and let it rest for 5 minutes before serving to allow the flavors to meld and the center to set slightly.
Pro Tips For Making Baked Beef Macaroni
- Drain and Rinse the Pasta: The starch clinging to elbow macaroni makes baked dishes soggy—give it a quick cold-water rinse after draining, then shake off excess. I learned this the hard way when my first batch turned into a gluey mess, no matter how long I baked it.
- Brown the Beef in Batches: Ground beef releases grease like a fountain, and crowding the pan steams instead of sears. Cook in 2 portions over medium-high heat until the edges crisp—this builds flavor and keeps the sauce from tasting flat.
- Sauté Onions Until Soft, Not Sweet: Chop onions into ¼-inch pieces and cook them low and slow until they’re translucent but not caramelized. Overcooking turns them mushy and makes the dish taste cooked-out; you want them to disappear into the sauce without drawing attention.
- Stir Before Baking: Don’t just dump everything into the baking dish and walk away. Give the raw mixture a quick stir to distribute the sauce evenly—this ensures every bite has the same balance of beef and pasta, not just a chewy center and a saucy crust.
Essential equipment for baked beef macaroni
Baking Dish
You’ll need a 9x13-inch baking dish—this size is perfect for even heat distribution and that signature crispy top. I recommend a glass or ceramic dish (like Pyrex) because it heats more evenly than metal and prevents burning. If you only have a metal pan, grease it generously with butter or nonstick spray to prevent sticking. Avoid dark-colored pans—they can make the bottom dry out faster. 🧑🍳
Mixing Tools
A large mixing bowl (at least 8-quart capacity) is essential for combining the macaroni and sauce without spills. I use a stainless steel bowl because it’s durable and easy to clean. A wooden spoon works best for stirring the sauce—it won’t scratch your pan like metal utensils. For the beef, a wooden spoon or silicone spatula helps break it up without sticking. 🥄
Measuring Cups
Precision matters here! Use dry measuring cups for the flour and liquid measuring cups for the milk, broth, and tomato sauce. A set from OXO or Pyrex is my go-to—they’re clear, durable, and accurate. For the cheese, a handheld grater (like Microplane) gives you fresher, finer shreds than pre-shredded. Pro tip: Weigh your cheese if you’re feeling fancy—8 oz of cheddar ≈ 2 cups shredded. 🧀
Skillet for Beef
A 10-inch cast-iron skillet (like Lodge) is ideal for browning the beef—it retains heat perfectly and adds a subtle iron flavor. If you don’t have cast iron, a heavy stainless steel skillet works too. Avoid nonstick—it can’t handle the high heat needed for proper browning. Use medium-high heat and break the beef into small pieces for even cooking. 🔥
Oven Thermometer
Your oven’s temperature gauge can be off by 25°F or more! An oven thermometer (like Thermoworks) ensures your 375°F setting is accurate. I place mine on the middle rack while preheating—if it reads 350°F, you’ll know to adjust. This small investment prevents undercooked or over-baked macaroni. Trust me, the difference is noticeable! 🌡️
Broiler Pan (Optional)
For that extra-crispy top, a broiler pan (or even a wire rack over a baking sheet) elevates the dish to restaurant-quality. Place your baking dish on the rack 1-2 minutes at the end for a golden, bubbly finish. Keep a close eye—broilers can go from perfect to burnt in seconds! If you don’t have one, a standard baking sheet with a wire rack works in a pinch. ✨
Nutrition facts
Frequently asked questions
Can I use ground turkey instead of beef?
Yes, but expect a slightly different texture and flavor! Ground turkey (especially 93% lean) will be leaner and drier, so add 1 extra tablespoon of butter or oil when browning to keep it moist. For best results, use 90% lean ground turkey and reduce the baking time by 3-5 minutes to prevent overcooking.
Why did my baked macaroni turn out soggy?
Soggy results usually mean one of two things: overcooked pasta or insufficient baking time. First, always cook pasta 1 minute less than package directions—it finishes cooking in the oven. Second, bake until the cheese is fully melted and golden brown (not just bubbly). For extra crispiness, broil for 1-2 minutes at the end.
Can I make this ahead of time?
This dish tastes even better the next day. Assemble it completely (including cheese topping) and refrigerate uncovered for 1 hour to let the cheese firm up. Then bake as directed. For leftovers, reheat covered at 350°F for 10-15 minutes with a splash of milk to restore crispiness. It keeps for 4-5 days in the fridge.
What's the best way to add extra veggies?
Finely diced bell peppers, zucchini, or mushrooms work beautifully! Sauté them with the onions and garlic for 3-4 minutes until softened. For heartier veggies like broccoli or carrots, add them to the baking dish after assembling and bake covered for 10 minutes before adding the cheese topping.
Can I use a different type of pasta?
Elbow macaroni is ideal because its shape holds the sauce well, but you can substitute with penne, rigatoni, or rotini. Avoid long pasta like spaghetti—it won't distribute evenly. For a fun twist, try shells or cavatappi, but reduce the baking time by 2-3 minutes since they cook faster. Always cook pasta slightly underdone!