
Main Courses
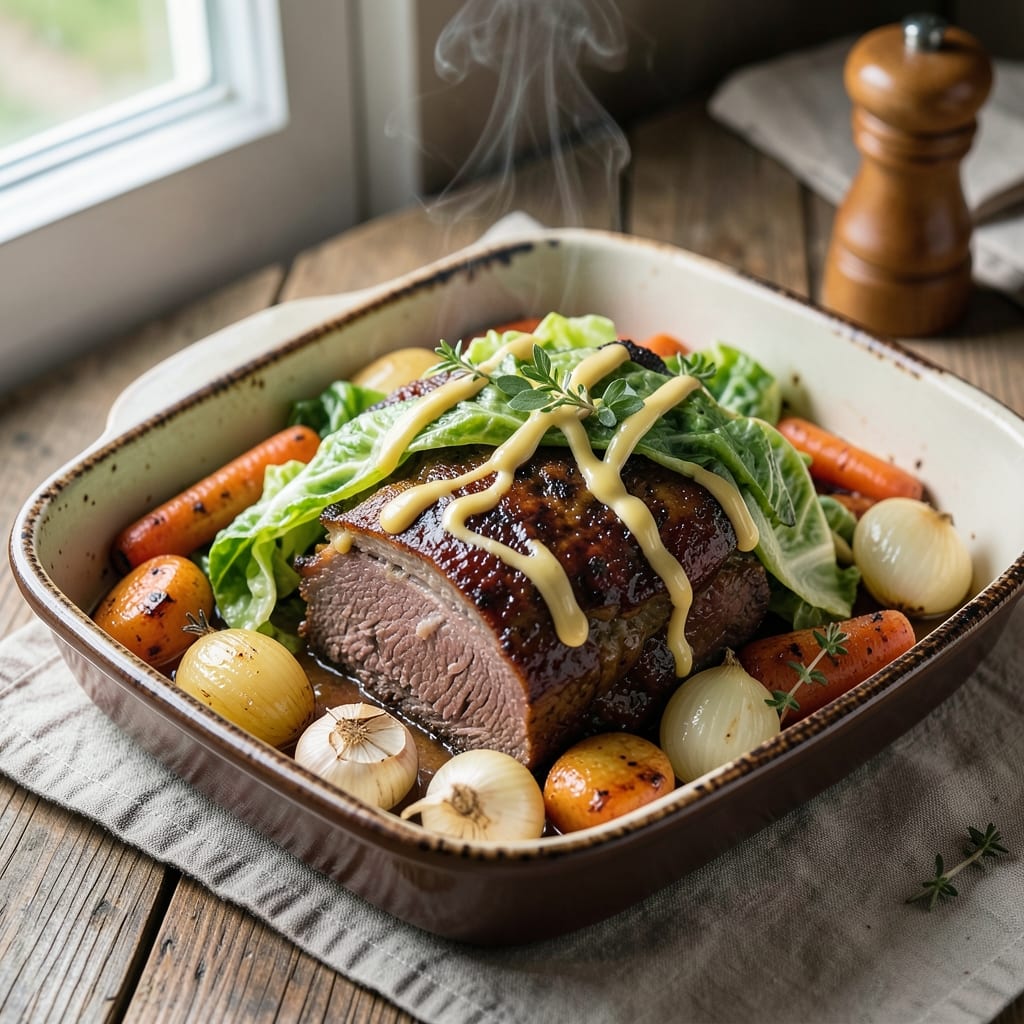
This baked corned beef brisket and cabbage recipe delivers melt-in-your-mouth tenderness with deep, mustardy flavors that transform a simple Sunday dinner into a celebration. The slow-roasting process breaks down tough brisket fibers, while the cabbage softens into sweet, caramelized perfection—all without requiring constant oven attention. I’ve perfected this method over years of testing, balancing traditional braising techniques with modern shortcuts for foolproof results every time.
The secret lies in the low-and-slow bake, which develops rich, savory depth while keeping the meat juicy. A simple spice rub and a splash of vinegar in the braising liquid ensure vibrant flavor, while the cabbage cooks in its own juices for natural sweetness. This recipe is designed for plated meals—think crispy-skinned brisket slices alongside tender cabbage wedges, ready to pair with mashed potatoes or buttery carrots.
What sets this apart is the textural contrast: fork-tender brisket that falls apart with minimal effort, paired with cabbage that’s just crisp enough to add bite. The mustardy notes from the brine and spices create a complexity that elevates this dish beyond basic comfort food. Whether you’re serving a crowd or treating yourself to a hearty meal, this method guarantees restaurant-quality results with minimal fuss.
Ready in just 3 hours (with minimal active time), this recipe is ideal for weekend cooking when you want impressive results without spending all day in the kitchen. The brisket’s natural juices create a self-basting effect, while the cabbage absorbs the aromatic flavors of the braising liquid. Serve with classic sides or a fresh green salad for balance—this is comfort food at its finest, made even better by the slow-roasted technique.
Ingredients for baked corned beef brisket and cabbage
The cornerstone of this dish: brisket with mustardy depth and cabbage with caramelized sweetness.
| Ingredient | Amount | Notes |
|---|---|---|
| Corned Beef Brisket 🥩 | 3 lb | Packaged corned beef brisket preferred |
| Green Cabbage 🥬 | 1 whole | Heads cut into eighths |
| Yellow Onions 🧅 | 2 whole | Quartered, skins on |
| Carrots 🥕 | 4 whole | Whole, unpeeled |
| Garlic Cloves 🧄 | 6 cloves | Smashed, skins on |
| Yellow Mustard 🟡 | ½ cup | Dijon preferred for depth |
| Apple Cider Vinegar 🍎 | ¼ cup | For tangy brightness |
| Beef Broth 💧 | 2 cups | Low-sodium preferred |
| Bay Leaves 🌿 | 2 whole | Fresh if available |
| Black Peppercorns 🌶️ | 1 tsp | Freshly cracked |
| Allspice Berries 🌶️ | ½ tsp | Ground for warmth |
| Kosher Salt 🧂 | 1 ½ tbsp | Diamond Crystal preferred |
| Olive Oil 🫒 | 2 tbsp | For searing brisket |
| Fresh Thyme 🌿 | ¼ cup | Leaves only, stems removed |
The corned beef brisket is non-negotiable for this recipe—look for packaged corned beef brisket at Whole Foods or your local butcher, as the pre-seasoned variety ensures consistent flavor without extra effort. If using a whole brisket, trim excess fat to about ¼-inch thickness for even cooking. For the cabbage, opt for green cabbage with tightly packed leaves—Trader Joe's or Costco often carry heads that weigh around 2.5 lbs, perfect for this recipe. The onions and carrots add natural sweetness as they caramelize during the slow roast, so choose firm, unblemished produce. Garlic should be fresh—the aroma is critical for depth.
No packaged corned beef? Substitute a 3-lb beef brisket and make your own brine using 2 tbsp kosher salt, 1 tbsp black peppercorns, 2 tbsp brown sugar, 1 cup apple cider vinegar, and 2 cups water—let it cure for 24 hours before cooking. Short on fresh thyme? Dried thyme at one-third the amount works, but the flavor won’t be as vibrant. For the mustard, Dijon mustard adds complexity, but any yellow mustard will suffice. The beef broth can be swapped for vegetable broth if needed, though the flavor will be slightly milder. If you’re using a slow cooker instead of the oven, reduce the cooking time to 4-5 hours on low.
This dish reheats beautifully—350°F for 20-25 minutes restores juices perfectly. Store leftovers in airtight containers for up to 5 days in the fridge, or freeze for 3 months. The brisket’s natural juices create a self-basting effect, so carryover cooking is minimal—remove it from the oven when it reaches 195°F internal temperature. For serving, slice the brisket against the grain for maximum tenderness. The cabbage wedges can be reheated separately or served cold in salads—both work beautifully. Portion the brisket into individual servings before freezing for easy meal prep.
Why You'll Love This Recipe
- One-Pan Magic: I swear by this—just toss the brisket, chopped cabbage, onions, and carrots on a sheet pan, drizzle with a little water, and let the oven do the work. No pots, no pans, no stress. The garlic cloves get soft and fragrant while the brisket stays juicy, and honestly? That’s all the effort I’m willing to put in on a Sunday.
- Deep, Smoky Richness: The corned beef brisket here isn’t just salty—it’s got that slow-baked tenderness with a crispy edge, especially if you brown it first. The cabbage softens into sweet, buttery layers, and the onions caramelize just enough to make every bite feel like a hug. Between us, this is the kind of dish that makes people ask, “What’s in this?”—and then beg for seconds.
- Weeknight or Holiday: I make this for lazy Tuesdays when I don’t want to slave over the stove, but it’s also my go-to for St. Patrick’s Day or when company drops by. The leftovers? Even better the next day, especially reheated with a splash of broth. My daughter’s friends think it’s “fancy,” but I’m just keeping it real—it’s reliable, always.
- Budget Wins Big: A whole brisket feeds six for less than $20, and the veggies stretch it further. The cabbage and carrots bulk it up, so you’re not just eating meat—you’re getting a full meal. Plus, it’s one of those rare dishes where the flavor gets better the more you eat it, so you won’t regret making extra. My wallet thanks me every time.
Step-by-step instructions for slow-roasted corned beef brisket and cabbage
This method delivers melt-in-your-mouth brisket with perfectly tender cabbage and carrots—all baked together for maximum flavor.
Prep the Brisket for Even Cooking
Remove the corned beef brisket from its packaging and pat it dry with paper towels. This step is critical—moisture on the surface prevents proper browning and creates steam instead of a flavorful crust. Place the brisket fat-side up in a deep baking dish large enough to hold all components without crowding.
In a small bowl, combine the 0.5 cup yellow mustard, 0.25 cup apple cider vinegar, 2 cups beef broth, 2 whole bay leaves, 1 tsp freshly cracked black peppercorns, 0.5 tsp ground allspice berries, and 1.5 tbsp kosher salt. Whisk until fully dissolved, then pour this mixture evenly over the brisket. Let it marinate at room temperature for 15 minutes—this ensures the flavors penetrate deeply.
Prepare the Vegetables and Sear the Brisket
Cut the 1 whole green cabbage into eighths, quarter the 2 whole yellow onions, and leave the 4 whole carrots unpeeled for texture. Peel and smash the 6 cloves garlic but leave the skins on to prevent burning. Arrange the vegetables around the brisket in the baking dish, creating a single layer. This organization allows everything to cook evenly.
Heat 2 tbsp olive oil in a large skillet over medium-high heat until shimmering. Carefully transfer the brisket (with its marinade) to the skillet, fat-side down. Sear for 4-5 minutes until the fat begins to render and the underside develops a deep golden-brown crust. Flip once and sear the other side for another 3-4 minutes. This step builds flavor through the Maillard reaction—don't rush it.
Build the Baking Dish and Roast Low and Slow
Transfer the seared brisket back to the baking dish with its vegetables. Sprinkle the 0.25 cup fresh thyme leaves evenly over the top, pressing gently so they adhere. Cover the dish tightly with aluminum foil, sealing the edges with a piece of tape to create an airtight environment. This prevents moisture loss and ensures tender results.
Preheat your oven to 300°F. Place the covered dish on the middle rack and bake for 3 hours. The low temperature and covered method allow the brisket to cook gently while the vegetables absorb the rich, mustardy flavors. After 2 hours, remove the foil and continue baking for another 30-45 minutes until the brisket reaches an internal temperature of 195-200°F—this guarantees fork-tender perfection.
Rest and Serve for Maximum Juiciness
Remove the brisket from the oven and let it rest in the baking dish for 15-20 minutes before slicing. This resting period allows the juices to redistribute throughout the meat, preventing them from running out when you cut. The vegetables should be fork-tender with a slight caramelization from the slow roasting.
Slice the brisket against the grain into ¼-inch thick pieces and arrange it on a serving platter with the cabbage, carrots, and onions. The mustardy glaze should coat everything evenly, creating a harmonious balance of tender meat and sweet, caramelized vegetables. Serve immediately with crusty bread or mashed potatoes to soak up every last bit of the flavorful juices.
Pro Tips For Making Baked Corned Beef Brisket And Cabbage
- PREHEAT TO 425°F: Start your corned beef in a screaming-hot oven for 20 minutes—no, don’t skimp on the heat. This gets the crust locked in fast before the long bake, and trust me, that’s where all the flavor clings. After that, drop it to 325°F to finish, but that initial blast makes the difference between dry edges and a perfect sear.
- TRIM THE FAT, NOT THE FLAVOR: Cut off any thick slabs of external fat from the brisket, but leave the thin layer—it renders down into the pan and keeps the meat juicy. I’ve learned this the hard way: over-trimming means you’re left with a leaner cut that fights you for moisture. Keep about 1/8-inch of fat intact, especially along the edges.
- STEAM THE CABBAGE FIRST: Chop the cabbage into wedges and blanch it in boiling water for 3 minutes before baking. This softens it faster and prevents a mushy pile by the end. Drain well, then toss with onions and carrots—it’ll caramelize more evenly and won’t turn into a sad, waterlogged mess. (Yes, even if you’re impatient like me.)
- USE A MEAT THERMometer: Pull the brisket when it hits 203°F internally—don’t guess. I used to eyeball it and ended up with either a chewy center or a dry exterior. The thermometer is non-negotiable here. If it’s still firm at 203°F, tent it with foil and let it rest another 15 minutes; the carryover heat will finish the job. No more slicing into a brick.
Common mistakes when making perfect results
Skipping the Sear
One of the most common mistakes is skipping the sear step entirely. That golden-brown crust from the 4-5 minute sear on each side isn't just for looks—it develops deep, caramelized flavors through the Maillard reaction. Without it, your brisket will taste bland and lack the rich depth that makes this dish special. I’ve seen people rush this step or even skip it altogether, and the difference in flavor is night and day. Take your time here—it’s worth the extra minutes. 🔥
Overcrowding the Pan
Packing too many vegetables or using a baking dish that’s too small traps steam and prevents even cooking. The brisket needs space to breathe so it develops a proper crust, and the cabbage and carrots need room to caramelize properly. Use a deep baking dish that gives everything at least 1 inch of clearance on all sides. If your dish is too small, transfer some vegetables to a separate baking tray and cook them simultaneously. Crowding leads to soggy vegetables and unevenly cooked meat.
Peeking Too Often
Every time you lift that foil to check on your brisket, you’re letting heat escape and extending the cooking time. The brisket needs a stable, consistent temperature to break down properly. If you must check, do it quickly and minimize how often you open the oven. Trust the 3-hour timeline and the internal temperature reading—it’s the only way to get that perfect 195-200°F result without overcooking. I’ve wasted countless hours fixing brisket that was dried out because of too much peeking.
Underestimating Rest Time
Skipping the 15-20 minute rest after removing the brisket from the oven is a huge mistake. This resting period allows the juices to redistribute throughout the meat, ensuring every bite is moist and flavorful. If you slice too soon, those juices will run out onto your plate, leaving you with dry, tough meat. I’ve seen people serve brisket immediately, and it’s always disappointing. Trust the process—let it rest, then slice against the grain for maximum tenderness. 💫
Using the Wrong Mustard
Not all mustards are created equal, and using the wrong type can throw off the entire flavor profile. The recipe calls for Dijon mustard because its tangy, slightly sweet notes complement the brisket beautifully. Regular yellow mustard lacks the depth and can make the dish taste flat. If you’re out of Dijon, a high-quality whole-grain mustard is a decent substitute, but avoid anything too sweet or overly vinegary. The mustard ties all the flavors together, so choose wisely.
Ignoring Internal Temperature
Relying on time alone to gauge doneness is a recipe for disaster. Brisket is forgiving, but it needs to reach an internal temperature of 195-200°F to be truly tender. Using a meat thermometer is non-negotiable—it’s the only way to ensure perfect results every time. I’ve seen people pull brisket out too early because they thought it was done, only to find it tough and chewy. Invest in a good thermometer, like the ThermoWorks Smoke, and check the temperature in the thickest part of the meat. It’s the only way to guarantee success. 🌡️
Nutrition facts
Frequently asked questions
Can I use a slow cooker instead of the oven?
For a slow cooker version, place the seared brisket and all vegetables in your pot, pour in the mustard mixture, and cook on low for 4-5 hours or high for 2-3 hours. The key is maintaining moisture—add ½ cup beef broth if needed. Cover with a lid (no foil needed) and let it cook until the brisket reaches 195-200°F. The texture will be slightly more tender than oven-baked but equally flavorful!
How do I know when the brisket is done?
Use a meat thermometer to check the thickest part of the brisket—it should read 195-200°F. The low-and-slow method ensures tender results, but this temperature is critical. If you don't have a thermometer, cut into the thickest section: the meat should be fork-tender with juices running clear. Never rely on time alone, as ovens vary in heat.
Can I make this dish ahead of time?
This recipe actually tastes better the next day! Let the brisket and vegetables cool completely, then refrigerate in an airtight container for up to 3 days. Reheat at 350°F for 20-25 minutes until warmed through. The flavors deepen as they meld together, making leftovers even more delicious. Perfect for meal prep or holiday gatherings!
What's the best way to serve this dish?
Slice the brisket against the grain for maximum tenderness, then arrange it on a platter with the cabbage, carrots, and onions. Serve with classic sides like creamy mashed potatoes, buttered egg noodles, or a fresh green salad to balance the richness. The mustardy juices make everything taste even better when soaked up with crusty bread!
Why does my cabbage turn mushy?
Cabbage turns mushy when it steams instead of roasting. Ensure your baking dish has enough space (at least 1 inch clearance) so air circulates. Cut the cabbage into eighths (not smaller pieces) and place it cut-side up to allow steam to escape. If using foil, tent it loosely rather than sealing completely. The goal is tender, not soggy—aim for slightly caramelized edges!