
Main Courses
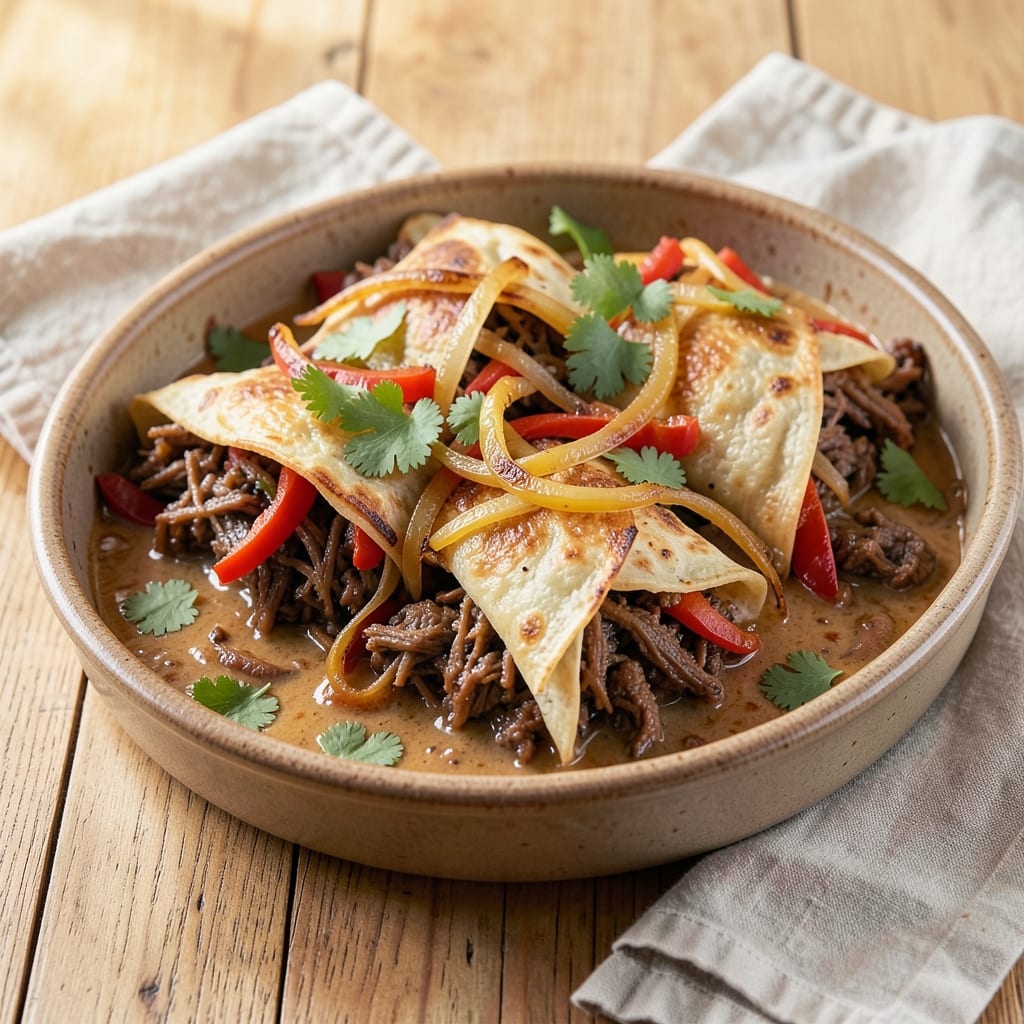
This baked shredded beef chimichanga recipe delivers all the comfort of a crispy, cheesy Mexican classic without the deep-frying mess. The secret lies in slow-braised beef that practically shreds itself, wrapped in tortillas and baked until golden—no oil splatter in sight. I perfected this version after years of testing, balancing tender meat with perfectly crispy shells and gooey melted cheese that makes every bite worth it.
The process starts with a rich beef filling—chuck roast slow-cooked until fork-tender, then seasoned with cumin, chili powder, and garlic for deep flavor. Wrap it in flour tortillas with cheese and sour cream, then bake until the edges turn golden and the cheese bubbles. This method keeps the filling juicy while creating that satisfying crunch we all love.
What you end up with is a restaurant-quality chimichanga that’s crispy on the outside, creamy on the inside, and packed with layers of flavor. The best part? No deep-fryer required—just a baking sheet and 20 minutes of oven time. Serve with sour cream, guacamole, and salsa for the full experience, or let it stand alone as a hearty main dish.
Whether you're feeding a crowd or craving a solo comfort meal, this recipe delivers crispy shells and melt-in-your-mouth beef every time. The technique is foolproof, and the results are impossible to resist—exactly what you need for a satisfying dinner without the fuss.
Ingredients for baked shredded beef chimichanga
Crispy shells, melt-in-your-mouth beef, and gooey cheese—just 14 ingredients for restaurant-quality chimichangas.
| Ingredient | Amount | Notes |
|---|---|---|
| Chuck Roast 🥩 | 1 ½ lb | Trimmed of excess fat |
| Yellow Onion 🧅 | 1 whole | Medium, diced |
| Garlic Cloves 🧄 | 4 cloves | Fresh, minced |
| Ground Cumin 🌿 | 1 tbsp | Toasted for depth |
| Chili Powder 🌶️ | 1 tbsp | Medium heat preferred |
| Salt 🧂 | 1 tsp | Kosher or sea salt |
| Black Pepper 🌶️ | ½ tsp | Freshly ground |
| Beef Broth 💧 | 1 ½ cups | Low-sodium preferred |
| Flour Tortillas 🌯 | 4 whole | Large, 10-inch size |
| Shredded Monterey Jack Cheese 🧀 | 1 ½ cups | Freshly shredded |
| Sour Cream 🥛 | ½ cup | Full-fat for creaminess |
| Olive Oil 🫒 | 1 tbsp | For brushing tortillas |
| Fresh Cilantro 🌿 | ¼ cup | Chopped, for garnish |
| Lime 🍋 | 1 whole | Juiced for brightness |
The chuck roast is your secret weapon here. Costco or Walmart usually have it pre-cut for convenience, but if you're buying a whole roast, look for good marbling—it keeps the meat juicy during slow cooking. I always grab the medium heat chili powder from the Mexican aisle at H-E-B; it's got that perfect balance of smoky and spicy. Fresh garlic and cumin? Worth the extra minute to toast the cumin seeds in a dry pan first—trust me, it makes all the difference. The beef broth should be low-sodium unless you're adding extra salt later, which I don't recommend with this recipe.
No chuck roast? Brisket or short ribs work in a pinch, but they'll need more time to become fork-tender. Running low on sour cream? Greek yogurt at half the amount gives you that tangy creaminess. The tortillas need to be large—Mission or La Tortilla Factory are my go-tos, but any 10-inch flour tortilla will do. If you can't find Monterey Jack, cheddar or pepper jack blend well. The lime juice is non-negotiable for brightness—fresh is best, but bottled works if you're in a hurry. For the cilantro, I always grab extra because half goes on top as garnish and half gets mixed into the filling.
The beef filling keeps beautifully in the fridge for 4 days—make extra and freeze half for lazy weeknights. Tortillas? Store them in a sealed bag with a paper towel to keep them soft. Once assembled, these chimichangas reheat in the oven for 10 minutes at 375°F—the cheese gets even gooier the second time around. I always portion the filling into containers first, then wrap and bake. That way, you can customize each chimichanga with different cheeses or toppings.
Why You'll Love This Recipe
- One-Pan Magic: I swear by this recipe because it’s actually hands-off—just toss the chuck roast with onions, garlic, and spices, then let the oven do the work while you sip your coffee. No skillet burns, no messy cleanup, just tender beef that falls apart at the touch of a fork.
- Spice Bomb Fusion: The cumin and chili powder turn this into something special—deep, smoky warmth that clings to the beef like a hug. Honestly, the first time I made it, I nearly ate the whole batch straight from the pan (and my husband didn’t even notice).
- Weeknight Workhorse: This feeds a crowd but costs less than takeout—perfect for game days, lazy Sundays, or when your friends “just drop by.” Between us, it’s the dish I always default to when I don’t want to stress but still crave something hearty.
Step-by-step instructions for baked shredded beef chimichanga
Here's how to transform simple ingredients into restaurant-quality chimichangas with crispy shells and gooey cheese.
Sear and Braise the Chuck Roast
Heat a large Dutch oven over medium-high heat. Add the 1.5 lb chuck roast and sear on all sides until deeply browned, about 5 minutes per side. This step creates the deep flavor that'll carry through your chimichangas.
Remove the roast and set it aside. In the same pot, add 1 tbsp olive oil and sauté the 1 whole yellow onion and 4 cloves garlic cloves until softened, about 4 minutes. Stir in 1 tbsp ground cumin, 1 tbsp chili powder, 1 tsp salt, and 0.5 tsp black pepper, cooking for another 30 seconds to toast the spices.
Return the roast to the pot, pour in 1.5 cups beef broth, and bring to a simmer. Cover and transfer to a 325°F oven. Braise for 2.5 to 3 hours, until the meat is fork-tender and easily shreds. Real talk: this is where patience pays off—don't rush it.
Shred the Beef and Prepare the Filling
Once the beef is tender, remove it from the pot and shred it using two forks. Discard any large fat pieces or connective tissue. You should have about 2.5 cups of shredded beef—enough to fill all four tortillas with plenty left over for extra flavor.
Strain the braising liquid through a fine-mesh sieve to remove any impurities, then return it to the pot. Simmer the liquid over medium heat until reduced by half, about 10 minutes. This concentrated broth will add richness to your chimichanga filling. Stir in the shredded beef and remove from heat.
In a small bowl, mix together 0.5 cup sour cream and the juice of 1 whole lime. This tangy mixture will balance the richness of the beef and cheese in your chimichangas.
Assemble the Chimichanga Filling
Spread ¼ cup of the beef mixture evenly over each of the 4 whole flour tortillas, leaving a ½-inch border around the edges. Sprinkle ¼ cup of the shredded Monterey Jack cheese over each tortilla, then add 1 tablespoon of the lime-sour cream mixture. Roll each tortilla tightly into a log, tucking in the sides as you go.
Here's the thing—don't overfill the tortillas or they'll burst open in the oven. You want a nice, compact package that holds its shape while baking. Place the filled tortillas seam-side down in a single layer on a parchment-lined baking sheet.
Bake Until Golden and Crispy
Preheat your oven to 400°F. Brush each chimichanga generously with 1 tbsp olive oil—this is what creates that perfect crispy exterior. Bake for 15-20 minutes, flipping halfway through, until the tortillas are deep golden brown and crispy all over.
Watch closely in the last few minutes—they go from perfect to burnt quickly. You'll know they're done when they're golden and the cheese inside has melted completely. If you're unsure, cut one open to check.
Garnish and Serve
Transfer the chimichangas to a serving platter and let them rest for 5 minutes to set slightly. Garnish with 0.25 cup chopped fresh cilantro and any remaining lime-sour cream mixture. Serve immediately with extra shredded Monterey Jack cheese on the side for those who want it extra cheesy.
The result should be crispy on the outside, gooey on the inside, and packed with that perfect balance of smoky beef, tangy cream, and melted cheese. Each bite delivers the magic of a chimichanga without the fuss of deep-frying!
Pro Tips For Making Baked Shredded Beef Chimichanga
- Sear the Chuck First: The roast won’t shred properly if it’s just slow-cooked—start with a 3-minute sear in a screaming-hot Dutch oven. After browning, deglaze with beer or broth to lock in flavor and prevent dryness. (Yes, even if you’re impatient like me.)
- Char the Onions Low: Slice onions thick—1/2-inch chunks—and cook them on low heat for 20 minutes until deep golden, not caramelized. Overcooking turns them bitter, and you’ll need that sweetness later when mixing with the beef. (I learned this the hard way with sad, mushy onions.)
- Don’t Overcrowd the Pan: When browning garlic, use a cold pan and add cloves in batches—3 at a time max. Crowding steams them instead of crisping, and you’ll end up with raw garlic in your chimichangas. (Your future self will thank you.)
- Rest the Shredded Beef: After pulling the roast from the oven, tent it with foil and let it sit for 10 minutes before shredding. This keeps it juicy—skipping this step turns your perfect beef into dry, stringy disappointment. (I was skeptical until I tried it.)
Storing and reheating your baked shredded beef chimichanga
Fridge Storage Tips
Store your baked chimichangas in an airtight container with parchment paper between layers to prevent sticking. They’ll stay fresh in the fridge for 3-4 days—the cheese actually gets even gooier when reheated. I like using glass Pyrex containers because they’re microwave-safe and let me see when the filling needs a splash of water to prevent drying out. 🥫
Freezer-Friendly Prep
Assemble your chimichangas but skip the baking step before freezing. Wrap each one individually in plastic wrap, then place them in a freezer bag with parchment between layers. They’ll keep for up to 3 months without losing crispiness. When ready to eat, bake straight from frozen at 400°F for 25-30 minutes, flipping halfway. 🧊
Oven Reheating Perfection
For the crispiest results, reheat chimichangas in a 400°F oven for 10-12 minutes on a parchment-lined sheet. Brush with a little olive oil before reheating to restore that golden crust. If they look dry, tent with foil for the first 5 minutes to prevent over-browning. I always add a sprinkle of Monterey Jack cheese while reheating for extra meltiness. 🔥
Microwave Shortcut
When time is tight, microwave chimichangas on 50% power for 1-2 minutes, then flip and repeat until heated through. Cover with a damp paper towel to trap steam and prevent drying. Add 1 tablespoon water to the plate if they seem dry—this mimics the moisture lost during baking. 💫
Air Fryer Crisp
For a crispy texture without oven space, use an air fryer at 375°F for 6-8 minutes, shaking halfway. This method works best for chimichangas that were previously baked and frozen. I recommend spraying them lightly with olive oil before air frying to restore that satisfying crunch. 🌡️
Cheese Melting Hacks
If your chimichangas lose crispiness when reheated, try this trick: Place them on a baking sheet with ½ cup water in the bottom of the oven. The steam keeps the tortillas tender while the cheese melts beautifully. For extra gooeyness, sprinkle shredded pepper jack on top during reheating—it melts faster than Monterey Jack. 🧀
Nutrition facts
Frequently asked questions
Can I use ground beef instead of chuck roast?
You can try, but the texture won't be the same. Ground beef lacks the rich, tender quality of slow-braised chuck roast, which is key for that melt-in-your-mouth chimichanga experience. If you're set on ground beef, use 80% lean and cook it until it reaches 165°F—then mix it with ¼ cup beef broth to keep it moist. The result will be more like a stuffed burrito than a traditional chimichanga.
Why did my chimichangas get soggy instead of crispy?
Soggy chimichangas usually happen from one of two things: overfilling the tortillas or not enough oil. Leave a ½-inch border around each tortilla, and brush them generously with 1 tbsp olive oil before baking. For extra crispiness, bake them on the top rack for the last 5 minutes of cooking. If they still turn out soggy, try using a mix of flour and corn tortillas—corn holds up better to moisture.
How can I make this recipe gluten-free?
Swap the flour tortillas for gluten-free flour tortillas (like Mission or La Tortilla Factory brands) and use a gluten-free cheese blend. The filling recipe stays the same, but gluten-free tortillas tend to be more delicate, so handle them gently when rolling. For extra stability, brush them with olive oil and bake at 375°F instead of 400°F to prevent cracking.
Can I make these chimichangas ahead of time?
Assemble them but skip the baking step. Store in an airtight container in the fridge for up to 2 days or freeze them for 3 months. When ready to bake, brush with oil and cook at 400°F for 20-25 minutes (15-20 minutes if thawed). Pro tip: Add 1 tbsp water to the bottom of the baking sheet to keep them moist while reheating.
What's the best way to serve these chimichangas?
Slice them into ½-inch rounds for easy serving, or keep them whole for a dramatic presentation. Pair with classic toppings like sour cream, guacamole, salsa verde, and pickled red onions. For a complete meal, serve with Mexican rice, black beans, and a side of charro beans. The lime-sour cream mixture in the recipe also doubles as a perfect dipping sauce!