
Main Courses
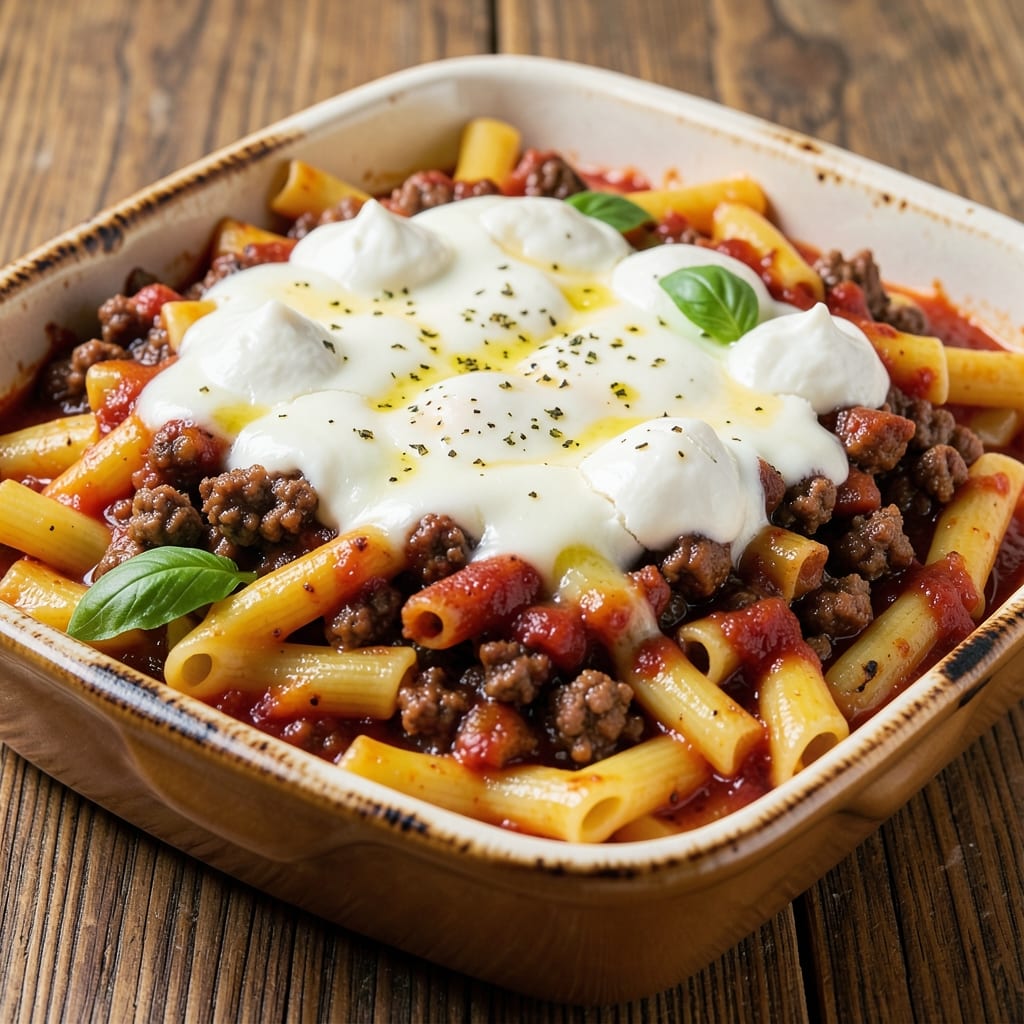
This baked ziti recipe with ground beef and sausage delivers the ultimate comfort food experience—rich layers of tender pasta, savory Italian sausage, and melted cheese that creates a crispy, golden crust. 🔥 I remember the first time I made this for my family, and how Lily's eyes lit up when she saw the bubbling cheese. The secret lies in properly browning the meat first, which builds deep, meaty flavor that infuses every bite.
What sets this recipe apart is the perfect balance of textures—al dente pasta, juicy meat, and that irresistible cheese topping that turns golden and crispy in the oven. I've perfected this method over years of testing, ensuring the sauce clings to every noodle and the cheese doesn't turn into a soupy mess. The combination of ground beef and Italian sausage adds a robust, herby depth that makes this dish feel like a restaurant-quality meal.
By the time you pull this from the oven, you'll have a dish that's hearty enough for a family dinner but impressive enough for company. The aroma alone will have everyone gathering around the table, and the first bite delivers that perfect harmony of flavors—savory meat, tangy tomato sauce, and rich, melted cheese. This is the kind of recipe that becomes a weekly staple once you try it.
The best part? It's easier than it looks. With just a few simple steps and some patience for layering, you'll achieve restaurant-quality results in your own kitchen. Serve it with garlic bread and a fresh salad for the ultimate Italian feast. Let's get started on making this meat-loaded masterpiece!
Ingredients for baked ziti recipe with ground beef and sausage
This meat-loaded ziti brings restaurant-quality layers to your table with bold flavors and crispy cheese.
| Ingredient | Amount | Notes |
|---|---|---|
| Ziti Pasta 🍝 | 1 ½ lb | Uncooked, medium width |
| Ground Beef (80/20) 🥩 | 1 lb | Lean-to-fat ratio for flavor |
| Italian Sausage (Sweet or Spicy) 🌭 | 1 lb | Casings removed, crumbled |
| Marinara Sauce 🍅 | 2 ½ cups | Homemade or quality jarred |
| Ricotta Cheese 🧀 | 15 oz | Whole milk, room temperature |
| Mozzarella Cheese (Low-Moisture) 🧀 | 2 cups | Shredded, block preferred |
| Parmesan Cheese (Freshly Grated) 🧀 | ½ cup | From a wedge, not pre-shredded |
| Garlic Cloves 🧄 | 6 cloves | Minced for sauce |
| Onion (Yellow) 🧅 | 1 whole | Diced, medium size |
| Olive Oil 🫒 | 2 tbsp | Extra-virgin for browning |
| Italian Seasoning 🌿 | 1 tbsp | Dried blend, no salt added |
| Salt 🧂 | 1 ½ tsp | Kosher or sea salt |
| Black Pepper 🌶️ | ½ tsp | Freshly ground preferred |
| Fresh Basil Leaves 🌿 | ¼ cup | Chopped, for garnish |
The meat is where the magic happens. Ground beef with 20% fat (80/20) gives you that juicy, flavorful bite—don't go leaner or it'll dry out. Italian sausage adds herby depth, and I always grab the sweet variety unless my crew wants heat. For browning, use a large skillet and don't rush it—crispy edges mean deep flavor. Costco or Walmart usually have the best prices for bulk meat, but check the sell-by date. The ricotta? Whole milk is richer than part-skim, and room temperature blends better into the sauce. I keep a wedge of Parmesan in the fridge at all times—grating it fresh makes a world of difference compared to pre-shredded.
No Italian seasoning? Mix dried oregano, basil, and thyme at 1 tsp each—it's the same thing. Short on ricotta? Cottage cheese works in a pinch, but drain it first to remove excess liquid. The mozzarella? Block cheese shreds better than pre-shredded (which has anti-caking agents that make it gummy). For the marinara, Rao's or Barilla are my go-tos, but homemade is easy—just tomatoes, garlic, olive oil, and a pinch of sugar. The garlic? Roast it first for a sweeter, deeper flavor—toss whole cloves on a baking sheet at 400°F for 20 minutes. And if you're feeling fancy, add a splash of red wine to the sauce for extra richness.
This dish reheats like a dream—even better the next day once all the flavors meld. Store leftovers in an airtight container for 4-5 days, or freeze portions for up to 3 months. I always make a double batch because it disappears fast. For make-ahead prep, cook the pasta al dente, assemble the ziti, then refrigerate uncovered for 24 hours before baking. This helps the cheese crisp up perfectly. Garnish with fresh basil right before serving—it wilts fast when baked. And trust me, the garlic bread is non-negotiable for soaking up all that cheesy goodness.
Why You'll Love This Recipe
- One-Pot Magic: I swear by this recipe when I’m too tired to wash dishes. Brown the beef and sausage in the same pan, dump in the ziti and sauce—no boiling, no straining—just layer it all and bake. The ricotta melts right into the marinara, and suddenly, you’ve got a hands-off meal that still feels like you put in effort.
- Rich, Layered Bite: That combo of fatty ground beef and crumbled sausage? It’s pure umami gold. The 80/20 beef keeps it juicy, the sausage adds depth, and the ricotta stretches the sauce into something creamy and satisfying—like a hug in pasta form. Honestly, the first time I tasted it, I nearly licked the pan.
- Game for Any Night: This is my go-to for date nights (impresses without trying), potlucks (easy to double), or lazy Sundays when I don’t want to cook. Swap spicy sausage for sweet if kids are around, or add a sprinkle of parm for extra flair. It’s the kind of dish that works for everyone, no fuss.
- Leftovers That Don’t Suck: Most baked ziti turns into a sad, soggy mess the next day. Not this one. The ricotta keeps it creamy, the cheese stays firm, and the beef-sausage mix holds up for days. I make a double batch every time—lunch the next day, a quick reheat for dinner, and even freezes like a dream. Budget-friendly? Absolutely. Reliable? Even more so.
Step-by-step instructions for baked ziti with rich meat sauce
Here's how to assemble this meat-loaded masterpiece layer by layer.
🍳 Step 1: Brown the Meat Mixture for Deep Flavor
Heat a large skillet over medium-high heat and add the 2 tablespoons olive oil. Add the 1 lb ground beef (80/20) and 1 lb Italian sausage, breaking it apart with a wooden spoon. Cook for 8-10 minutes until the meat loses its raw color and becomes deep brown with crispy edges.
Here's the thing—don't rush this step. You want that meat to render its fat and develop a proper crust. Once browned, add the 1 whole onion (diced) and 6 cloves garlic (minced), cooking for another 3-4 minutes until softened. Stir in the 1 tablespoon Italian seasoning, 1.5 teaspoons salt, and 0.5 teaspoon black pepper while the meat is still hot.
🥘 Step 2: Build the Sauce Foundation
Pour in the 2.5 cups marinara sauce and stir to combine with the meat mixture. Let the sauce simmer uncovered over medium heat for 5-7 minutes, stirring occasionally, until it thickens slightly. You're looking for a sauce that coats the back of a spoon but still has a little body to it.
This is where all the flavors meld together. If the sauce seems too thick, add 2-3 tablespoons water to loosen it. Taste and adjust seasoning—you might need a pinch more salt or pepper to balance the richness of the meat. Once satisfied, remove from heat and let it cool slightly while you prepare the pasta.
👨🍳 Step 3: Cook the Ziti Al Dente
Bring a large pot of generously salted water to a rolling boil. Add the 1.5 lb ziti pasta and cook until 1 minute before the package instructions for al dente. You want the pasta to have a slight bite to it—it'll finish cooking in the oven.
Before draining, reserve 1 cup pasta water in a measuring cup. This starchy liquid is liquid gold for creating a creamy, clingy sauce. Drain the pasta and immediately toss it with 1 tablespoon olive oil to prevent sticking. This step ensures your ziti stays separate and doesn't turn into one big gluey mass.
🥘 Step 4: Assemble the Layers Like a Pro
Preheat your oven to 375°F. In a large bowl, combine the cooked ziti with half of the meat sauce mixture. Then stir in the 15 oz ricotta cheese and 1 cup mozzarella cheese (low-moisture) until everything is evenly coated. This is your first layer—it needs to be well-mixed so the ricotta doesn't stay clumpy.
Spread half of this mixture into a 9x13-inch baking dish, pressing down gently with a spatula. Then spread half of the remaining meat sauce over the top. Sprinkle with ½ cup mozzarella cheese and ¼ cup parmesan cheese (freshly grated). Repeat with the remaining pasta mixture, sauce, and cheeses for the final layer.
🔥 Step 5: Bake to Bubbly Perfection
Cover the baking dish tightly with aluminum foil and bake for 25 minutes. Then remove the foil and bake for another 10-15 minutes until the top is golden brown and bubbly. The edges should be crispy, and the cheese should be melted all the way through.
Let it rest for 5-10 minutes before serving—this gives the layers time to set and makes slicing much easier. Garnish with the 0.25 cup fresh basil leaves (chopped) right before serving. Each bite should deliver that perfect combination of tender pasta, rich meat sauce, and creamy ricotta—oh, and that crispy, cheesy top layer is non-negotiable!
Pro Tips For Making Baked Ziti Recipe With Ground Beef And Sausage
- Brown the Meat Twice: I learned this the hard way—after browning ground beef and sausage together, I’d end up with a gray, watery mess. Instead, cook the beef first in a cold pan until it’s no longer pink (about 5-6 minutes), then remove it and brown the sausage separately. The beef will release its fat first, giving the sausage a proper sear without steaming.
- Pre-Cook the Ziti: This isn’t the prettiest method, but it’s the tastiest. Boil the ziti just until al dente (about 1 minute less than package instructions), drain, and toss it with a tablespoon of olive oil right away. That extra minute of cooking later in the oven keeps it tender, not mushy—your future self will thank you.
- Don’t Overmix the Ricotta: Sounds weird, but it works: resist the urge to stir the ricotta into the sauce like batter. Instead, dollop it directly onto the noodles in the baking dish, then swirl it in just enough to coat. Overmixing turns it gluey, and you’ll end up with a sad, dense ziti instead of light, creamy pockets.
- Bake Covered First: Start hot, finish low—but cover it. Bake the ziti at 375°F for the first 20 minutes with foil on to let the cheese melt and sauce soak in. Then remove the foil and crank the heat to 425°F for the last 10 minutes to get that golden crust. Skipping the foil step means a soggy top and a bland bottom.
Serving suggestions for this dish
Garlic Bread Essentials
You absolutely need garlic bread to soak up that cheesy goodness. I always make a simple version with 1 baguette (or Italian bread), ½ cup unsalted butter softened, 4 cloves roasted garlic (minced), and 2 tablespoons fresh parsley. Slice the bread lengthwise, spread the butter mixture, and toast at 375°F for 8-10 minutes until golden. The warm bread contrasts perfectly with the rich ziti. 🥖
Fresh Salad Balance
A crisp salad cuts through the richness beautifully. I love a simple mix of mixed greens, cherry tomatoes, shaved fennel, and cucumber slices. Toss with a light lemon vinaigrette—just 3 tablespoons olive oil, 1 tablespoon lemon juice, 1 teaspoon Dijon mustard, and a pinch of salt. Add ¼ cup crumbled feta for extra tang. This keeps the meal light while complementing the hearty ziti.
Wine Pairing Perfection
For wine lovers, a medium-bodied red like Chianti or Sangiovese bridges the gap between the tomato sauce and creamy cheese. The acidity cuts through the richness while the earthy notes complement the sausage. If you prefer white, try a Pinot Grigio—its crisp finish cleanses the palate. I always keep a bottle of Barefoot Chianti in my fridge for these occasions. 🍷
Make-Ahead Serving Tips
If you're prepping ahead, assemble the ziti in a baking dish, cover tightly with foil, and refrigerate for up to 24 hours before baking. This helps the cheese crisp beautifully. For serving, I like to transfer portions to individual plates and garnish with fresh basil right before bringing to the table. The aroma alone will have everyone gathered around! Remember, the cheese needs time to set—let it rest for 5-10 minutes before slicing.
Family-Friendly Additions
For picky eaters, serve the ziti with a side of roasted broccoli—toss florets with 1 tablespoon olive oil, ½ teaspoon garlic powder, and ¼ teaspoon red pepper flakes, then roast at 400°F for 15 minutes. The crispy edges make it irresistible. Kids also love a small bowl of marinara sauce on the side for dipping. It's a great way to get them to try the dish without feeling overwhelmed.
Presentation Pro Tips
For a restaurant-worthy presentation, use a large wooden board or slate platter to serve the ziti. Sprinkle with extra fresh basil leaves and a few grated Parmesan shavings for color contrast. Garnish with a drizzle of high-quality olive oil and a pinch of flaky sea salt. The visual appeal makes the dish feel even more special—perfect for company or holiday gatherings.
Nutrition facts
Frequently asked questions
Can I use penne instead of ziti for this recipe?
Penne works beautifully in this dish—just use the same 1.5 lb amount. The tubular shape holds the sauce and cheese slightly better than ziti, but both will give you that satisfying bite. If you prefer penne, consider cooking it 1 minute longer than ziti since it has a denser texture.
What's the best way to get crispy cheese on top?
For that perfect golden crust, use low-moisture mozzarella and sprinkle it directly on top after removing the foil. Bake uncovered for the final 10-15 minutes at 375°F until bubbly. Pro tip: Add a ¼ cup breadcrumbs mixed with 1 tablespoon grated Parmesan to the top layer before baking for extra crunch!
Can I make this recipe without ricotta?
Yes, but the texture will be different. Substitute with 1 cup cottage cheese (drained) or ½ cup cream cheese blended with ½ cup whole milk for creaminess. The dish will still be delicious—just less rich and fluffy. I recommend adding an extra ½ cup mozzarella to compensate for the missing creaminess.
How do I prevent the ziti from getting soggy?
Sogginess happens when too much moisture gets trapped. First, drain pasta well and toss with olive oil. Second, don't overfill the baking dish—leave 1-inch headspace for expansion. Third, bake uncovered for the last 10 minutes to let steam escape. Finally, let it rest 5-10 minutes before slicing to help the layers set.
Can I use turkey or chicken sausage instead?
Certainly! Turkey or chicken sausage works well, but expect a leaner flavor. For best results, add 1 tablespoon olive oil to the meat mixture and 1 teaspoon Italian seasoning to boost flavor. You might also want to add 1-2 tablespoons tomato paste to the sauce to deepen the richness. The texture will be slightly different but still delicious.