
Main Courses
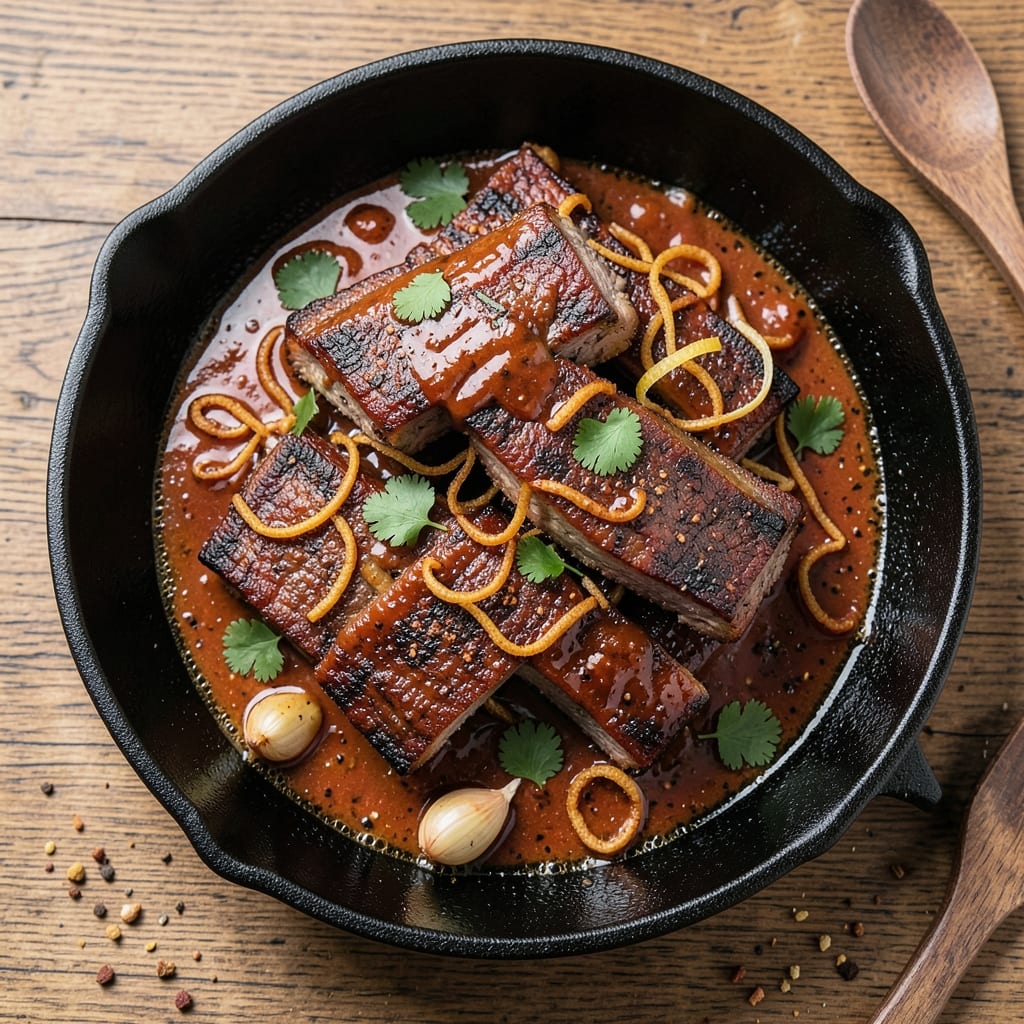
This BBQ beef chuck short ribs recipe delivers melt-in-your-mouth tenderness after an 8-hour oven braise—no smoker required. I perfected this method after years of experimenting with French slow-cooking techniques and my family's Southern BBQ traditions. The key? A perfect balance of time, temperature, and a dry rub that creates a flavorful bark while keeping the meat juicy inside.
What sets these ribs apart is the 195°F internal temperature—the magic number where collagen breaks down into gelatin, transforming tough beef into fall-apart perfection. We'll use a simple dry rub of brown sugar, smoked paprika, and garlic powder for depth, then let the oven do the heavy lifting while you sip coffee or enjoy a glass of wine. The result? Ribs so tender they practically dissolve on your tongue, with a caramelized crust that's worth every minute of wait.
This recipe works equally well for a weekend family dinner or a weeknight meal when you crave restaurant-quality comfort food. The slow cooking method means minimal effort after the initial prep, and the leftovers reheat beautifully—though you'll likely devour them all in one sitting. Serve with classic BBQ sides like coleslaw or cornbread for the full experience.
Whether you're using a traditional oven, a pressure cooker for faster results, or even a grill, this technique ensures restaurant-quality tenderness at home. The secret lies in patience and precision—two things that always pay off when cooking with beef. Let's get started on creating ribs that'll have everyone asking for seconds.
Ingredients for bbq beef chuck short ribs
Four pounds of beef chuck short ribs transform into melt-in-your-mouth perfection with these simple ingredients.
| Ingredient | Amount | Notes |
|---|---|---|
| Beef Chuck Short Ribs 🥩 | 4 lb | Bone-in, 2-3 inches thick |
| Brown Sugar 🍚 | ½ cup | Light or dark variety |
| Smoked Paprika 🌶️ | 2 tbsp | High-quality for rich flavor |
| Garlic Powder 🧄 | 1 tbsp | Freshly ground preferred |
| Ground Black Pepper 🌶️ | 1 tbsp | Freshly cracked peppercorns |
| Kosher Salt 🧂 | 1 tbsp | Diamond Crystal preferred |
| Yellow Onion 🧅 | 1 whole | Medium size, sliced |
| Garlic Cloves 🧄 | 6 cloves | Fresh, peeled |
| Beef Broth 💧 | 2 cups | Low-sodium preferred |
| Apple Cider Vinegar 🍎 | 2 tbsp | For tangy depth |
| Olive Oil 🫒 | 2 tbsp | Extra-virgin for richness |
| Fresh Rosemary 🌿 | ½ tsp | Chopped, or 1/4 tsp dried |
| Fresh Thyme 🌿 | ½ tsp | Leaves only, or 1/4 tsp dried |
| Honey 🍯 | 1 tbsp | For glaze finish |
The ribs are the star—bone-in, 2-3 inches thick—that's non-negotiable for maximum flavor and tenderness. Costco or your local butcher are best for this cut, though most grocery stores carry pre-cut short ribs. Look for good marbling and bright red color. The dry rub ingredients are all pantry staples, but Penzeys smoked paprika takes this to next level. Fresh herbs? Trader Joe's usually has great bundles—just snip the stems off before using. For the beef broth, low-sodium is key so you control the saltiness.
No smoked paprika? Regular paprika plus a pinch of liquid smoke works in a pinch. Short on garlic? Garlic powder at double the amount gets you close. The apple cider vinegar can be swapped for red wine vinegar, but it adds a subtle sweetness that pairs perfectly. Fresh rosemary and thyme are ideal, but dried at one-third the amount works if that's what you've got. The honey glaze is optional but worth it—Manuka honey adds an extra layer of depth if you're feeling fancy. For the olive oil, use something fruity and peppery—California-grown brands shine here.
These ribs reheat like a dream—just 350°F for 10-15 minutes until warmed through. Store leftovers in an airtight container with the juices for up to 5 days. Freeze for 3 months by wrapping tightly in foil. The dry rub keeps for 3 months in an airtight container, so make extra for future braises. Pro tip: Portion the ribs before freezing for easy reheating later.
Why You'll Love This Recipe
- One-Pan Magic: I swear by this recipe because it’s that simple—just ribs, a dry rub of brown sugar and smoked paprika, and a slow cook. No flipping pans, no messy sauces, just hands-off perfection while you sip wine or scroll through your phone.
- Caramelized Edge: That brown sugar crust? It’s the star. The ribs get this sticky, smoky-sweet bark that cracks open to reveal tender meat underneath—like biting into a perfect balance of crisp and melt-in-your-mouth. Honestly, I’ve tried fancier rubs, but this combo never lets me down.
- Tailgate or Tuesday: Serve these at a backyard BBQ with zero stress, or pull them from the oven for a lazy night in. The rich, smoky flavor works just as well with a cold beer as it does with mashed potatoes—because sometimes, you just want ribs, no excuses.
- Leftovers? Please.: Between us, I always make extra. The ribs stay juicy for days, and the flavor only deepens as they sit. Freeze half for a future night when you’re too tired to cook—just reheat and watch your dinner table light up. Budget-friendly? Absolutely. Lazy-friendly? Even more so.
Step-by-step instructions for BBQ beef chuck short ribs
Here's how to transform tough beef chuck short ribs into melt-in-your-mouth perfection through slow braising.
Prep and Season the Ribs
Remove the beef chuck short ribs from the refrigerator and pat them completely dry with paper towels. This step is crucial for developing that beautiful caramelized crust later. Place them in a large bowl and rub them generously with the olive oil until they're evenly coated. This helps the seasonings stick and creates a barrier against drying out during the long cook.
In a small bowl, whisk together the brown sugar, smoked paprika, garlic powder, ground black pepper, and kosher salt. Sprinkle this mixture evenly over the ribs, pressing it into the meat so it adheres well. The sugar will caramelize during cooking, adding depth of flavor and a glossy finish. Let the seasoned ribs sit at room temperature for about 30 minutes while you prepare the rest of your ingredients.
Sear the Ribs for Maximum Flavor
Heat a large Dutch oven over medium-high heat. Add the ribs in a single layer, making sure they don't overcrowd the pan. Sear them for 3-4 minutes per side until they develop a deep golden-brown crust. This initial searing locks in juices and builds complex flavors through the Maillard reaction. If you have a large skillet, work in batches to avoid steaming the ribs instead of searing them.
As the ribs sear, you'll notice the fat begin to render out. This is normal and actually enhances the flavor of the braising liquid. Once all sides are beautifully browned, transfer the ribs to a plate and set them aside. You'll want to keep them warm while you build the braising base in the same pot.
Build the Braising Liquid
In the same Dutch oven, reduce the heat to medium and add the sliced yellow onion and peeled garlic cloves. Cook them for 3-4 minutes until they become soft and fragrant, stirring occasionally. This step develops their flavors and prevents them from turning bitter during the long braise. You'll know they're ready when they're translucent and the garlic is just beginning to turn golden around the edges.
Pour in the beef broth and apple cider vinegar, scraping up any browned bits from the bottom of the pot with a wooden spoon. These bits are packed with flavor, and incorporating them into the braising liquid ensures maximum taste in every bite. Bring the mixture to a gentle simmer, then carefully return the ribs to the pot, bone-side down if possible. This positioning helps them cook more evenly and prevents them from floating.
Braise Until Fork-Tender
Cover the Dutch oven with a tight-fitting lid and transfer it to a preheated 325°F oven. Braise the ribs for 6-7 hours, checking occasionally to ensure there's enough liquid in the pot. If the liquid level gets too low, add a little hot water or beef broth to maintain a good braising environment. The ribs are done when they're fork-tender and the meat pulls away from the bone with just slight resistance.
Here's the thing—don't be tempted to lift the lid to check on them too often. Every time you do, you lose heat and moisture, potentially extending the cooking time. Instead, trust the process and the timing. The ribs should have a rich, deep color and the cooking liquid should be reduced and concentrated with flavor. If you're short on time, you can increase the oven temperature to 350°F for the last hour to help them finish cooking more quickly.
Finish with Glaze and Rest
Once the ribs are fork-tender, remove them from the oven and increase the heat to medium-high. Pour the braising liquid through a fine-mesh strainer into a saucepan, discarding the solids. Return the liquid to the heat and bring it to a gentle simmer. Stir in the honey and let it cook for 3-4 minutes until the liquid thickens slightly and becomes glossy.
Return the ribs to the Dutch oven and spoon the honeyed braising liquid over them, turning to coat evenly. Let them rest in the sauce for about 10 minutes to absorb all those wonderful flavors. Then, transfer the ribs to a serving platter and let them rest for an additional 10-15 minutes before serving. This resting period allows the juices to redistribute throughout the meat, ensuring each bite is as tender and flavorful as possible.
Pro Tips For Making Bbq Beef Chuck Short Ribs
- CUT THE FAT CAP FIRST: That thick layer of fat on beef chuck short ribs? Trim it down to about ¼-inch—enough to render but not enough to turn your BBQ into a grease fire. I learned this the hard way after one batch turned into a smoky, greasy mess that stuck to the grill grates like glue.
- SEAR IN BATCHES: Don’t crowd the ribs when searing—give them space to brown properly. Two ribs at a time in a hot cast-iron skillet (or grill) ensures a deep crust, not a sad, steamed exterior. The first batch I overloaded ended up gray and flavorless, so I doubled the cooking time. Don’t make my mistake.
- USE WET BROWN SUGAR: Packaged brown sugar clumps like cement when dry—sprinkle it over ribs while still warm from the sear to help it stick and caramelize. I used to just dump it straight from the bag, and half of it would slide right off. A quick spray of water or a damp paper towel on the sugar first makes all the difference.
- REST BEFORE SLICING: Let the ribs sit under foil for 5-10 minutes after cooking—they’ll hold together better and taste richer. I know, I know, you’re eager to dig in, but cutting into them too soon turns them into a pile of shredded disappointment. Trust me, the wait is worth it.
Regional styles of bbq beef chuck short ribs
Texas-Style BBQ
In Texas, ribs are all about bold flavors and slow cooking. The key is a dry rub packed with chili powder and coffee grounds for that signature smoky-sweet taste. I like adding 2 tbsp coffee grounds to my rub for depth. Serve with white bread for dipping—it's a must in Texas BBQ culture. The ribs here are cooked low and slow, often on a Traeger pellet grill for that authentic smoke ring. 🔥
Carolina Vinegar Braise
Carolina-style ribs lean into tangy, vinegar-forward flavors. I swap the apple cider vinegar for ½ cup white vinegar and add 1 tbsp hot sauce to the braising liquid. These ribs are often wrapped in pig's feet or butter during the last hour for extra richness. The sauce is thick, sticky, and served on the side for dipping. This style is all about balance—sweet, tangy, and smoky all at once. 🌶️
Kansas City Sweet & Smoky
Kansas City ribs are famous for their molasses-based dry rub and maple-glazed finish. I blend ¼ cup molasses into my rub for a deeper caramelization. The city’s BBQ culture also emphasizes pepper-based sauces—try adding 1 tbsp cayenne to the glaze for heat. These ribs are often cooked on a charcoal smoker, and the sauce is thick, almost like a paste. It’s a sweet, smoky, and slightly spicy trifecta. 🍯
Memphis Dry Rub
Memphis ribs are all about the dry rub—no sauce needed. I use a mix of brown sugar, paprika, and a pinch of cayenne for a crusty, caramelized bark. These ribs are cooked on a gas grill with hickory wood chips for that iconic smoky flavor. The secret? A 3-2-1 method: 3 hours smoking, 2 hours wrapped in foil, and 1 hour unwrapped to crisp the bark. Serve with pickled onions for a tangy kick. 🍋
North Carolina Eastern Style
Eastern NC ribs are leaner and more vinegar-forward than their Western counterparts. I use apple cider vinegar and black pepper as the base for the braise. These ribs are often peeled (the membrane removed) before cooking for tenderness. The sauce is thin, tangy, and served on the side. This style is all about simplicity—just ribs, vinegar, and pepper. It’s a refreshing contrast to the sweeter BBQ styles. 💫
Nutrition facts
Frequently asked questions
Can I use bone-in or boneless beef chuck short ribs for this recipe?
This recipe is designed specifically for bone-in beef chuck short ribs—the bones add incredible flavor to the braising liquid. If you must use boneless, expect slightly faster cooking time (4-5 hours instead of 6-7 hours) and less connective tissue for that signature fall-apart tenderness. The bones are what create the rich, gelatinous sauce that makes these ribs so special.
How do I know when the ribs are fully tender?
The ribs are done when they reach an internal temperature of 195°F and the meat pulls away from the bone with just slight resistance when probed with a fork. A good test is to pick up a rib—if it wobbles dramatically when lifted with tongs, it's ready. The braising liquid should also be reduced and concentrated, with a rich, deep color.
Can I make these ribs in a slow cooker or Instant Pot?
For a slow cooker, sear the ribs first, then cook on low for 8 hours or high for 5-6 hours with the same braising liquid. For an Instant Pot, use the "High Pressure" setting for 60 minutes after searing. The pressure cooker method cuts time dramatically but requires careful monitoring. The texture will be slightly different but still incredibly tender.
What if my ribs aren't tender enough after the full cooking time?
If the ribs still feel tough, they likely need more time. Increase the oven temperature to 350°F and cook for another 1-2 hours, adding a splash of beef broth if needed. The key is patience—short ribs are designed to be cooked low and slow. If they're still not tender, check your internal temperature gauge (they should reach 195°F) and consider adding more liquid to prevent drying out.
How should I store and reheat these ribs?
Store cooked ribs in an airtight container with their juices for up to 5 days in the fridge or 3 months in the freezer. To reheat, warm in a 350°F oven for 10-15 minutes or until heated through. For leftovers, add a splash of beef broth to maintain moisture. Never microwave—it makes the meat tough and dry. The ribs reheat beautifully, making them perfect for meal prep!