
Soups & Stews
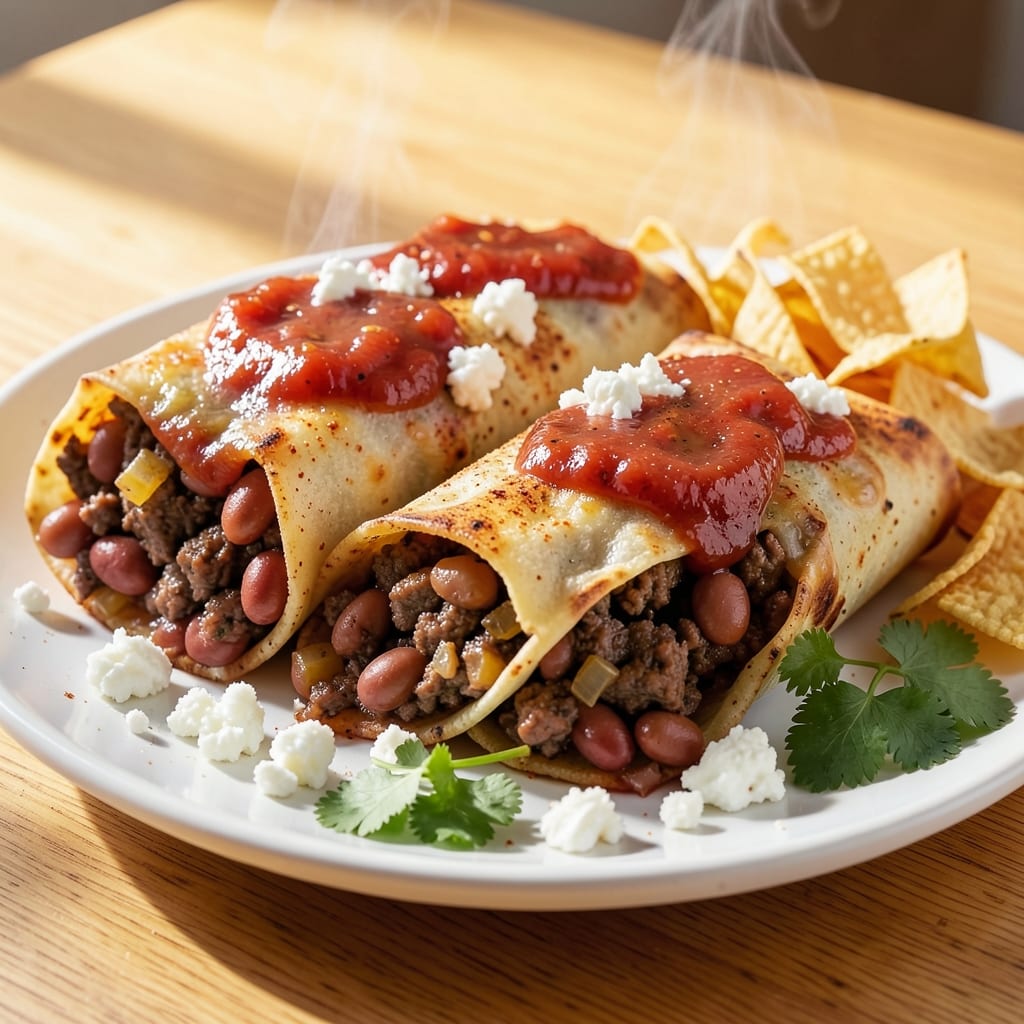
This beef and bean chimichanga recipe delivers the perfect balance of crispy, golden shells and flavorful filling—every bite is a satisfying mix of smoky beans and tender beef. The secret lies in properly seasoning the filling and achieving that signature crunch through careful frying, a technique I've perfected over years of testing. Unlike traditional burritos, chimichangas transform simple ingredients into a hearty, restaurant-worthy dish with minimal effort.
The filling combines ground beef with seasoned pinto beans, creating a rich, savory base that's both hearty and balanced. You'll roll it tightly in large flour tortillas, then fry or bake until the edges turn golden and crispy—a process that takes just 10 minutes of hands-on time. The result is a dish that's crispy on the outside, tender on the inside, and packed with bold flavors that make it a crowd-pleaser.
Serve your chimichangas with classic toppings like sour cream, guacamole, and salsa for a fresh contrast to the crispy shells. This recipe is versatile enough for weeknight dinners or game day gatherings, and it's easy to scale up for a crowd. Whether you're a seasoned cook or a beginner, the step-by-step instructions will guide you to perfect results every time.
The beauty of this recipe is its adaptability—swap in black beans for extra protein, use gluten-free tortillas for dietary needs, or air-fry for a lighter version. The key is nailing the crispy shell, and with this method, you'll achieve that satisfying crunch without the mess. Ready to make dinner unforgettable?
Ingredients for beef and bean chimichanga
These 14 ingredients transform into crispy, golden chimichangas with smoky bean and beef filling.
| Ingredient | Amount | Notes |
|---|---|---|
| Ground Beef (80/20) 🥩 | 1 lb | Lean but flavorful, not extra-lean |
| Pinto Beans (canned) 🌽 | 1 can | Drained and rinsed, no salt added |
| Large Flour Tortillas 🌯 | 4 whole | 10-inch size, for crispy shells |
| Yellow Onion 🧅 | 1 whole | Diced, medium size preferred |
| Garlic Cloves 🧄 | 3 cloves | Minced, fresh preferred |
| Chili Powder 🌶️ | 2 tbsp | Smoked or mild variety |
| Ground Cumin 🌿 | 1 tsp | Toasted for deeper flavor |
| Dried Oregano 🍃 | 1 tsp | Mexican oregano if available |
| Salt 🧂 | 1 ½ tsp | Kosher or sea salt |
| Black Pepper 🌶️ | ½ tsp | Freshly ground preferred |
| Vegetable Oil 🫒 | 2 cups | For frying, high smoke point |
| Sour Cream 🥛 | ½ cup | For serving, full-fat preferred |
| Guacamole 🥑 | ½ cup | Homemade or store-bought |
| Salsa 🍅 | ½ cup | Fresh or jarred, medium heat |
The ground beef is where flavor starts. 80/20 fat ratio keeps it juicy—skip extra-lean, or it'll dry out. I grab mine from the butcher counter if possible, but pre-packaged works too. Pinto beans? No-salt-added is key—rinsing removes any residual sodium. For the tortillas, Mission brand is my go-to; they're sturdy enough to handle frying without tearing. The onion and garlic are simple but essential—sauté them until soft, or they'll stay raw-tasting in the filling. Chili powder should be smoked if you can find it—it adds that authentic chimichanga depth.
No pinto beans? Black beans or kidney beans work in a pinch, but texture changes slightly. Short on chili powder? Mix smoked paprika with cayenne at a 3:1 ratio. The tortillas can be gluten-free if needed—just check they're large enough (8-inch minimum). For frying, vegetable oil is safest—canola works too, but avoid olive oil (burns too easily). The sour cream, guac, and salsa are all about balance—store-bought guacamole with lime juice stays fresh longer than homemade. If you're air-frying instead of deep-frying, brush the tortillas with oil first—they'll still crisp up, just with less grease.
Keep the beef and beans prepped ahead, but assemble chimichangas just before frying—they lose crispiness if left sitting. The oil stays hot for about 10 minutes at high heat, so work in batches. Leftover chimichangas? 3 days in the fridge, reheated in a skillet with a splash of oil. Freeze them unfried for up to 2 months—fry from frozen, adding 1-2 extra minutes. The filling reheats beautifully, so don't stress about leftovers.
Why You'll Love This Recipe
- Here’s what sold me: deep-frying these in small batches keeps the tortillas golden and crispy, but I’ve also mastered the oven method (350°F, 10 minutes flipping once). No fancy equipment, just hot oil or a sheet pan. That crispy edge with the creamy center? Chef’s kiss.
- Foolproof Fillings: I swear by that 80/20 ground beef—juicy, flavorful, and forgiving. Brown it right in the pan with onions and garlic until it’s just crispy enough, then dump in those canned pinto beans (no fancy prep needed). The mix of textures—crunchy beef, tender beans—makes every bite satisfying.
- Crispy Without Fuss: Here’s what sold me: deep-frying these in small batches keeps the tortillas golden and crispy, but I’ve also mastered the oven method (350°F, 10 minutes flipping once). No fancy equipment, just hot oil or a sheet pan. That crispy edge with the creamy center? Chef’s kiss.
- Lunchbox Hero: Between us, these are my go-to for meal prep. Wrap them in foil, toss in a bag, and they stay warm (and delicious) for days. My kids grab them cold for lunch, and honestly? The flavor holds up better than most takeout. Plus, they’re hearty enough to pack for work—no sad, wilted salads here.
Step-by-step instructions for beef and bean chimichangas
Master the art of crispy shells and flavorful fillings with these precise techniques.
Prepare the Smoky Beef and Bean Filling
In a large skillet over medium-high heat, add the 1 lb ground beef (80/20) and cook until browned, breaking it apart with a wooden spoon. Drain any excess fat, leaving just enough to coat the pan. This ensures your filling stays flavorful without being greasy.
Add the diced yellow onion and cook for 3-4 minutes until softened. Stir in the 3 minced garlic cloves and cook for 30 seconds until fragrant. The garlic should sizzle but not burn—this releases its full flavor. Add the 1 can drained pinto beans, 2 tbsp chili powder, 1 tsp ground cumin, 1 tsp dried oregano, 1.5 tsp salt, and 0.5 tsp black pepper. Simmer for 5 minutes until the flavors meld together and the mixture thickens slightly. This step builds the foundation of your chimichanga filling.
Assemble the Chimichangas
Lay out the 4 large flour tortillas on a clean work surface. Spoon approximately 1 cup of the beef and bean mixture onto the center of each tortilla, leaving a 1-inch border around the edges. This border is crucial—it prevents the filling from bursting out during frying and ensures crispy edges.
Fold the sides of each tortilla inward, then roll tightly from the bottom up, tucking in the sides as you go. The goal is to create a compact, cylindrical shape that will hold together during frying. If the filling is too loose, press it gently into a tight roll. This assembly technique guarantees even cooking and maximum crispiness.
Fry to Golden Perfection
Heat 2 cups vegetable oil in a deep skillet or Dutch oven over medium heat until it reaches 350°F. Use a thermometer to monitor the temperature—this is critical for achieving crispy shells without burning the filling. Carefully place the assembled chimichangas in the hot oil, working in batches if needed to avoid overcrowding. Fry for 3-4 minutes per side until the tortillas are deep golden brown and crispy.
Drain the fried chimichangas on a wire rack or paper towels to remove excess oil. The rack allows air to circulate, ensuring the shells stay crispy rather than becoming soggy. If the oil starts smoking or the chimichangas brown too quickly, reduce the heat slightly. This step is where the magic happens—crispy shells with tender, flavorful fillings.
Serve with Classic Toppings
Transfer the crispy chimichangas to a serving platter and let them rest for 2-3 minutes. This brief rest allows the filling to set slightly, making it easier to slice and serve. Cut each chimichanga diagonally into 1-inch pieces for easy handling and presentation.
Serve immediately with 0.5 cup sour cream, 0.5 cup guacamole, and 0.5 cup salsa on the side. The contrast of creamy, cool toppings against the crispy, warm chimichangas creates the perfect balance of textures and flavors. Each bite should deliver a satisfying crunch from the shell, followed by the tender, smoky beef and bean filling.
Pro Tips For Making Beef And Bean Chimichanga
- Brown the Beef First: I learned this the hard way—skipping the initial sear makes the filling taste flat. Cook the ground beef over medium-high heat until it’s deeply browned (not just cooked through), then break it up with a wooden spoon. That crusty bit? It’s the thing that matters most when you fold it into the tortilla.
- Drain and Rinse the Beans: Canned pinto beans are salty by default, and that salt builds up fast in chimichangas. Drain them, then rinse under cold water for 30 seconds—just enough to cut the salt without turning the filling soggy. Pro move: Pat them dry with a paper towel after rinsing.
- Preheat the Oil, Not the Pan: Cold oil in a hot pan is a recipe for splatter city. Instead, heat the oil in the skillet first (about 2 minutes on medium), then add the assembled chimichangas. The oil should shimmer but not smoke—this guarantees a crispy exterior without burning the tortilla edges.
- Layer the Filling Thin: Stuffing tortillas too tightly leads to messy, uneven chimichangas. Spread the beef-bean mixture in a thin, even layer—about ¼-inch thick—leaving a ½-inch border. Fold the sides in first, then roll tightly but gently. The goal is a neat package, not a football.
Perfect pairings for this dish
Crispy Shell Essentials
For that signature crunch, Mission brand flour tortillas are my go-to—they're sturdy enough to handle frying without tearing. If you prefer gluten-free, Siete brand tortillas work beautifully too. The key is to keep the tortillas at room temperature before assembling—cold tortillas crack more easily when rolled. I also like to brush the assembled chimichangas lightly with vegetable oil before frying for extra crispiness. 🌯
Toppings That Elevate
Classic toppings like sour cream, guacamole, and salsa are non-negotiable—they cut through the richness of the fried shells. For a creamy twist, try Mexican crema instead of sour cream, or add pickled red onions for a tangy kick. I always keep lime wedges on hand to brighten up every bite with a squeeze of fresh citrus. 🍋
Drink Pairings
A cold Mexican lager like Modelo Especial or Pacifico cleanses your palate perfectly between bites. For something lighter, a margarita with fresh lime and tequila works wonders. If you prefer non-alcoholic, horchata or Mexican soda like Jarritos provide a sweet, creamy contrast to the savory chimichangas. 🍺
Dipping Sauces
Skip the traditional toppings for a moment and try queso dip for dipping—just mix cream cheese, salsa, and a pinch of cayenne for a smoky, creamy sauce. Another favorite is mango-habanero salsa—sweet, spicy, and irresistible. I also love avocado lime crema, blending avocado, sour cream, and lime juice until smooth. 🥑
Side Dish Harmony
Serve chimichangas with Mexican rice and charro beans for a complete meal. The rice soaks up any extra salsa, while the beans add extra fiber. For a lighter option, cilantro-lime cauliflower rice keeps the dish fresh and vibrant. A simple tortilla salad with crispy tortilla strips also adds a refreshing crunch. 🥗
Modern Twists
For a lighter version, air-fry the chimichangas at 375°F for 8-10 minutes, flipping halfway. They won’t be as crispy as fried, but they’re still delicious. Another fun variation is to stuff with shredded chicken instead of beef—just swap the filling and keep the same frying technique. 🔥
Nutrition facts
Frequently asked questions
Can I make chimichangas without frying them?
For a lighter version, bake them at 375°F for 15-20 minutes, flipping halfway, until golden. Brush with oil first for crispiness. Or try air-frying at 375°F for 8-10 minutes—they won't be as crispy but still delicious.
How do I prevent my chimichangas from falling apart?
Use a tight roll with a 1-inch border of tortilla around the filling. Press gently as you roll, and don't overfill—1 cup per chimichanga is perfect. Chill assembled chimichangas for 15 minutes before frying to help them hold together.
What's the best way to reheat leftover chimichangas?
Reheat in a skillet over medium heat for 2-3 minutes per side with a splash of oil to restore crispiness. Avoid microwaving—they'll get soggy. For extra crunch, broil for 1-2 minutes after reheating.
Can I make chimichangas ahead of time?
Assemble them and refrigerate unfried for up to 24 hours. Freeze uncooked chimichangas for 2 months. Fry from frozen, adding 1-2 extra minutes per side. Never freeze already-fried chimichangas—they lose crispiness.
What's the secret to extra crispy shells?
Use room-temperature tortillas and brush the outside lightly with oil before frying. Fry in 350°F oil until deep golden brown—don't rush! Drain on a wire rack (not paper towels) to maintain crispiness.