
Main Courses
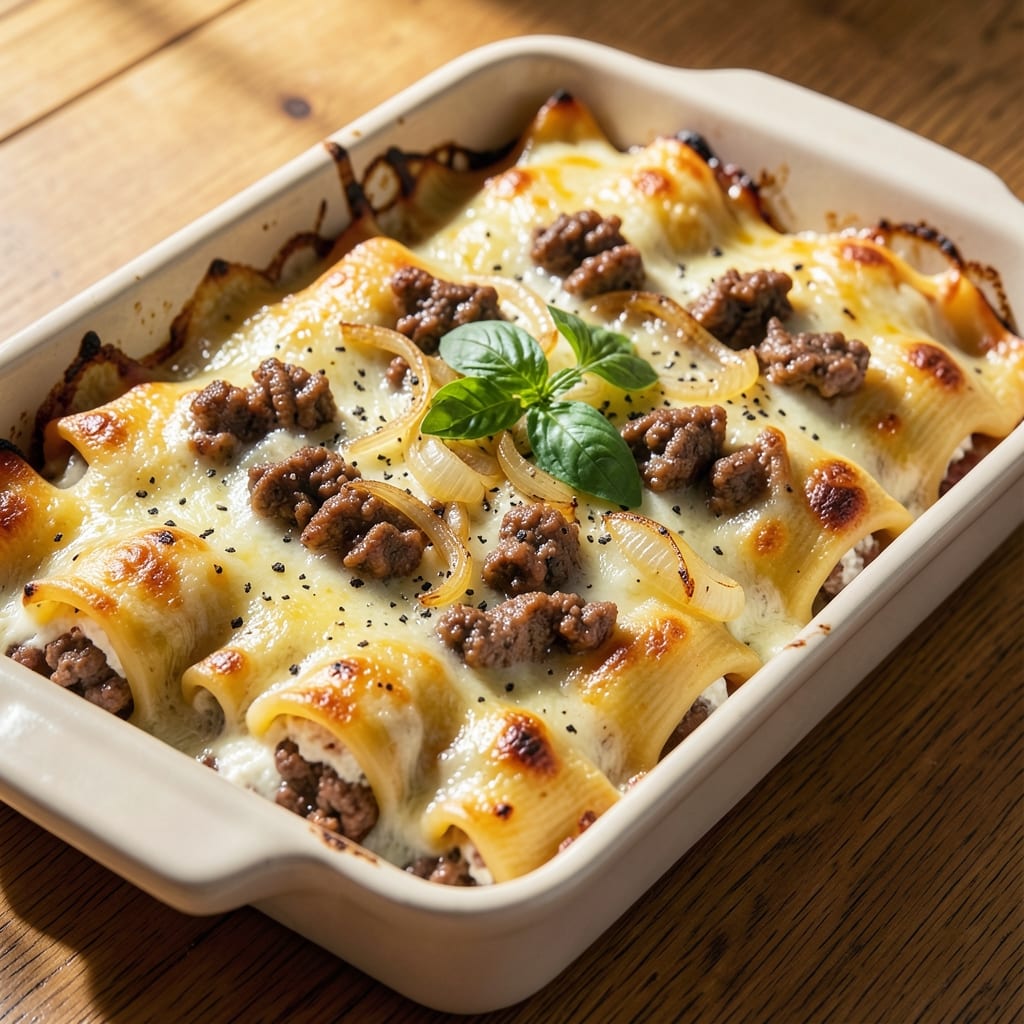
This beef and cheese manicotti recipe delivers restaurant-quality comfort in your own kitchen, with layers of tender pasta, savory beef filling, and gooey melted cheese that always impresses. The secret lies in perfectly cooked pasta sheets and a rich filling that combines ground beef, ricotta, and a blend of cheeses for maximum flavor and texture. I've perfected this recipe over years of testing, ensuring every bite delivers that satisfying mix of creamy, cheesy goodness and hearty beef flavor.
The process starts with homemade-style manicotti sheets—either fresh or dried—that cook up tender yet sturdy enough to hold their shape. The beef filling combines ground beef with ricotta, parmesan, and herbs for depth, while the topping of mozzarella and parmesan creates that irresistible golden crust when baked. What makes this recipe stand out is the balance: the filling stays moist, the cheese melts perfectly, and the pasta doesn't turn mushy.
By the time it emerges from the oven, you'll have a dish that's rich, cheesy, and deeply satisfying—each forkful packed with flavor and texture. The aroma alone will have everyone gathering around the table, and the presentation is elegant enough for company but simple enough for a weeknight dinner. This is comfort food at its finest, with layers of flavor that keep you coming back for more.
For extra depth, consider adding spinach to the filling or swapping cheeses for a different flavor profile. Serve with garlic bread and a side salad for a complete meal. Let's get started on creating this foolproof manicotti that's sure to become a family favorite.
Ingredients for beef and cheese manicotti
Pantry staples meet Italian comfort—rich beef, creamy ricotta, and gooey cheese layers.
| Ingredient | Amount | Notes |
|---|---|---|
| Ground Beef 🥩 | 1 lb | Lean or 80/20 preferred |
| Manicotti Pasta Sheets 🍝 | 12 whole | Fresh or dried, 8x11 inches |
| Ricotta Cheese 🧀 | 15 oz | Whole milk, not part-skim |
| Parmesan Cheese 🧀 | 1 cup | Freshly grated from block |
| Mozzarella Cheese 🧀 | 16 oz | Fresh or low-moisture shredded |
| Yellow Onion 🧅 | 1 whole | Medium size, finely chopped |
| Garlic Cloves 🧄 | 3 cloves | Minced for filling |
| Large Eggs 🥚 | 2 whole | For binding filling |
| All-Purpose Flour 🌾 | ¼ cup | For thickening if needed |
| Canned Tomato Sauce 🍅 | 2 cups | High-quality, no added sugar |
| Dried Basil 🌿 | 1 tbsp | Or 2 tbsp fresh |
| Dried Oregano 🍃 | 1 tsp | Italian blend preferred |
| Salt 🧂 | 1 tsp | Kosher or sea salt |
| Black Pepper 🌶️ | ½ tsp | Freshly ground preferred |
| Olive Oil 🫒 | 2 tbsp | For greasing baking dish |
The beef is where the flavor starts. Ground chuck gives you the best texture, but lean ground beef works too—just don't overcook it. Whole milk ricotta is non-negotiable for creaminess (part-skim gets rubbery). For the Parmesan, buy a wedge and grate it yourself—pre-grated has anti-caking agents that make it taste like sawdust. Mozzarella? Fresh works best—it melts like a dream, but low-moisture shredded is fine if you're in a pinch. I always grab mine from Whole Foods or the Italian market for the best quality.
No ricotta? Cottage cheese blended until smooth gets you close—just drain off the whey first. Short on tomato sauce? Crushed tomatoes with a pinch of sugar works in a bind. Fresh basil is ideal, but dried oregano at half the amount keeps things simple. The eggs help bind the filling, but if you're making this ahead, skip them and add extra ricotta for moisture. For the pasta sheets, dried are easier to find but fresh cook faster and hold shape better—boil them just 3-4 minutes instead of 8-10.
This reheats beautifully—honestly tastes better the next day once everything melts together. Keeps 3 days in the fridge, 2 months frozen. I always make a double batch because leftovers are even better. Store in an airtight container with parchment between layers to prevent sticking. For serving, a sprinkle of fresh basil and red pepper flakes adds that restaurant touch.
Why You'll Love This Recipe
- Weeknight-Friendly Filling: I swear by this recipe because it’s the kind of dish that doesn’t require a fancy dinner party setup—just brown the beef with garlic and herbs, mix in ricotta and Parmesan, and you’re halfway done. The ground beef adds heartiness without needing a full roast, and the cheeses blend into a creamy, satisfying filling that’s foolproof.
- Cheesy Layer Magic: Honestly, the moment I tasted that first bite of gooey mozzarella and ricotta peeking out from the manicotti sheets, I knew this was my new comfort food. The crisp edges of the pasta hold up perfectly while the melty cheese inside feels like a warm hug—especially when topped with extra Parmesan. It’s the kind of flavor that sticks with you.
- Leftovers That Don’t Suck: Between us, most casseroles turn into sad, dry leftovers by day three. Not this one. The beef keeps it rich, and the cheese stays creamy even reheated, so I can meal prep a big batch and still serve it up for lunch without it tasting like yesterday’s dinner. (Yes, even on a Tuesday.)
- Budget Meal for Crowds: Here’s what sold me—the ground beef stretches easily, and the cheeses (especially ricotta) are affordable staples that make this dish feel indulgent without breaking the bank. I can feed six people for under $20, and everyone leaves happy. That’s a win in my book.
Step-by-step instructions for beef and cheese manicotti
Here's how to create layers of tender pasta filled with rich beef and melted cheese.
Cook the Manicotti Pasta
Bring a large pot of salted water to a rolling boil. Add the 12 whole manicotti pasta sheets and cook according to package instructions until al dente—they should float to the surface. This typically takes about 8-10 minutes. I like to test one by pressing it gently with tongs—it should feel firm but still slightly springy.
Drain the pasta immediately and transfer it to a clean kitchen towel to absorb any excess moisture. This step is crucial because damp pasta can make your filling soggy. While the pasta cooks, prepare the filling so you can assemble the manicotti right away.
Prepare the Beef Filling
Heat 2 tablespoons olive oil in a large skillet over medium-high heat. Add the 1 lb ground beef and cook, breaking it apart with a wooden spoon, until it's browned and fully cooked—about 5-7 minutes. Drain any excess fat, leaving just about 1 tablespoon in the pan for flavor.
Add the finely chopped yellow onion and minced garlic cloves to the skillet. Cook for 2-3 minutes until the onion becomes translucent and the garlic is fragrant. Stir in 1 tablespoon dried basil and 1 teaspoon dried oregano, letting the spices toast for 30 seconds to release their aroma.
Combine Filling Ingredients
In a large bowl, mix together the cooked beef mixture, 15 oz ricotta cheese, 2 whole large eggs, 0.25 cup all-purpose flour, 1 cup grated parmesan cheese, 1 teaspoon salt, and 0.5 teaspoon black pepper. Use a fork or your hands to combine everything until smooth and well incorporated.
Here's the thing—don't overmix. You want the filling to be just combined, not dense. If it feels too thick, you can add 1 tablespoon of water to help bind it. The filling should be spreadable but not runny, so you can pipe it easily into the pasta shells.
Assemble the Manicotti
Preheat your oven to 375°F. Grease a 9x13-inch baking dish with a bit of olive oil to prevent sticking. Spread 1 cup of the canned tomato sauce on the bottom of the dish to create a flavorful base.
Using a piping bag or a spoon, fill each cooked manicotti shell with about 2 tablespoons of the beef filling. You'll use about half of the filling for this layer. Arrange the filled shells seam-side up in the baking dish, snugly fitting them together. Pour another ½ cup of the tomato sauce over the top.
Layer and Bake to Perfection
Sprinkle 8 oz of the mozzarella cheese evenly over the filled shells. Add another ½ cup of the tomato sauce, then top with the remaining 8 oz mozzarella cheese. Fold a piece of aluminum foil over the dish, creating a tight seal to prevent the cheese from browning too quickly.
Bake for 25 minutes. Remove the foil and bake for another 10-15 minutes until the cheese is golden brown and bubbly and the edges are crispy. The filling should be hot throughout, and the top should be beautifully browned with a few melted cheese bubbles.
Rest and Serve
Let the manicotti rest for 10 minutes before serving. This allows the layers to set and makes it easier to slice. The cheese will be gooey and stretchy—this is what you're aiming for!
Slice into 4 equal portions and serve with extra tomato sauce on the side if desired. Each bite should deliver a perfect balance of tender pasta, savory beef filling, and melted cheese. Enjoy immediately while the cheese is at its peak gooeyness.
Pro Tips For Making Beef And Cheese Manicotti
- Drain and Pat the Ricotta: I learned this the hard way—ricotta straight from the tub is wet, and soggy manicotti tubes are a nightmare. Spread it on paper towels, press gently, and let it sit for 10 minutes. The filling stays firm, and your layers won’t turn into a cheesy sludge.
- Brown the Beef Properly: Ground beef loses flavor when it’s just simmered. Break it into small chunks first, then cook until deep brown (not just pink). Drain most of the fat afterward—you want flavor, not grease swimming in your sauce.
- Pre-Cook the Pasta Sheets: Skipping this step is how you end up with gummy, undercooked manicotti. Boil them just until al dente (check the package time, then subtract 1-2 minutes), then cool them in ice water. They’ll hold their shape when you roll them, and the sauce won’t turn into a watery mess.
- Layer Cheese Strategically: Don’t just dump all the mozzarella on top—it’ll melt into a gooey blob. Mix half the mozzarella into the ricotta filling for creaminess, then sprinkle the rest between layers. Top with a thin layer of parmesan for that crispy crust without drowning the dish.
Serving suggestions for this beef and cheese manicotti
Classic Italian Sides
Start with a simple garlic bread made from a crusty Italian loaf like Bocce Bakery's Ciabatta, brushed with 3 tbsp olive oil and 4 minced garlic cloves. Toast it alongside your manicotti for 5-7 minutes until golden and crisp. The buttery, garlicky notes cut through the richness of the cheese layers beautifully. 🍞
For a fresh contrast, serve with a simple arugula salad tossed with 2 tbsp lemon vinaigrette (mix 3 tbsp olive oil, 1 tbsp lemon juice, ½ tsp Dijon mustard, and ¼ tsp salt). The peppery greens balance the creamy, cheesy manicotti perfectly.
Sauce Variations
Swap the basic tomato sauce for a white wine reduction by simmering 2 cups heavy cream, 1 cup chicken broth, ½ cup dry white wine, and 2 tbsp butter until thickened. Stir in 1 tbsp fresh parsley and ½ tsp nutmeg for an elegant twist. This sauce pairs wonderfully with the beef filling and adds a sophisticated touch.
For a spicy kick, drizzle extra tomato sauce with ½ tsp crushed red pepper flakes and a sprinkle of fresh basil before serving. The heat contrasts the creamy cheese, making every bite exciting. I love adding a few drops of hot honey for a sweet-spicy balance.
Beverage Pairings
A crisp Chianti Classico from Tuscany complements the hearty flavors perfectly. Look for a Sangiovese-based red with bright acidity—it cleanses the palate between rich bites. For a lighter option, try a Pinot Grigio from Alto Adige, which balances the dish's richness without overpowering it. 🍷
For beer lovers, a Belgian-style witbier like Hoegaarden adds a refreshing citrus note that contrasts the dish's richness. Alternatively, a light Italian lager like Peroni keeps things simple and refreshing. Avoid heavy stouts or IPAs that might compete with the manicotti's flavors.
Presentation Tips
Use a serrated knife to slice the manicotti into neat rectangles or diamonds for an elegant presentation. Arrange the slices on a platter with the sauce spooned around the edges. Garnish with a sprinkle of fresh basil leaves and a few red pepper flakes for a restaurant-worthy finish. 💫
For a fun twist, serve individual portions in small cast-iron skillets with a side of warm sauce for dipping. This makes it perfect for sharing and adds a cozy, rustic touch. Pair with a simple side salad or roasted vegetables to complete the meal.
Nutrition facts
Frequently asked questions
Can I use dried manicotti shells instead of fresh?
Yes! Dried shells work perfectly—just cook them 8-10 minutes in boiling water until al dente. The key is draining them well and letting them dry on a towel before filling to prevent a soggy texture. Fresh shells cook faster (3-4 minutes) and hold shape better, but dried are more widely available.
What's the best cheese ratio for maximum gooeyness?
For the filling, use 8 oz mozzarella (fresh or low-moisture) split evenly between layers and topping. Add 4 oz extra parmesan on top for a crispy crust. The secret? Don't overmix the filling—keep it light so the cheese melts perfectly. For extra stretchiness, add 1 oz cream cheese to the ricotta mixture.
Why did my manicotti get watery after baking?
This usually happens from two things: undercooked pasta or too much moisture in the filling. Always cook pasta al dente and pat it dry thoroughly. For the filling, reduce ricotta by 1 oz if it's very wet, or add 1 extra tbsp flour to bind. Bake uncovered for the last 5 minutes to evaporate excess moisture.
Can I make this ahead of time?
Assemble the manicotti in a baking dish, cover tightly with foil, and refrigerate for up to 24 hours before baking. For freezing, bake as directed, cool completely, then wrap individual portions in plastic wrap and foil. Reheat covered at 350°F for 20-25 minutes until bubbly. Leftovers reheat beautifully!
What's the best way to reheat manicotti?
For the best results, cover with foil and reheat at 350°F for 15-20 minutes until warmed through. Add 1-2 tbsp water to the bottom of the dish to prevent drying. For microwave reheating, cover with a damp paper towel and heat in 30-second intervals until hot—this keeps the cheese from getting rubbery.