
Main Courses
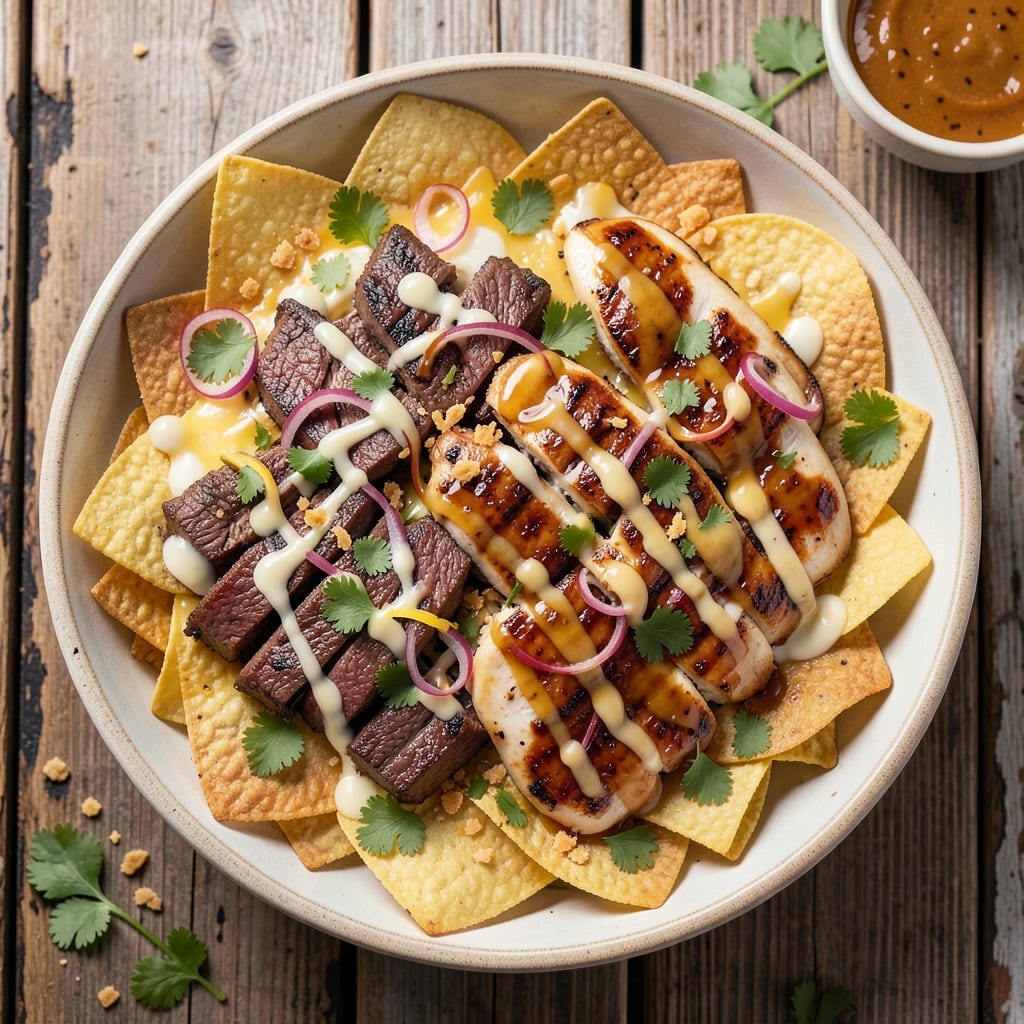
This beef and chicken nachos recipe delivers the ultimate three-cheese magic that transforms a simple snack into a hearty, restaurant-quality meal. 🔥 The secret lies in perfectly seasoned proteins, melted cheese layers, and a balance of textures that keeps every bite exciting. I've perfected this over countless game days and family gatherings—it's the kind of dish that disappears faster than you can say "extra guac."
The foundation starts with crispy tortilla chips topped with a blend of sharp cheddar, Monterey Jack, and pepper jack that melts into a bubbly, golden blanket. Grilled beef and chicken add protein-rich satisfaction, while jalapeños and pickled onions bring the heat and tang. What makes this recipe stand out is the foolproof method for keeping chips crispy while cheese melts perfectly—no soggy bottoms here.
By the time you're done, you'll have a loaded tray of nachos with tender, flavorful proteins, melty cheese, and all the classic toppings you love. The combination of smoky grilled chicken, savory beef, and creamy cheese creates a flavor profile that's impossible to resist. This is comfort food at its finest—easy to assemble but packed with restaurant-quality taste.
Perfect for game day, movie nights, or feeding a hungry crowd, these nachos are designed to impress without hours in the kitchen. The best part? Every component can be prepped ahead, so you spend more time enjoying the meal and less time slaving over the stove. Let's get started!
Ingredients for beef and chicken nachos
Sixteen ingredients for a crowd-pleasing nacho feast that's restaurant-quality at home.
| Ingredient | Amount | Notes |
|---|---|---|
| Tortilla Chips 🍟 | 8 cups | Sturdy blue corn or potato chips |
| Sharp Cheddar Cheese 🧀 | 2 cups | Shredded, block preferred |
| Monterey Jack Cheese 🧀 | 1 ½ cups | Shredded, freshly grated |
| Pepper Jack Cheese 🧀 | 1 cup | Shredded, for heat kick |
| Beef Steak 🥩 | 1 lb | Sirloin or flank, thinly sliced |
| Boneless Chicken Breast 🍗 | 1 ½ lb | Thinly sliced, pounded even |
| Taco Seasoning 🌶️ | 2 tbsp | Homemade or quality packet |
| Olive Oil 🫒 | 2 tbsp | For grilling proteins |
| Jalapeños 🌶️ | ½ cup | Sliced, pickled or fresh |
| Pickled Red Onions 🧅 | ½ cup | Chopped, tangy bite |
| Sour Cream 🥛 | ½ cup | Full-fat for creaminess |
| Guacamole 🥑 | 1 cup | Store-bought or homemade |
| Salt 🧂 | 1 tsp | Kosher or sea salt |
| Black Pepper 🌶️ | ½ tsp | Freshly ground |
| Lime Wedges 🍋 | 2 whole | For serving |
The cheese trio is non-negotiable—sharp cheddar for tang, Monterey Jack for melt, and pepper jack for heat. Grab pre-shredded from Trader Joe's if you're short on time, but trust me on freshly grating the cheddar for that perfect texture. For the proteins, sirloin or flank steak gives you that perfect beefy bite—thinly sliced and marinated. I always grab mine from the butcher counter at Whole Foods when it's on sale, but the regular grocery store stuff works too. The chicken? Pound it thin so it cooks fast and stays juicy—no one likes dry chicken on nachos.
No taco seasoning packet? Mix 1 tbsp chili powder, 1 tsp cumin, 1 tsp paprika, ½ tsp garlic powder, ½ tsp onion powder, and ¼ tsp cayenne—it's a game-changer. Short on jalapeños? Swap in diced serrano peppers for extra heat. Pickled onions missing? Quick-pickle red onions in vinegar and sugar—takes 15 minutes. The guacamole can be store-bought (I won't judge), but if you're making it fresh, avocados should be slightly soft to the touch. And for the love of nachos, full-fat sour cream is worth the splurge—it's the creamy crown on top.
Prep ahead like a pro: Grill the proteins and store in the fridge for 2 days, cheese can be shredded and refrigerated for 3 days, and guacamole keeps for 1 day if you add a squeeze of lime. Assemble just before serving—5 minutes under the broiler with cheese on top turns it into nacho perfection. Leftovers? 3 days max in the fridge, but honestly, they won't last that long. Serve with lime wedges and extra jalapeños for the ultimate crowd-pleaser.
Why You'll Love This Recipe
- One-Pan Magic: I swear by this—just toss everything on a sheet pan, no fancy layers. The chips stay crispy while the cheeses melt into a gooey blanket, and the beef? It caramelizes right there, no flipping required.
- Spicy-Savory Balance: That Pepper Jack brings the heat, but the sharp cheddar and Monterey Jack smooth it out—like a perfect hug for your taste buds. The beef adds richness, so every bite feels indulgent without being overwhelming.
- Game for Any Gathering: I’ve served these at game days, lazy Sundays, and even as a "fancy" dinner when company drops by. The chips hold up, the toppings are customizable, and no one ever complains about seconds.
- Budget-Friendly Feast: A single steak stretches across multiple servings, and the cheeses stretch further than you’d think. Leftovers? They’re even better the next day—just reheat and add a sprinkle of fresh jalapeños for a kick.
Step-by-step instructions for loaded three-cheese nachos
Here's how to build nachos that deliver perfect texture and bold flavor every time!
🔥 Step 1: Cook the Beef and Chicken to Perfection
Heat 1 tablespoon olive oil in a large skillet over medium-high heat. Add the 1 lb beef steak sliced into thin strips and cook for 3-4 minutes until browned but still slightly pink inside. Remove and set aside.
In the same skillet, add the remaining 1 tablespoon olive oil and cook the 1.5 lb boneless chicken breast (already sliced thin) for 4-5 minutes until fully cooked through and no longer pink. Season both proteins immediately after cooking with 1 tablespoon taco seasoning each, tossing well to coat.
I like to cook them separately so each protein gets proper attention—beef needs that quick sear while chicken benefits from even cooking. Both should be hot when they hit the nachos, so keep them warm in a 200°F oven while you assemble.
🍳 Step 2: Layer the Cheese and Chips
Preheat your oven to 375°F to get that perfect melty cheese texture. Spread half of the 8 cups tortilla chips evenly on a large baking sheet or rimmed baking pan. Sprinkle half of each cheese—1 cup sharp cheddar, ¾ cup monterey jack, and ½ cup pepper jack—over the chips, distributing them evenly.
Here's the thing—don't overcrowd the chips or the cheese won't melt properly. You want them to touch each other so they create a cohesive layer, but with enough space for that golden, bubbly finish. The pepper jack will add some heat while the cheddar brings that classic sharpness.
🔥 Step 3: Bake Until Cheese is Bubbly and Golden
Bake for 5-7 minutes until the cheese is fully melted and starting to turn golden brown around the edges. You'll see little bubbles forming—that's your signal the cheese is getting gooey and delicious. Remove from the oven and immediately sprinkle the remaining chips over the top.
Return to the oven for another 3-4 minutes to crisp up the chips while keeping the cheese melted. Watch carefully—you want the chips to get crispy but not burn. If they start browning too quickly, reduce the oven temperature to 350°F for the final minute.
🥘 Step 4: Top with All the Fixings
Remove the nachos from the oven and let them cool for 2-3 minutes—this prevents the cheese from sliding off when you add toppings. Now comes the fun part! Spread the 1 cup guacamole evenly over the top, then sprinkle with the 0.5 cup jalapeños and 0.5 cup pickled red onions. Dot with dollops of 0.5 cup sour cream and finish with a pinch of 0.5 tsp black pepper.
Gently fold everything together so each bite gets a mix of textures and flavors. The guacamole adds creaminess, the jalapeños bring heat, and the pickled onions cut through the richness. I like to serve these immediately while the chips are still crispy and the cheese is melty.
🍽️ Step 5: Serve with Lime and Enjoy!
Divide the nachos among plates and serve with the 2 whole lime wedges for squeezing over the top. The acidity from the lime brightens all the flavors and ties everything together. These nachos are best served right away while the chips are still crispy and the cheese maintains its perfect melt.
For extra flavor, I like to add a sprinkle of 1 tsp salt over the top right before serving—it enhances all the other flavors without overpowering. And here's the best part: each bite delivers that perfect combination of textures—crispy chips, melty cheese, fresh toppings, and perfectly seasoned proteins.
Pro Tips For Making Beef And Chicken Nachos
- CRANK THE OVEN HIGH: Your chips won’t get that perfect crispy crunch at 375°F—start at 425°F for the first 5 minutes, then drop to 350°F once the cheese starts bubbling. I learned this the hard way after serving nachos with soggy bottoms that looked like they’d been microwaved.
- PRE-SHAVE THE CHEESES: Buy pre-shredded cheese? Skip it—it’s coated with anti-caking agents that make your nachos taste like plastic. Instead, grate your own sharp cheddar, Monterey Jack, and Pepper Jack (use a box grater, not a food processor) and mix them together. The melt will be smoother, and the flavor will be richer.
- DON’T OVERLOAD THE CHIP LAYER: Three layers of chips is the sweet spot—any more and the bottom ones turn to mush before the cheese even melts. Press them down lightly so they stay put, but resist the urge to pack them like a brick. Your nachos will hold together without falling apart.
- SEAR THE BEEF SLICE-THIN: Thinly sliced beef (about ¼-inch thick) cooks faster and stays tender, while still giving you that perfect char. Slice against the grain, pat it dry, and sear it in a screaming-hot skillet for 1-2 minutes per side—no need to cook it all the way through. It’ll finish in the oven with the cheese.
Make-ahead tips for this recipe
Protein Prep Ahead
Cook the beef and chicken up to 2 days in advance and store them in airtight containers in the fridge. I like to marinate them with 2 tbsp taco seasoning and 1 tbsp olive oil before grilling, then reheat in a skillet over medium heat for 3-4 minutes until hot. This keeps them moist and ready to top your nachos without drying out. 🌡️
Cheese Prep Shortcut
Shred all three cheeses 1 day ahead and store them in separate airtight containers. This saves time and prevents the cheese from sticking together in clumps. I always use a box grater for the sharp cheddar because it gives the best texture—pre-shredded cheese contains anti-caking agents that make it grainy when melted. 🧀
Assemble the Base
Spread the tortilla chips on a large baking sheet and sprinkle half the cheese mixture evenly. Pop this in the oven at 375°F for 5 minutes to get the cheese partially melted before adding toppings. This creates a sturdy base that won't slide off when you add all the fixings later. Pro tip: Use sturdy blue corn chips—they hold up better to the cheese than regular potato chips. 🍟
Toppings Organization
Keep all your toppings—jalapeños, pickled onions, guacamole, and sour cream—in small bowls or ramekins. This makes it easy to portion them out evenly when you're ready to assemble. I like to divide the guacamole into 4 small containers so I can distribute it perfectly over the nachos without making a mess. 🥑
Final Assembly Timing
Assemble the nachos just before serving to keep the chips crispy. Start with the cheese-covered chip base, then add the proteins, jalapeños, and pickled onions. Finish with guacamole and sour cream right before putting them under the broiler for 2-3 minutes to melt everything together. This ensures the chips stay crispy while the cheese gets gooey. ⏰
Reheating Leftovers
If you have leftovers, store them in an airtight container for up to 3 days. To reheat, cover with aluminum foil and warm in a 350°F oven for 8-10 minutes. For a quicker option, microwave for 1 minute covered, then add a splash of water to restore crispiness. The cheese might get a little dry, so I like to add a fresh dollop of sour cream and guacamole when serving. 🔥
Nutrition facts
Frequently asked questions
Can I use ground beef instead of sliced steak for these nachos?
Ground beef works perfectly—just brown 1 lb in a skillet with 1 tbsp olive oil over medium-high heat for 5-6 minutes until fully cooked. Season immediately with 1 tbsp taco seasoning and drain any excess fat. The texture will be slightly different but still delicious. For extra flavor, add ½ tsp garlic powder while cooking.
How do I keep the chips crispy when adding all the toppings?
Timing is everything! Bake the cheese-covered chips for 5-7 minutes at 375°F until bubbly, then add toppings immediately. For extra insurance, place the assembled nachos under the broiler for 1-2 minutes right before serving. Keep the oven door closed as much as possible to maintain heat.
What's the best way to make these nachos vegetarian?
Swap the beef and chicken for 1.5 cups black beans (rinsed and drained) and 1 cup corn (grilled or canned, drained). Add ½ cup diced bell peppers and ½ cup sliced mushrooms for extra texture. Keep the cheese blend the same—it's the star! For protein, consider adding ½ cup crumbled feta or ½ cup vegan cheese.
Can I make this recipe in a slow cooker?
Not for the chips, but you can absolutely make the proteins in advance! Cook the beef and chicken separately in a slow cooker on low for 2-3 hours with 2 tbsp taco seasoning and ¼ cup beef broth. Shred the chicken and slice the beef thinly. Assemble the nachos traditionally with the pre-cooked proteins and bake as directed. The slow cooker keeps everything moist and flavorful.
Why did my cheese get stringy instead of creamy?
Pre-shredded cheese contains anti-caking agents that cause stringiness when melted. For perfect texture, grate your own sharp cheddar and Monterey Jack using a box grater. If using pre-shredded, mix in 1 tbsp cornstarch per cup to improve melt. Also ensure your oven isn't too hot—375°F is ideal for smooth, bubbly cheese.