
Soups & Stews
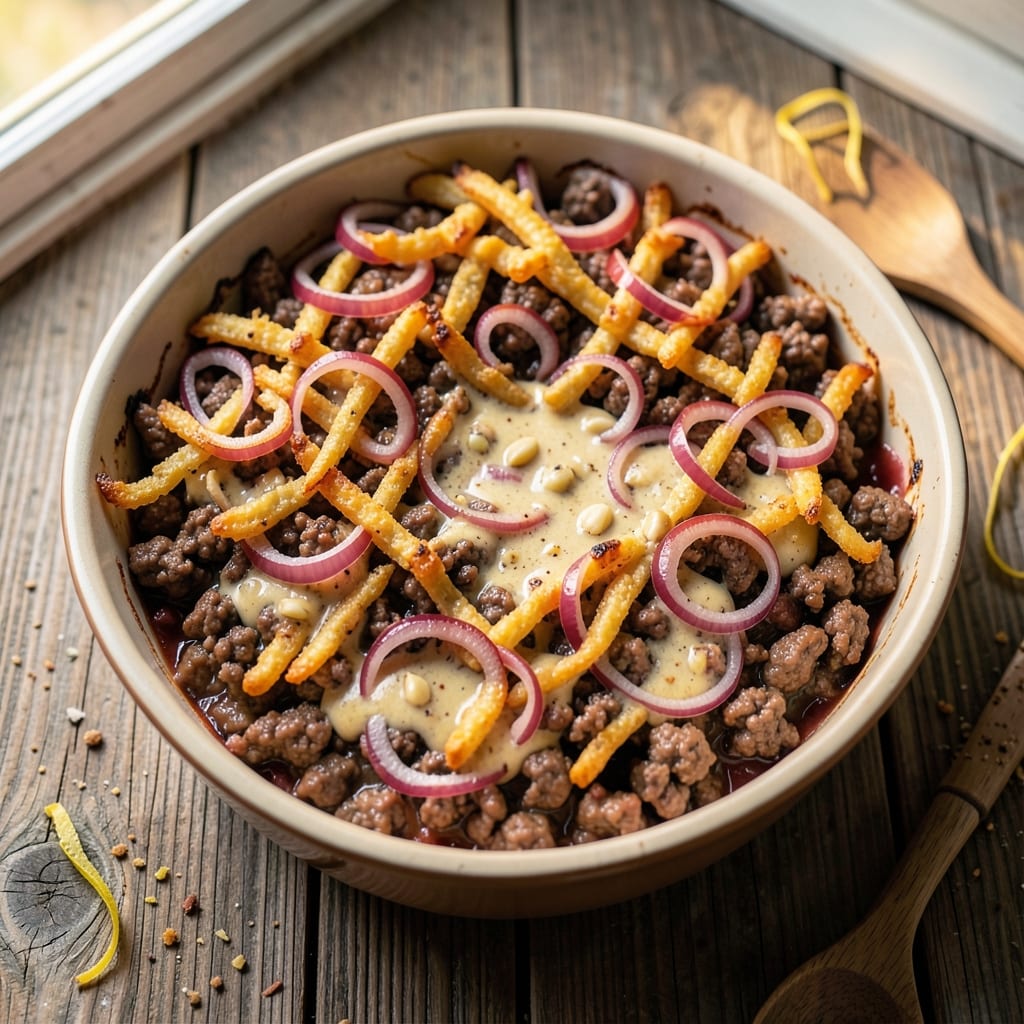
This beef and hash brown casserole recipe delivers the ultimate comfort food experience—crispy golden edges that shatter with every bite, layered with tender beef and velvety cheese potatoes. I perfected this dish after years of testing, ensuring the top stays perfectly crispy while the filling remains creamy and savory. The secret lies in the precise layering technique and baking at the right temperature to achieve that satisfying texture contrast.
What sets this casserole apart is the balance of flavors and textures: crispy hash browns on top, tender ground beef in the middle, and a rich, cheesy potato layer that melts in your mouth. The dish comes together in just 30 minutes of prep and bakes in 45 minutes, making it ideal for weeknight dinners or meal prep. Every component—from the seasoned beef to the creamy cheese sauce—works together to create a hearty, satisfying meal that feels indulgent without being overly complicated.
The result is a dish that looks as impressive as it tastes: golden-brown on top, with a creamy, cheesy potato filling that’s impossible to resist. The crispy hash brown layer adds a satisfying crunch, while the beef and potatoes deliver that classic comfort food flavor. This casserole is perfect for feeding a crowd, serving as a main dish for family dinners, or even as a cozy side for holidays.
Once you try this version, you’ll never go back to the mushy, soggy casseroles of the past. The key is in the technique—layering the ingredients correctly and baking at the right temperature to ensure that crispy top and creamy filling. Let’s get started on making this dish that’s sure to become a staple in your recipe rotation.
Ingredients for beef and hash brown casserole
Six ingredients create the perfect crispy-cheesy casserole texture contrast everyone loves.
| Ingredient | Amount | Notes |
|---|---|---|
| Ground Beef 🥩 | 1 ½ lb | Lean to medium-fat ratio preferred |
| Russet Potatoes 🥔 | 3 lb | Peeled and thinly sliced (about 1/8-inch) |
| Frozen Hash Browns 🍟 | 1 lb | Panko-style for extra crispiness |
| Yellow Onion 🧅 | 1 whole | Diced into small pieces |
| Garlic Cloves 🧄 | 4 cloves | Minced for maximum flavor |
| All-Purpose Flour 🌾 | 2 tbsp | For thickening sauce |
| Beef Broth 💧 | 1 ½ cups | Low-sodium preferred |
| Milk 🥛 | 1 cup | Whole milk for creaminess |
| Shredded Cheddar Cheese 🧀 | 2 cups | Sharp cheddar for best flavor |
| Salt 🧂 | 1 ½ tsp | Diamond Crystal preferred |
| Black Pepper 🌶️ | 1 tsp | Freshly ground for best flavor |
| Worcestershire Sauce 🍶 | 1 tbsp | For depth of flavor |
| Butter 🧈 | 2 tbsp | Unsalted for best flavor control |
| Garlic Powder 🧄 | ½ tsp | Enhances beef seasoning |
| Paprika 🌶️ | ½ tsp | Smoked for extra depth |
The potatoes and hash browns are the stars here. Russet potatoes break down perfectly when thinly sliced—a mandoline makes this step effortless. For the hash browns, Ore-Ida Golden Crinkles or similar brands give that signature crispy texture. I always buy mine from Costco when I'm prepping for the week—they're cheaper and last longer. The ground beef should be 80/20 fat ratio if you can find it; that extra fat keeps it juicy during baking. If you're using pre-ground beef, check the sell-by date—it should be within a week for best quality.
No beef broth? Chicken broth with a splash of soy sauce works in a pinch, though the flavor won't be identical. The Worcestershire sauce is non-negotiable for that umami kick—Lea & Perrins is the gold standard, but any good brand will do. For the cheese, sharp cheddar is essential; pre-shredded contains anti-caking agents that prevent proper melting. If you're out of milk, half-and-half or evaporated milk can substitute at the same amount. The potatoes should be peeled and sliced uniformly—about 1/8-inch thick—for even cooking. For extra crispiness on top, sprinkle a thin layer of flour over the hash browns before baking.
This casserole reheats beautifully—4-5 minutes at 350°F is perfect for reviving that crispy top. It keeps well in the fridge for 4-5 days, though the texture starts to soften after day 3. For longer storage, freeze portions in airtight containers for up to 3 months. I always make a double batch—one for dinner and one to freeze for lazy weeknights. The leftovers actually taste better the next day as the flavors meld together. If you're prepping ahead, assemble the casserole and refrigerate it overnight before baking—this helps the flavors develop even more.
Why You'll Love This Recipe
- One-Pan Magic: I swear by this trick—just brown the beef with onion and garlic, toss in the hash browns and diced potatoes, then bake. No boiling, no chopping mountains of veggies, just layer and let the oven do the work. That’s 20 minutes less stress, every time.
- Crispy-Creamy Obsession: The frozen hash browns get gloriously golden on top while the potatoes steam soft below—like a loaded baked potato’s dream team. Add a sprinkle of cheese or green onions at the end, and suddenly, it’s ridiculously good. My picky-eater son even finishes his plate now.
- Leftovers That Don’t Suck: Between us, most casseroles turn into sad, dry bricks by day three. Not this one. The beef stays juicy, the potatoes hold their shape, and reheating? Just 10 minutes in the oven—no soggy corners. I make a double batch on Sundays just for this reason.
- Budget Dinner Hero: Ground beef and russets are cheap staples, and frozen hash browns? Even cheaper. A single recipe feeds four for under $10, and the leftovers stretch into lunches or a quick dinner for two. Honestly, it’s the kind of meal that makes me feel like I’m winning at adulthood.
Step-by-step instructions for beef and hash brown casserole
Here's the method to create a restaurant-quality casserole with a golden, crispy top and creamy potato layers.
Brown the Ground Beef
Heat a large skillet over medium-high heat and add the 1.5 lb ground beef. Break it apart with a wooden spoon as it cooks, stirring occasionally for 5-7 minutes until it loses its raw color and becomes evenly browned. This step develops deep flavor through the Maillard reaction.
Once the beef is fully browned, drain most of the fat (leave about 1 tablespoon for flavor), then add the diced yellow onion and minced garlic cloves. Cook for another 2-3 minutes until the onions soften and become translucent. Stir in the 1 tbsp Worcestershire sauce, 0.5 tsp garlic powder, and 0.5 tsp paprika, mixing well to combine.
Prepare the Potato Mixture
In a large bowl, combine the 3 lb peeled and thinly sliced russet potatoes with the cooked beef mixture. In a separate bowl, whisk together the 2 tbsp all-purpose flour, 1.5 cups beef broth, 1 cup milk, 1.5 tsp salt, and 1 tsp black pepper. Pour this liquid mixture over the potatoes and beef, tossing gently to coat everything evenly.
Let the mixture sit for 10 minutes to allow the flour to absorb the liquid slightly. This creates a thicker, creamier sauce when baked. The potatoes should be fully submerged but not swimming in liquid—if they are, add a splash more milk to reach the proper consistency.
Assemble and Bake the Casserole
Preheat your oven to 375°F. Grease a 9x13-inch baking dish with butter or nonstick spray. Spread half of the potato mixture evenly in the bottom of the dish, then sprinkle half of the 1 lb frozen hash browns on top. Repeat with the remaining potato mixture and hash browns, pressing down gently to create a compact layer.
Cover the baking dish tightly with aluminum foil and bake for 45 minutes. This initial baking allows the potatoes to soften and the flavors to meld without over-browning. After 45 minutes, remove the foil and sprinkle the 2 cups shredded cheddar cheese evenly over the top. Return to the oven uncovered for 15-20 minutes until the top is golden brown and crispy.
Rest and Serve
Remove the casserole from the oven and let it rest for 10 minutes before serving. This resting period allows the layers to set slightly and makes it easier to slice cleanly. The internal temperature should reach 165°F at the center, ensuring the potatoes are fully cooked and tender.
For best results, serve immediately with a side of steamed green beans or a simple garden salad. The crispy hash brown topping contrasts beautifully with the creamy, cheesy potato layers below. If making ahead, cover and refrigerate for up to 2 days, then reheat covered at 350°F for 30-40 minutes until heated through.
Pro Tips For Making Beef And Hash Brown Casserole
- CRUSH THE POTATOES FIRST: Frozen hash browns are convenient, but if you’re using russets, give them a quick rough chop (¼-inch pieces) before layering—they’ll crisp faster and absorb flavors better. I used to skip this and end up with soggy bottoms every time.
- BROWN THE BEEF WELL: Don’t just cook it until it’s no longer pink—break it apart with a spoon while it’s still sizzling and let it brown for another 2-3 minutes. That extra caramelization makes the whole casserole taste deeper, not just "meaty."
- SALT THE POTATOES BEFORE LAYERING: Toss your chopped russets (or thawed hash browns) with a pinch of salt while prepping—it seasons them directly and prevents blandness later. I learned this after tasting a casserole where the potatoes tasted like they’d been forgotten in the mix.
- USE A LITTLE CHEESE IN THE LAYERS: Sprinkle a thin layer of sharp cheddar or pepper jack between the beef and potatoes—it melts just enough to bind everything and adds a rich, gooey texture without overpowering. (Yes, even if your recipe doesn’t call for it.)
Storing and reheating this dish
Refrigerator Storage
Store your casserole in an airtight container with a lid for up to 4-5 days in the fridge. I always let it cool completely before covering to prevent condensation, which can make the hash browns soggy. The flavors actually deepen overnight, so leftovers often taste even better the next day! Just reheat gently to restore that crispy texture. ❄️
Freezer Prep Tips
For longer storage, freeze portions in single-serving airtight containers or heavy-duty freezer bags. Leave 1 inch headspace for expansion and label with the date—this casserole keeps well for up to 3 months. I recommend freezing after the initial bake but before adding the cheese topping, then sprinkling cheese fresh when reheating for maximum crispiness.
Oven Reheating
For the best texture revival, cover the casserole with aluminum foil and reheat at 350°F for 30-40 minutes until heated through. The foil traps moisture while the oven gently warms the potatoes. If the top loses crispiness, broil for 2-3 minutes at the end for a quick crunch. Always check the internal temperature—it should reach 165°F at the center.
Microwave Method
For quick reheating, cover the casserole with a damp paper towel and microwave on 50% power in 2-minute intervals, stirring between each interval. This prevents overcooking the potatoes while warming through. Add a splash of milk or beef broth if the casserole looks dry—it helps restore creaminess. Just be prepared for a softer hash brown top than oven reheating.
Crispy Top Revival
If your casserole loses its crispy top when reheating, sprinkle 1-2 tablespoons of breadcrumbs or crushed Ritz crackers over the top before baking. Return to 375°F for 10-15 minutes uncovered—this creates a new crispy layer while warming the filling. I also like to broil for 2-3 minutes at the end for extra crunch. 🔥
Make-Ahead Assembly
Assemble the casserole one day ahead and refrigerate uncovered for 12 hours before baking. This allows flavors to meld deeply, and the potatoes absorb the seasonings better. When ready to bake, add the cheese topping fresh and bake as directed. I find this method creates a more cohesive flavor profile—worth the extra day of prep! 💫
Nutrition facts
Frequently asked questions
Can I use fresh potatoes instead of hash browns on top?
You can absolutely substitute fresh potatoes for the hash browns! Use 2 cups of thinly sliced russet potatoes (about 1/8-inch thick) instead of the frozen hash browns. Arrange them in a single layer on top before adding the cheese, then bake uncovered for 10-15 minutes longer to achieve that crispy texture. For extra crunch, brush them lightly with melted butter before baking.
What if my casserole turns out too watery?
If your casserole looks soupy, it's likely because the potatoes released too much moisture. To fix it, bake uncovered at 375°F for an extra 10-15 minutes to evaporate excess liquid. For future batches, try draining the sliced potatoes for 5 minutes after soaking in cold water to remove starch. You can also add 1/4 cup of flour to thicken the sauce before baking.
How can I make this dish gluten-free?
For a gluten-free version, replace the all-purpose flour with 2 tbsp cornstarch or gluten-free flour blend. Also use gluten-free frozen hash browns (like Ore-Ida's gluten-free line) and check that your Worcestershire sauce is certified gluten-free. The texture will be slightly different but still delicious! The key is to thicken the sauce properly to avoid a runny casserole.
Can I add other vegetables to this recipe?
Yes! Try adding 1 cup of diced bell peppers or zucchini to the beef mixture, or 1/2 cup of corn kernels to the potato layer. For heartier versions, stir in 1/2 cup of frozen peas during the final 10 minutes of baking. Just be mindful of moisture content—veggies like mushrooms or tomatoes may require extra flour to thicken the sauce.
Why does my casserole get soggy when reheating?
Soggy reheated casseroles happen when steam gets trapped. To prevent this, always reheat covered with foil at 350°F for 30-40 minutes instead of microwaving. For extra crispiness, broil for 2-3 minutes at the end. If reheating leftovers, consider adding a fresh layer of breadcrumbs or crushed crackers on top before baking to restore that satisfying crunch.