
Main Courses
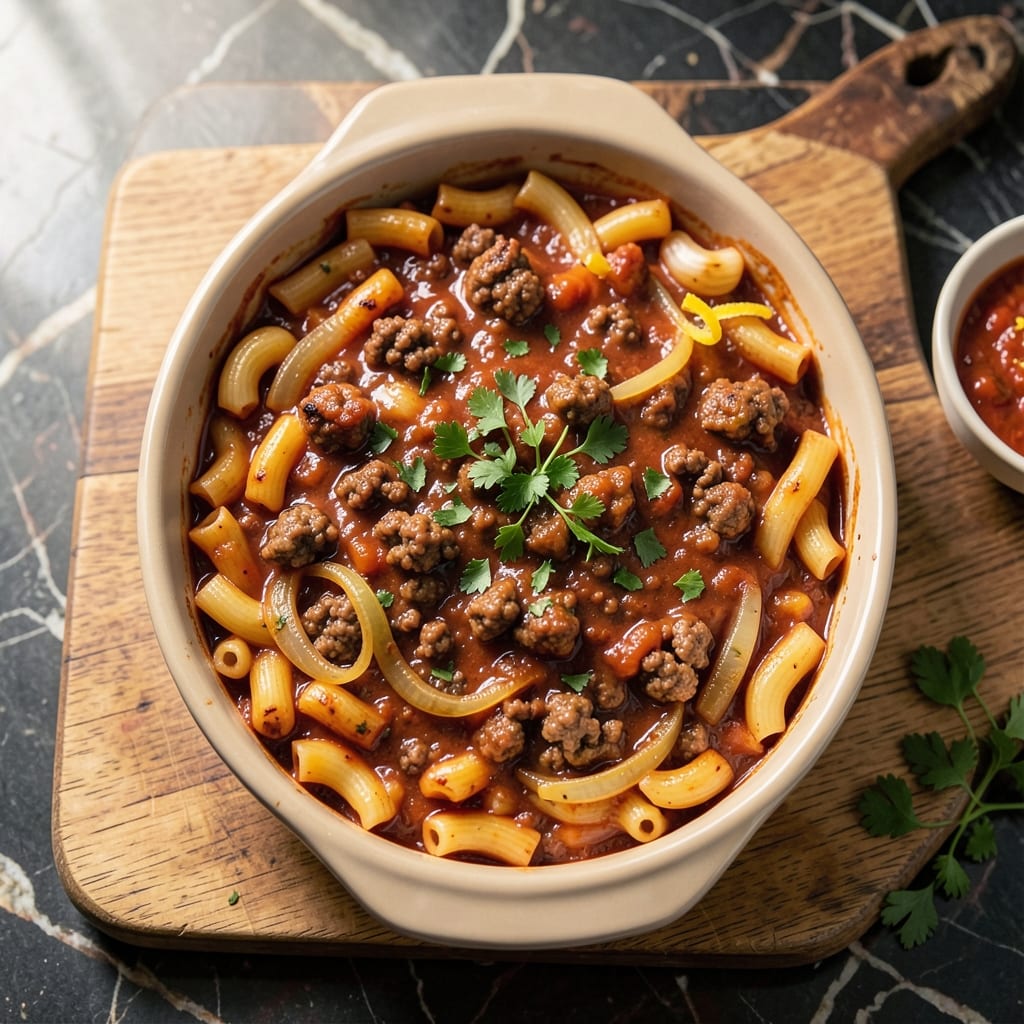
This beef and pasta casserole recipe delivers comfort food perfection with minimal effort—one-pan magic that combines tender beef, al dente pasta, and a golden crispy cheese top. 🔥 The secret lies in layering ingredients just right so every bite delivers creamy, savory goodness without the mess of multiple dishes. I developed this recipe during a busy week when I needed a hearty meal that could feed my family without stressing over timelines.
The beauty of this dish is its simplicity: ground beef browned with onions and garlic forms the flavor base, while elbow macaroni absorbs the rich, cheesy sauce as it bakes. A final sprinkle of breadcrumbs creates that coveted crispy top that everyone loves to pull apart. What makes it truly special is how the flavors meld together during baking—salty, cheesy, and slightly smoky notes that make this casserole irresistible.
By the time it emerges from the oven, you'll have a bubbling, golden dish with tender beef, perfectly cooked pasta, and a crispy cheese crust that's impossible to resist. The aroma alone will have everyone gathering around the table, and the first bite delivers that perfect balance of textures and flavors. This is the kind of meal that transforms a regular weeknight into a cozy family dinner.
Serve with a simple side salad or steamed vegetables to round out the meal, or enjoy it as-is when you want maximum comfort. The best part? Leftovers reheat beautifully, making this an ideal make-ahead option for busy schedules. Let's get started on creating this crowd-pleasing classic.
Ingredients for beef and pasta casserole
Comfort food essentials that come together in one pan for crispy, cheesy perfection.
| Ingredient | Amount | Notes |
|---|---|---|
| Ground Beef 🥩 | 1 ½ lb | 80% lean, finely chopped |
| Elbow Macaroni 🍝 | 2 cups | Uncooked, medium elbow |
| Yellow Onion 🧅 | 1 whole | Medium, finely diced |
| Garlic Cloves 🧄 | 4 cloves | Fresh, minced |
| Canned Tomato Sauce 🍅 | 1 ½ cups | No sugar added preferred |
| Beef Broth 💧 | 1 cup | Low-sodium preferred |
| Shredded Mozzarella Cheese 🧀 | 2 cups | Part-skim or whole milk |
| Parmesan Cheese 🧀 | ½ cup | Freshly grated |
| All-Purpose Flour 🌾 | ¼ cup | For breadcrumb topping |
| Panko Breadcrumbs 🍞 | ½ cup | Japanese-style preferred |
| Dried Italian Seasoning 🌿 | 1 tbsp | Or 1 tsp each dried oregano/basil |
| Salt 🧂 | 1 ½ tsp | Kosher or sea salt |
| Black Pepper 🌶️ | ½ tsp | Freshly ground |
| Unsalted Butter 🧈 | ½ cup | Melted for crispy topping |
| Olive Oil 🫒 | 1 tbsp | For browning beef |
The ground beef is where all the flavor starts. 80% lean gives you that perfect balance of juiciness and fat for rich flavor—90% lean can get dry. I always grab mine from Costco when I'm doing a big batch, but the regular supermarket stuff works fine. Look for packages with good marbling, not those pale, grayish chunks. The elbow macaroni? Barilla or De Cecco are my go-tos—they hold up better during baking. If you're in a pinch, any medium elbow will do, but don't use those tiny star shapes. The pasta needs room to breathe in that sauce.
No Italian seasoning? Mix 1 tsp dried oregano and 1 tsp dried basil—it's the same thing, just split up. The tomato sauce can be jarred (I use Rao's when I'm lazy), but homemade is better if you've got the time. Quick tip: if your tomato sauce is too watery, simmer it uncovered for 5-10 minutes to thicken it up. The cheese is non-negotiable here—pre-shredded gets clumpy when it melts, so buy a block and grate it yourself. For the breadcrumbs, Panko is your friend—it stays crispy while regular breadcrumbs turn soggy. No Panko? Toast regular breadcrumbs in the oven at 350°F for 5 minutes first.
This casserole tastes even better the next day—honestly, that's when all the flavors really meld together. Keeps 4-5 days in the fridge, freezes for 3 months. I always make a double batch because leftovers are perfect for lunches. To reheat, cover with foil and bake at 350°F for 20 minutes. The crispy top might soften a bit, but it's still delicious. Store any extra sauce in the fridge for up to 1 week—great for quick pasta meals later.
Why You'll Love This Recipe
- One-Pot Magic: I swear by this recipe when I’m too tired to scrub a million dishes—just brown the beef and onions in the same pan, dump in the pasta and sauce, and bake. No extra pots, no stress.
- Garlic Bomb Flavor: That minced garlic sizzling in the beef? Chef’s kiss. The slow simmer with tomato sauce lets it mellow into this rich, umami depth that makes the whole dish taste like you slaved over it.
- Weeknight Workhorse: Between us, this is my go-to for busy nights, potlucks, or when my college-aged kids show up unannounced. Double the batch, freeze half—it reheats like a dream and still tastes fresh.
- Budget-Friendly Feast: Ground beef and elbow macaroni stretch to feed four for under $10, and the canned sauce cuts prep time without sacrificing flavor. Honestly, it’s the kind of meal that makes grocery day feel like a win.
Step-by-step instructions for beef and pasta casserole
Here's how to build this one-pan wonder with layers of flavor and that perfect crispy top.
🍳 Step 1: Brown the Beef and Sauté Aromatics
Heat the 1 tablespoon olive oil in a large oven-safe skillet over medium-high heat. Add the 1.5 lb ground beef and break it apart with a wooden spoon, cooking until it loses its raw color and begins to brown—about 5-6 minutes. Don't worry if it's not fully cooked through yet.
Once the beef is mostly browned, push it to one side of the pan and add the finely diced yellow onion and minced garlic cloves. Sauté for 2-3 minutes until the onions soften and become translucent, releasing their sweet aroma. This step builds the flavor foundation for your casserole.
👨🍳 Step 2: Build the Sauce Base
Pour in the 1.5 cups canned tomato sauce and 1 cup beef broth, scraping up any browned bits from the bottom of the pan. Add the 1.5 teaspoons salt, 0.5 teaspoon black pepper, and 1 tablespoon dried Italian seasoning, then stir to combine. Let the mixture simmer for 3-4 minutes until slightly thickened.
While the sauce simmers, cook the 2 cups elbow macaroni according to package instructions until al dente—about 1 minute less than recommended. Drain and add the cooked pasta directly to the skillet, stirring to coat everything evenly in the sauce. The pasta will absorb some liquid, so don't worry if it looks dry at first.
🥘 Step 3: Assemble and Bake the Casserole
Spread the beef-pasta mixture evenly in the skillet, creating a single layer. Sprinkle 1 cup of the shredded mozzarella cheese evenly over the top, then scatter the 0.5 cup freshly grated parmesan cheese on top. The cheeses will melt into a creamy blanket during baking.
Transfer the skillet to a 375°F preheated oven and bake for 20 minutes. This initial baking time allows the cheese to begin melting and the flavors to meld together. Halfway through, peek at the top—if it's browning too quickly, tent loosely with foil to prevent burning.
🔥 Step 4: Create the Crispy Topping
While the casserole bakes, melt the 0.5 cup unsalted butter in a small saucepan over low heat. In a separate bowl, mix the 0.25 cup all-purpose flour and 0.5 cup panko breadcrumbs until combined. Pour the melted butter over the flour mixture and stir until it forms a crumbly, moist paste.
After the initial 20 minutes of baking, remove the skillet from the oven and sprinkle the buttery breadcrumb mixture evenly over the top. Return to the oven and bake for another 10-12 minutes until the topping is deep golden brown and the cheese is fully melted and bubbly underneath.
⏰ Step 5: Rest and Serve
Let the casserole rest for 5 minutes after removing from the oven. This short rest allows the cheese to set slightly and makes serving easier. The crispy topping will be tempting to dig into immediately, but waiting ensures the perfect texture.
Serve straight from the skillet with a side salad or crusty bread. The first bite should deliver tender beef, al dente pasta, creamy melted cheese, and that satisfying crunch from the crispy topping. The flavors will continue to meld as it sits, making it even more delicious.
Pro Tips For Making Beef And Pasta Casserole
- CRISP THE ONIONS FIRST: Sauté the diced yellow onion in a dry pan for 3-4 minutes before adding oil—just until the edges turn golden and translucent. This jumpstarts the flavor without burning later when the beef joins in. (Yes, it’s weird to skip the oil at first, but it works.)
- BREAK UP THE BEEF: Use your hands to separate the ground beef into small, uneven clumps before browning—think walnut-sized chunks, not a solid patty. More surface area means better browning and deeper flavor when it cooks down with the sauce.
- DON’T OVERMIX THE SAUCE: Once the tomato sauce hits the pan, stir just enough to coat the beef—resist the urge to blend it into a smooth paste. Little chunks of onion and garlic in the sauce add texture that turns this into a proper casserole, not a gloppy stew.
- SALT THE PASTA WATER: Boil the elbow macaroni in salted water (like the ocean, not the Dead Sea) and drain it right before mixing with the beef sauce. Cold pasta absorbs flavors faster, and salting it early prevents bland, soggy noodles in the final dish. (Trust me, this is the thing that matters most.)
Essential equipment for this dish
Oven-Safe Skillet
This recipe is built around a large oven-safe skillet—I use a 12-inch Lodge cast iron skillet because it distributes heat evenly and creates that perfect crispy crust. Cast iron retains heat beautifully, but any oven-safe skillet with a 4-quart capacity will work. If you don’t have cast iron, a heavy stainless steel skillet or ceramic baking dish (like Le Creuset) is a great alternative. Just avoid thin, flimsy pans—they won’t hold up to the baking process. 🔥
Mixing Bowls
You’ll need two medium mixing bowls for prepping the crispy topping: one for combining the panko breadcrumbs and flour, and another for mixing in the melted butter. I like using stainless steel bowls because they’re durable and easy to clean, but any non-reactive bowl (glass or ceramic) works. Pro tip: Use a small bowl for the butter to prevent spills when melting it on the stovetop.
Measuring Tools
Precision matters for this casserole, so grab a set of measuring cups and spoons—especially for the breadcrumbs, flour, and cheese. A microplane for grating the parmesan cheese ensures fine, even shreds that melt smoothly. For the ground beef, a food scale (like OXO Good Grips) helps you measure 1.5 lbs accurately, but a kitchen scale isn’t mandatory if you’re comfortable eyeballing it.
Wooden Spoon
A long-handled wooden spoon is essential for browning the beef and stirring the sauce without scratching your skillet. I reach for a sturdy, heat-resistant wooden spoon (like OXO Good Grips) because it handles high heat and won’t melt. Avoid metal utensils during browning—they can cause the beef to steam instead of sear, which dulls the flavor. A silicone spatula is also handy for scraping up browned bits from the pan.
Basting Brush
For that golden, crispy topping, a small pastry brush (like Silpat’s silicone brush) helps spread the melted butter evenly over the breadcrumb mixture. Brush it lightly—just enough to moisten the crumbs so they stick together and crisp up beautifully. If you don’t have a pastry brush, a clean silicone spatula or even a paper towel (lightly dampened) works in a pinch. 💫
Timer and Thermometer
Set a timer for the baking stages—20 minutes for the initial bake and 10-12 minutes for the crispy topping—to avoid overcooking. A meat thermometer isn’t strictly necessary, but it’s useful if you’re unsure about the internal temperature of the beef. Aim for 160°F in the center of the casserole before serving. For extra peace of mind, I use a Thermoworks Smoke thermometer with an oven probe to monitor the skillet’s temperature.
Nutrition facts
Frequently asked questions
Can I use ground turkey or chicken instead of beef?
Ground turkey (especially lean) or chicken works beautifully—just reduce the cooking time slightly since poultry cooks faster. Use 1 lb of ground poultry instead of 1.5 lbs beef to maintain similar portion sizes. For extra flavor, add 1 teaspoon Italian seasoning directly to the meat before browning.
How do I make this casserole ahead of time?
Prepare the entire casserole up to the crispy topping step, then refrigerate uncovered for 2-3 hours to dry out the top slightly. Bake at 375°F for 30-35 minutes (covered with foil for the first 20 minutes) to crisp the topping. For freezing, assemble completely (including topping), freeze in portions, and bake from frozen for 45-50 minutes.
Why did my casserole turn out soggy?
Sogginess usually happens from overcooking the pasta or not baking long enough. Cook pasta 1 minute less than package instructions and bake until the center reaches 160°F. For extra crispiness, broil for 1-2 minutes at the end. Another trick: Sprinkle 1/4 cup extra panko on top before the final bake to absorb moisture.
Can I make this in a slow cooker?
Yes! Brown the beef first, then combine all ingredients (except breadcrumb topping) in your slow cooker. Cook on LOW for 3-4 hours or HIGH for 2-2.5 hours. For the crispy top, transfer to a baking dish, sprinkle breadcrumbs, and broil for 3-5 minutes. The texture will be more saucy than baked, but still delicious.
What's the best way to reheat leftovers?
Cover with foil and reheat at 350°F for 20-25 minutes. For extra crispiness, broil for 1-2 minutes at the end. Microwave reheating works but makes the topping soggy—always use the oven method for best results. Leftovers keep for 4-5 days in the fridge or 3 months frozen.