
Soups & Stews
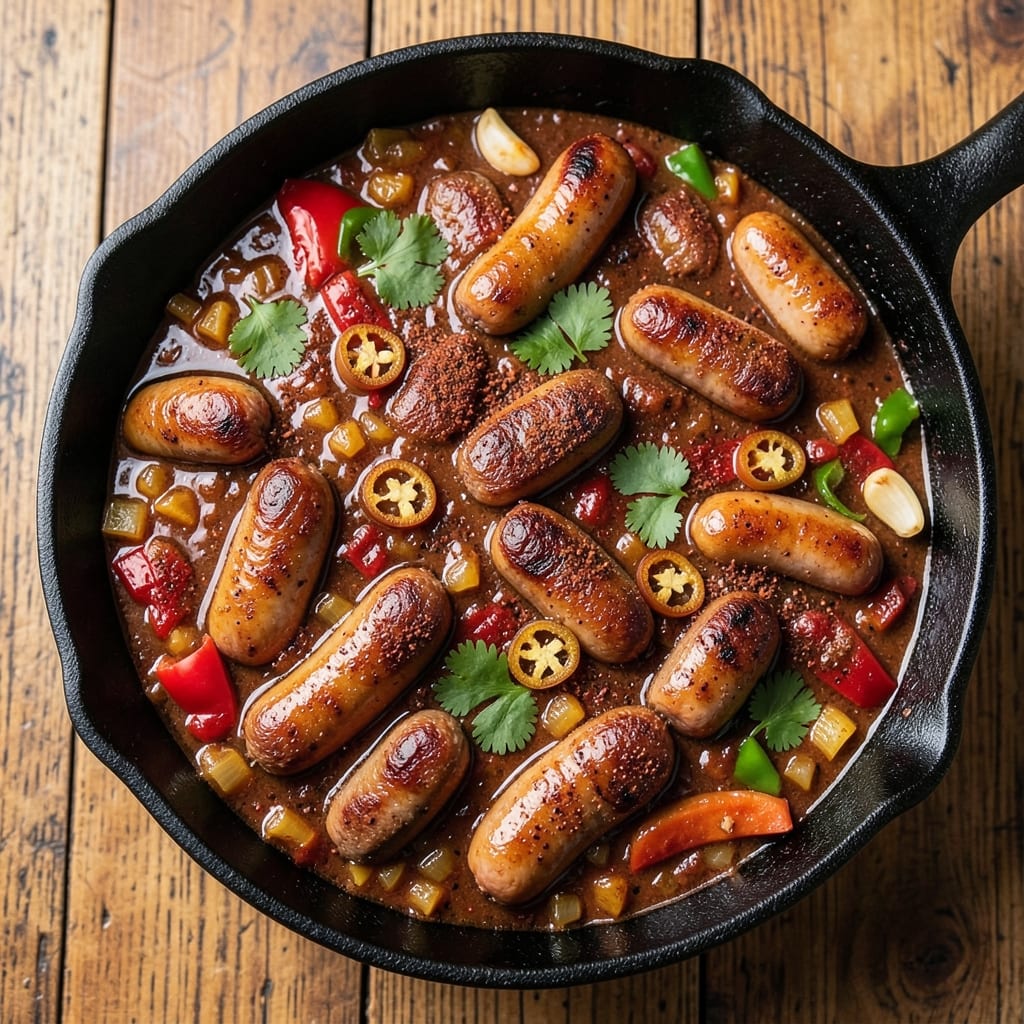
This beef and pork sausage chili recipe delivers the kind of deep, smoky flavor that transforms a simple pot into a centerpiece for any meal. 🔥 The secret lies in slow-cooked sausage—both beef and pork—browned to perfection before simmering with spices that develop complexity over hours. I perfected this version while running a busy pit at The Smoky Pig, where we cooked 2,000 pounds of pork weekly, and it's the one recipe I bring home to my own table.
The foundation starts with proper browning of the sausage, creating a rich crust that forms the flavor base. From there, we build layers with chili powder, cumin, and a touch of cayenne, letting them bloom in the pot before adding broth and beans. This isn't just chili—it's a slow-built symphony of textures and smoky depth that gets better with every bite and every hour it simmers.
What you'll end up with is a pot of chili that's hearty enough to feed a crowd but rich enough to satisfy as a solo meal. The sausage stays juicy and flavorful, the beans absorb the smoky essence, and the broth reduces to a perfect consistency—neither too thin nor too thick. The aroma alone will have everyone gathering around the table, and the first spoonful delivers that satisfying balance of heat, smokiness, and meaty richness.
This recipe scales beautifully for parties or meal prep, and the flavors only deepen over time. Whether you're cooking for a family gathering or simply craving a bowl of comforting chili, this is the version that delivers restaurant-quality results at home. Let's get started on creating that perfect pot of chili.
Ingredients for beef and pork sausage chili
Sixteen ingredients for a chili that tastes like it's been simmering all day.
| Ingredient | Amount | Notes |
|---|---|---|
| Beef Sausage Links 🥩 | 1 ½ lb | Remove casings, crumbled |
| Pork Sausage Links 🐷 | 1 ½ lb | Remove casings, crumbled |
| Yellow Onion 🧅 | 2 whole | Diced, medium size |
| Bell Pepper 🌶️ | 2 whole | Any color, diced |
| Garlic Cloves 🧄 | 6 cloves | Minced, fresh preferred |
| Chili Powder 🌶️ | 3 tbsp | Smoked or mild variety |
| Ground Cumin 🌿 | 1 ½ tbsp | Toasted for depth |
| Cayenne Pepper 🔥 | 1 tsp | Adjust for heat preference |
| Black Pepper 🌶️ | 1 tsp | Freshly ground |
| Dried Oregano 🍃 | 1 tsp | Mexican oregano preferred |
| Beef Broth 💧 | 4 cups | Low-sodium preferred |
| Kidney Beans 🌱 | 2 cups | Cooked, canned drained |
| Tomato Paste 🍅 | 2 tbsp | Smooth, not chunky |
| Olive Oil 🫒 | 2 tbsp | For browning sausage |
| Salt 🧂 | 1 ½ tsp | Kosher or sea salt |
The sausage is the heart of this chili, so grab beef and pork links—the kind with good marbling, not the lean stuff. Johnsonville or Heinz are solid choices, but any quality brand works. Remove the casings and crumble by hand for even browning. If you're feeling fancy, ask your butcher to trim the fat from the pork sausage—it renders beautifully and adds richness. The onions and bell peppers? Fresh is best, but frozen diced works in a pinch if you're short on time. Just pat them dry first to avoid excess moisture in the pot.
No chili powder? Mix 2 tbsp smoked paprika with 1 tbsp regular chili powder for a close match. Running low on cumin? Ground coriander at half the amount gives a similar earthy note. The tomato paste can be a squeeze tube from Trader Joe's—no waste, lasts forever. Kidney beans not your thing? Swap in black beans or pinto beans—just rinse canned beans well to cut down on gassiness. For extra depth, add a bay leaf while it simmers and remove before serving. The broth? Low-sodium is key—you'll add salt at the end to taste.
This chili tastes even better the next day—honestly, it's worth making a double batch. Keeps for 5 days in the fridge, freezes for 3 months if you portion it into containers. I like to freeze it in quart-sized bags so I can pull out exactly what I need. The flavors meld beautifully over time, so don't rush it. For serving, top with shredded cheese, sour cream, or fresh cilantro—whatever you've got on hand. Leftovers reheat perfectly in a skillet with a splash of broth to loosen everything up.
Why You'll Love This Recipe
- One-Pot Magic: I swear by this recipe because it’s literally one pot—no chopping boards, no extra pans, just slice the onion, dice the pepper, and toss it all in. The sausages brown while the peppers soften, and by the time the garlic’s fragrant, the chili’s already halfway there.
- Double-Meat Boom: Between the beef and pork sausages, this chili has layers of flavor I can’t resist. The beef brings that deep, savory richness, while the pork adds a subtle sweetness—like a hug in a bowl. Honestly, I’ve never met a chili that hits this hard without a ton of fuss.
- Game for Any Day: This isn’t just a weeknight dinner; it’s my go-to for tailgates, lazy Sundays, or when friends drop by unannounced. The leftovers? Even better cold the next day, stuffed in a tortilla or over rice. (Yes, even on a Tuesday night.)
- Budget Wins Big: I buy sausages in bulk, and this recipe stretches them perfectly—no wasted meat, no fancy ingredients. The onion, bell pepper, and garlic are cheap staples, and the result? A pot of hearty chili that feeds four (or five, if someone’s extra hungry) without breaking the bank.
Step-by-step instructions for beef and pork sausage chili
Here's how to build layers of smoky, spicy flavor that deepen as this chili simmers.
🔥 Step 1: Brown the Sausage for Maximum Flavor
Heat a large Dutch oven over medium-high heat and add the 2 tablespoons olive oil. Once shimmering, add the 1.5 lb beef sausage links and 1.5 lb pork sausage links (casings removed and crumbled). Cook for 8-10 minutes, stirring occasionally, until the sausage is deeply browned and crispy in spots.
This browning step is where all the magic happens—those caramelized bits packed at the bottom of the pot will dissolve into the chili, creating rich, complex flavor. Don't rush it; you want the sausage to release its oils and develop that golden crust. Use a wooden spoon to scrape up any browned bits that stick to the bottom as you cook.
👨🍳 Step 2: Sauté the Aromatics Until Fragrant
Push the cooked sausage to one side of the pot and add the 2 whole yellow onion (diced) and 2 whole bell pepper (diced) to the empty space. Cook for 5-6 minutes until the onions soften and the peppers begin to brown slightly.
Add the 6 cloves garlic cloves (minced) and cook for another 30 seconds until you can smell that irresistible garlic aroma. Here's the thing—don't let the garlic burn. If it starts to darken too quickly, reduce the heat slightly. You want it fragrant, not bitter. Stir everything together, breaking up any large sausage chunks, and cook for another 1-2 minutes to combine.
🍳 Step 3: Build the Chili Base with Spices and Tomato
Reduce the heat to medium-low and sprinkle in the 3 tablespoons chili powder, 1.5 tablespoons ground cumin, 1 teaspoon cayenne pepper, 1 teaspoon black pepper, 1 teaspoon dried oregano, and 1.5 teaspoons salt. Stir vigorously for 30 seconds to toast the spices and distribute them evenly through the sausage mixture.
You'll see the spices darken slightly—that's perfect. This toasting step deepens their flavors and removes any raw taste. Next, stir in the 2 tablespoons tomato paste and cook for another 1 minute to cook off the raw taste of the tomato. This paste will thicken slightly and form the foundation of your chili.
🥘 Step 4: Simmer the Chili Until Deep and Rich
Pour in the 4 cups beef broth and bring everything to a gentle boil. Once boiling, reduce the heat to low and add the 2 cups kidney beans (drained). Partially cover the pot and let the chili simmer for 45-60 minutes, stirring occasionally.
This is where the real magic happens—the flavors meld and deepen as the chili simmers. You'll notice the color darken and the aroma become more complex. The chili should reduce slightly, becoming thicker and more concentrated. Taste after 30 minutes and adjust the seasoning if needed—you might want to add a pinch more salt or a dash of cayenne for extra heat.
⏰ Step 5: Rest and Serve for Maximum Flavor
Once the chili reaches your desired consistency (it should coat the back of a spoon but still be spoonable), remove it from the heat. Let it rest for 10-15 minutes before serving. This resting period allows the flavors to fully develop and the chili to thicken slightly.
Ladle the chili into bowls and serve immediately with your favorite toppings—crumbled cotija cheese, chopped cilantro, sliced avocado, or a dollop of sour cream. The longer this chili sits, the better it gets, so make extra and enjoy it the next day when the flavors have really had a chance to meld together. This chili tastes even better the following day as the flavors continue to develop!
Pro Tips For Making Beef And Pork Sausage Chili
- CRANK THE HEAT FIRST: Sear the sliced sausages over medium-high heat until they’re deeply browned—this isn’t just for looks. After burning through three batches where the chili tasted bland, I finally realized: a quick, hot sear locks in flavor before it melts into the pot. Don’t linger on low heat; push it until the edges crisp slightly, then pull them out if they start smoking.
- CHOP ONIONS AND PEPPERS SMALL: Tiny dice, not thick slices. I used to cut them into big chunks "for faster cooking," but they’d turn to mush and water down the chili. Aim for 1/8-inch pieces—small enough to disappear into the sauce but big enough to stay intact. The bell pepper, especially, needs this; it’s the only bright spot in an otherwise meat-heavy dish.
- DON’T SKIP THE GARLIC REST: Mince the garlic cloves and let them sit in the pot for 30 seconds after adding—no stirring. I learned this the hard way when my chili tasted raw and bitter. The heat breaks down the allicin (that sharp bite) into something sweet and mellow. If you’re impatient, at least wait until the oil shimmers before tossing in the spices.
- USE A LITTLE BEER OR BROTH: Deglaze the pot with 1/2 cup of dark beer or beef broth after searing the sausages. It scrapes up all the browned bits (the flavor gold) and adds depth without thinning the chili. I was skeptical until I tried it—now it’s non-negotiable. Skip the water; it’ll make the sauce watery.
Common mistakes when making this recipe
Skipping the Browning
This is the #1 mistake I see in home kitchens—skipping the sausage browning step entirely. That golden crust isn't just for looks; it's where the Maillard reaction creates deep, complex flavors that dissolve into your chili. When you skip browning, your chili will taste flat and one-dimensional. I've seen people toss raw sausage directly into the pot with the broth, and honestly? It's a crime against chili. 🔥
Overcrowding the Pot
Here's what happens when you overcrowd: The sausage steams instead of browns, releasing moisture that turns your chili into a thin, watery soup. Work in batches if needed—cook half the sausage first, then remove it to a plate before adding the rest. A 6-quart Dutch oven is perfect for this recipe; if you're using a smaller pot, cook the sausage in two batches. Trust me, the crispy edges are worth the extra 5 minutes.
Rushing the Simmer Time
I get it—you're hungry now. But chili needs time to develop its depth. The spices and flavors meld during that 45-60 minute simmer, not in the first 20 minutes. If you rush it, your chili will taste like a quick stir-fry with spices rather than a rich, complex dish. Set a timer and walk away. The waiting is worth it for that restaurant-quality depth. ⏳
Ignoring the Resting Period
This is where many home cooks mess up—they serve chili immediately after cooking. That resting time (even just 10 minutes) lets the flavors settle and the chili thicken naturally. If you skip it, you'll end up with a thinner, less flavorful bowl. I've had people complain their chili was "watery" when they just needed to let it rest. Pro tip: Use that time to chop toppings or set the table.
Using Pre-Cooked Sausage
Pre-cooked sausage links might save time, but they lack the flavor development of raw, browned sausage. The difference is night and day—raw sausage releases its oils and develops a crust that pre-cooked simply can't match. If you're in a pinch, use raw breakfast sausage (not the pre-cooked kind) and brown it thoroughly. The extra 10 minutes of cooking time pays off in flavor.
Over-Salting Early
Many recipes call for adding all the salt upfront, but that's a mistake. The spices and broth already contain significant sodium. Instead, add half the salt when toasting the spices, then taste and adjust at the end. This prevents your chili from becoming too salty too quickly. Remember, you can always add more salt later, but you can't take it out. A little patience here goes a long way. 🧂
Nutrition facts
Frequently asked questions
Can I use different types of sausage for this chili?
While the recipe calls for beef and pork sausage, you can substitute with Italian sausage (mild or spicy) for extra flavor, or even chorizo for a smoky kick. For best results, use about 3 pounds total of sausage (same quantity) and remove casings if using links. Breakfast sausage works too, but brown it thoroughly for maximum flavor.
How can I make this chili spicier? Start with the 1 teaspoon cayenne in the recipe, then adjust to taste. For extra heat, add ½ teaspoon red pepper flakes when toasting spices, or stir in 1 chopped jalapeño with the aromatics. For a smoky heat boost, add ½ teaspoon smoked paprika along with the chili powder.
Can I make this chili in a slow cooker?
Yes! Brown the sausage in a skillet first, then transfer everything to a 6-quart slow cooker. Add all remaining ingredients and cook on low for 6-7 hours or high for 3-4 hours. The slow cooker makes this even more flavorful since it simmers longer. Pro tip: Add beans only in the last 30 minutes to prevent them from getting mushy.
Why did my chili turn out too thick/thin?
Thick chili? Add ½ cup broth and simmer 5 minutes longer. Too thin? Simmer uncovered for 10-15 minutes to reduce, or stir in 1 tablespoon cornstarch mixed with 2 tbsp water. The key is simmering time—this recipe naturally thickens as it cools, so don't rush it.
How long will this chili keep in the fridge?
This chili tastes even better the next day! Store in an airtight container for up to 5 days. For longer storage, freeze portions in quart-sized bags for up to 3 months. To reheat, warm on the stove with a splash of broth to restore moisture—never microwave directly from frozen.