
Soups & Stews
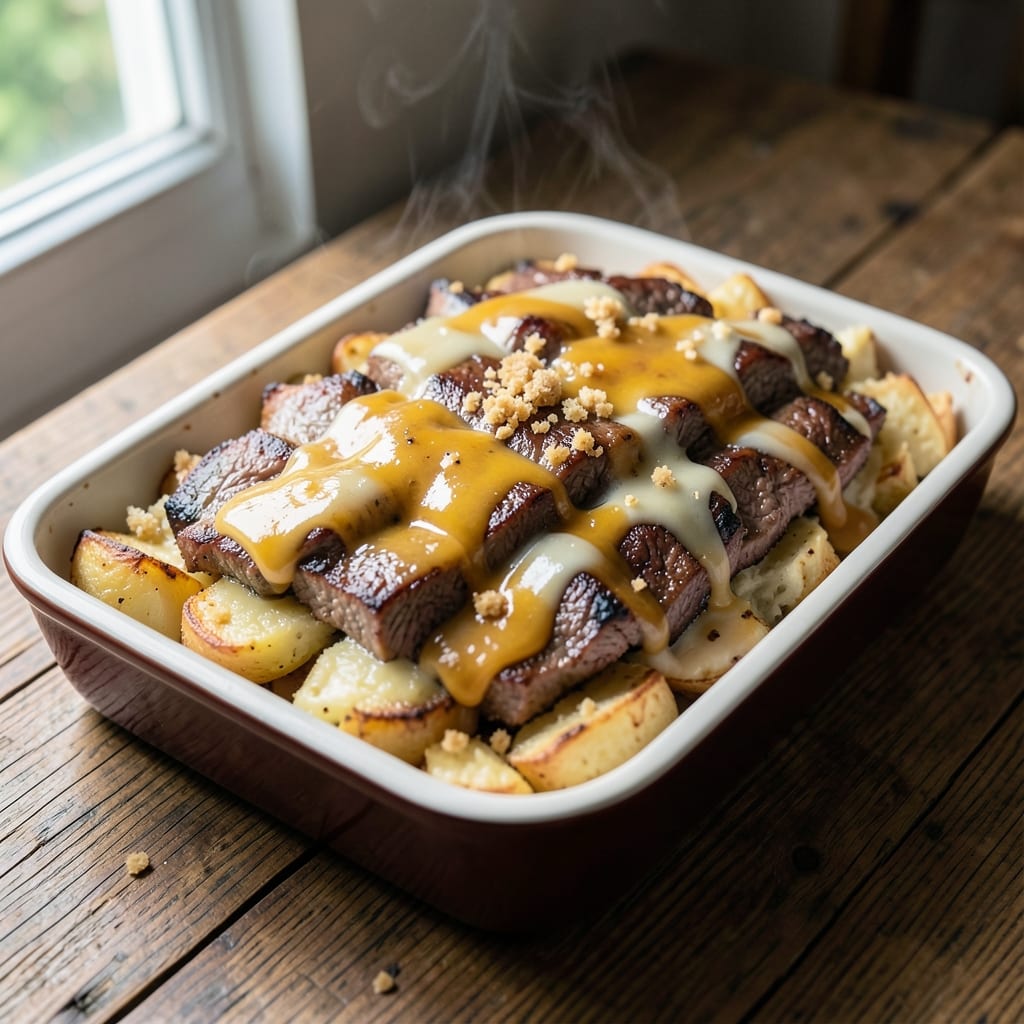
This beef and tater bake recipe delivers the ultimate comfort food experience—crispy golden potato topping, tender beef slices, and layers of melted cheese that make every bite irresistible. The secret lies in browning the beef first for deep flavor, then building layers that bake into a cohesive, restaurant-quality casserole. I've perfected this technique over years of testing, ensuring the potatoes stay crispy while the cheese remains gooey and the beef stays juicy.
The beauty of this dish is its simplicity combined with impressive results. You'll start with thinly sliced beef that cooks quickly in a skillet, then layer it with potatoes and cheese in a baking dish. A crispy potato topping made from grated potatoes and breadcrumbs transforms the dish from ordinary to extraordinary. The high-heat bake creates that coveted golden crust while keeping everything inside warm and comforting.
What you'll end up with is a hearty, satisfying meal that's perfect for family dinners or meal prep. The beef stays tender, the potatoes achieve that perfect crispy texture, and the cheese melts into a velvety blanket over every layer. This isn't just another casserole—it's a dish that brings people together, with every forkful packed with flavor and texture.
Serve with a side of steamed green beans or a simple garden salad for a complete meal. The leftovers reheat beautifully, making this an ideal dish for busy weeks. Let's get to the recipe—your taste buds will thank you.
Ingredients for beef and tater bake
These 13 ingredients create the ultimate beef and tater bake with crispy topping and melty cheese layers.
| Ingredient | Amount | Notes |
|---|---|---|
| Top Round Roast Beef 🥩 | 1 ½ lb | Thinly sliced against grain |
| Russet Potatoes 🥔 | 3 lb | Unpeeled, thinly sliced |
| Sharp Cheddar Cheese 🧀 | 2 cups | Shredded, block preferred |
| Milk 🥛 | ½ cup | Whole milk for creaminess |
| All-Purpose Flour 🌾 | ½ cup | For crispy potato topping |
| Panko Breadcrumbs 🍞 | ½ cup | Extra for extra crunch |
| Yellow Onion 🧅 | 1 whole | Thinly sliced, white or yellow |
| Garlic Cloves 🧄 | 4 cloves | Minced for flavor base |
| Beef Broth 💧 | 1 cup | Low-sodium preferred |
| Kosher Salt 🧂 | 1 ½ tsp | Diamond Crystal preferred |
| Black Pepper 🌶️ | 1 tsp | Freshly ground for heat |
| Worcestershire Sauce 🍶 | 1 tbsp | For umami depth |
| Olive Oil 🫒 | 2 tbsp | For searing beef |
The beef is everything here—top round roast stays tender when sliced thin against the grain. Costco sells it pre-sliced, but if you're buying a whole roast, ask the butcher to cut it paper-thin. The potatoes? Russets are non-negotiable for that crispy texture—no waxy potatoes here. For the cheese, sharp cheddar gives the best melt and flavor, but a mix of cheddar and Monterey Jack works too. I always grab extra breadcrumbs because that crispy topping is what makes this dish restaurant-quality.
No Worcestershire sauce? Extra soy sauce plus a pinch of sugar gets you close. Short on beef broth? Chicken broth works in a pinch, but the beef flavor will be less intense. The onion and garlic can be swapped for green onions if you're in a hurry—just use twice the amount since they're milder. For the potato topping, grated potatoes (from a box) save time, but they lack the crispiness of fresh. If you're feeling fancy, toss in a handful of crispy fried shallots for extra crunch on top.
This reheats like a dream—just cover with foil and pop in the oven at 375°F for 15-20 minutes. Keeps for 4-5 days in the fridge, freezes beautifully for 3 months. I portion mine into individual containers so I can grab and reheat for quick lunches. The leftovers taste even better the next day—all that cheese gets extra melty, and the beef stays juicy. Store any extra breadcrumbs in the freezer for up to 6 months to keep them crispy.
Why You'll Love This Recipe
- One-Pan Magic: I swear by this when I’m too tired to wash dishes—just brown the beef, toss in the sliced potatoes and cheese, and let the oven do the rest. The flour-thickened milk sauce pools right in the pan, so no extra bowls or strainers needed.
- Cheddar-Crusted Crunch: That sharp cheddar melts into a golden blanket on top, but here’s the secret: the crust gets crispy in spots, almost like a mini gratin. Honestly, I’ve been known to eat it straight off the cutting board—no judgment.
- Weeknight Workhorse: It’s my go-to for game day, lazy Sundays, or when my college kid calls and says, “Mom, I’m bringing friends over.” The beef stays tender, the potatoes soak up all the savory milk, and it reheats like a dream—no sad leftovers here.
- Budget Stretch: Top round’s affordable, potatoes last forever, and a block of cheddar goes a long way when you’re slicing it thin. Between us, I’ve fed six people for under $15 with this—plus the leftovers turn into next-day breakfast hash. Smart, right?
Step-by-step instructions for beef and tater bake recipe
Here's how to create that perfect combination of tender beef, creamy potatoes, and golden crispy topping.
Sear the Beef for Maximum Flavor
Heat the 2 tablespoons olive oil in a large skillet over medium-high heat until shimmering. Add the 1.5 lb top round roast beef that's been thinly sliced against the grain, working in batches if needed to avoid crowding. Sear for 2-3 minutes per side until deeply browned and cooked through to 160°F internally.
As the beef sears, you'll notice it releases its juices into the pan—this creates incredible flavor. Remove the beef from the skillet and set it aside on a plate. Pour the 1 cup beef broth into the same skillet and scrape up all those delicious browned bits from the bottom. This deglazing step captures all the beefy flavor that will later infuse into your entire dish.
Prepare the Potato Mixture
In a large mixing bowl, combine the 3 lb russet potatoes (thinly sliced), 1 whole yellow onion (thinly sliced), and 4 cloves garlic (minced). Pour in the 1 cup beef broth from the skillet, along with the 1 tablespoon Worcestershire sauce, 1.5 teaspoons kosher salt, and 1 teaspoon black pepper. Toss everything together until the potatoes are evenly coated.
Here's where it gets good—add the seared beef back to the bowl and mix gently to distribute it throughout the potato mixture. The beef will release its juices as it cools slightly, creating an incredibly flavorful base. Let this mixture sit for 5 minutes while you prepare the crispy topping—this gives the potatoes time to absorb some of the beefy goodness.
Assemble the Bake
Preheat your oven to 375°F. In a separate bowl, whisk together the 0.5 cup all-purpose flour, 0.5 cup panko breadcrumbs, and 0.5 cup milk until you have a smooth, thick batter. Spread the potato mixture evenly into a 9x13-inch baking dish, then pour the batter mixture over the top.
Sprinkle the 2 cups sharp cheddar cheese evenly over the batter, pressing down lightly so it makes contact with the potatoes below. This layering is crucial—it ensures every bite gets that perfect combination of creamy potatoes, tender beef, and melty cheese. The cheese will bubble and brown beautifully as it bakes, creating that irresistible golden crust.
Bake to Crispy Perfection
Bake uncovered for 45-50 minutes until the top is deep golden brown and the edges are bubbling. You'll know it's ready when you see that beautiful crispy crust forming on top—this is what makes this dish so special. The potatoes should be tender when pierced with a fork, and the cheese should be fully melted throughout.
For the final touch, broil for 2-3 minutes on high heat until the top is golden brown and slightly blistered. Keep a close eye on it during this step—broilers can be aggressive! Remove from the oven and let it rest for 10 minutes before serving. This resting time allows the layers to set and makes slicing much easier.
Serve with Confidence
Slice into 6 equal portions (about 1.5 cups each) and serve immediately. Each bite should deliver tender beef, creamy potatoes, and that perfect crispy cheese topping. The flavors are rich and satisfying, with the beef adding depth that transforms this into a hearty, restaurant-quality meal.
This dish tastes even better the next day when the flavors have time to meld together. Store any leftovers in the refrigerator for up to 3 days—just reheat in the oven at 350°F for 15-20 minutes to restore that crispy texture. The secret to this recipe is in the layers and the searing—don't skip either step if you want that perfect combination of textures and flavors!
Pro Tips For Making Beef And Tater Bake
- SEAR THE BEEF FIRST: Top round can get tough if it’s just baked—hit it with a quick sear in a hot pan (4-5 minutes per side) before slicing and layering. The crust locks in moisture and adds depth of flavor that raw beef just can’t match.
- SLICE POTATOES THIN AND EVEN: Uneven slices mean uneven cooking—aim for ¼-inch thick rounds, no thicker. Soak them in cold water for 10 minutes first to rinse off excess starch, or they’ll turn gummy instead of creamy.
- SALT THE POTATOES BEFORE LAYERING: I learned this the hard way—salting them raw (not just after baking) lets the seasoning penetrate while they steam. Use about ½ teaspoon salt per pound of potatoes, and don’t skip it.
- USE A SLURRY FOR CHEESY RICHNESS: Skip the dry cheese sprinkle—mix 1 cup shredded cheddar with 2 tablespoons flour and ¼ cup milk into a smooth slurry. Brush it over the top layer before baking; it melts into a glossy, gooey blanket instead of clumping.
Best sauces and condiments for this beef and tater bake
Classic Brown Gravy
This rich, savory gravy is a game-changer for your beef and tater bake. After searing the beef, you already have the perfect pan sauce base—just deglaze with 1 cup beef broth and whisk in 2 tablespoons cornstarch mixed with 2 tablespoons cold water. Simmer until thickened, then stir in 1 tablespoon Worcestershire sauce for that umami kick. Serve warm over each portion to soak up every last bite of crispy topping. 🍲
Creamy Horseradish Sauce
For a tangy twist, blend ½ cup sour cream, 2 tablespoons prepared horseradish, 1 tablespoon Dijon mustard, and 1 teaspoon lemon juice. Thin with a splash of milk if needed. This sauce cuts through the richness of the beef and adds a refreshing zing. I like to dollop it on top of each serving for a pop of color and flavor. The horseradish pairs beautifully with the sharp cheddar cheese in the bake.
Garlic-Herb Butter
Melt ¼ cup butter with 2 minced garlic cloves and 1 tablespoon chopped fresh parsley. Brush this fragrant mixture over the crispy potato topping just before serving for an extra layer of flavor. The garlic infuses into the butter while it melts, creating a rich, aromatic finish. This is my go-to for elevating the dish without extra effort—just a quick brush before digging in. 🧄
Spicy Jalapeño Cream
Mix ½ cup sour cream, 1 tablespoon chopped pickled jalapeños, 1 teaspoon lime zest, and a pinch of salt. This adds a creamy, slightly spicy contrast that balances the hearty flavors. I recommend serving this on the side so everyone can adjust the heat to their preference. The jalapeños add a bright, tangy note that cuts through the richness of the cheese and beef.
Classic Ranch Dressing
Use ½ cup ranch dressing (store-bought or homemade) as a dipping sauce for the crispy edges. The creamy, herby flavors complement the savory beef and cheesy topping perfectly. For a quick homemade version, mix ½ cup mayonnaise, 2 tablespoons buttermilk, 1 teaspoon dried dill, 1 teaspoon dried parsley, and ½ teaspoon garlic powder. This is especially great if you're serving the bake with a side salad.
Sweet & Tangy BBQ Glaze
For a sweet and smoky contrast, simmer ¼ cup BBQ sauce (like Sweet Baby Ray's) with 1 tablespoon brown sugar until slightly thickened. Drizzle this over the top of the bake right before serving. The caramelized sugars caramelize in the oven, creating a sticky, flavorful crust that pairs surprisingly well with the salty cheese and savory beef. 🔥
Nutrition facts
Frequently asked questions
Why do you slice the beef against the grain?
Slicing the beef against the grain creates shorter muscle fibers, which makes it more tender and easier to chew. The grain runs along the muscle fibers, so cutting perpendicular to it breaks them up. This is especially important for tougher cuts like top round—it transforms what could be chewy into melt-in-your-mouth beef.
Can I use waxy potatoes instead of russets?
Waxy potatoes like red or Yukon Gold won't give you that perfect crispy topping—they're too moist and don't hold their shape as well. Russets are the gold standard because their high starch content creates that desirable crispy crust while keeping the inside creamy. If you're desperate, try a 50/50 mix with russets, but expect less texture contrast.
How do I prevent a soggy potato topping?
The secret is in the baking order: always bake the casserole uncovered for the first 40 minutes to evaporate moisture, then add the cheese and broil. The flour-panko-milk topping needs time to dry out before the cheese goes on. Also, don't skip the resting time—letting it sit 10 minutes after baking helps the layers set properly.
What's the best way to reheat leftovers?
For maximum crispiness, cover with foil and reheat at 350°F for 15-20 minutes, then broil for 2-3 minutes uncovered to restore that golden crust. Microwaving works in a pinch (just 2-3 minutes with a damp paper towel), but it'll make the topping soggy. The oven method preserves all the textures you worked so hard to create.
Can I make this ahead of time?
Assemble the dish (without baking) up to 24 hours ahead and refrigerate uncovered. When ready to bake, add the cheese and bake as directed—just add 10-15 minutes to the baking time. For freezing, assemble completely (including cheese), cover tightly, and freeze for up to 3 months. Thaw overnight in the fridge before baking.