
Main Courses
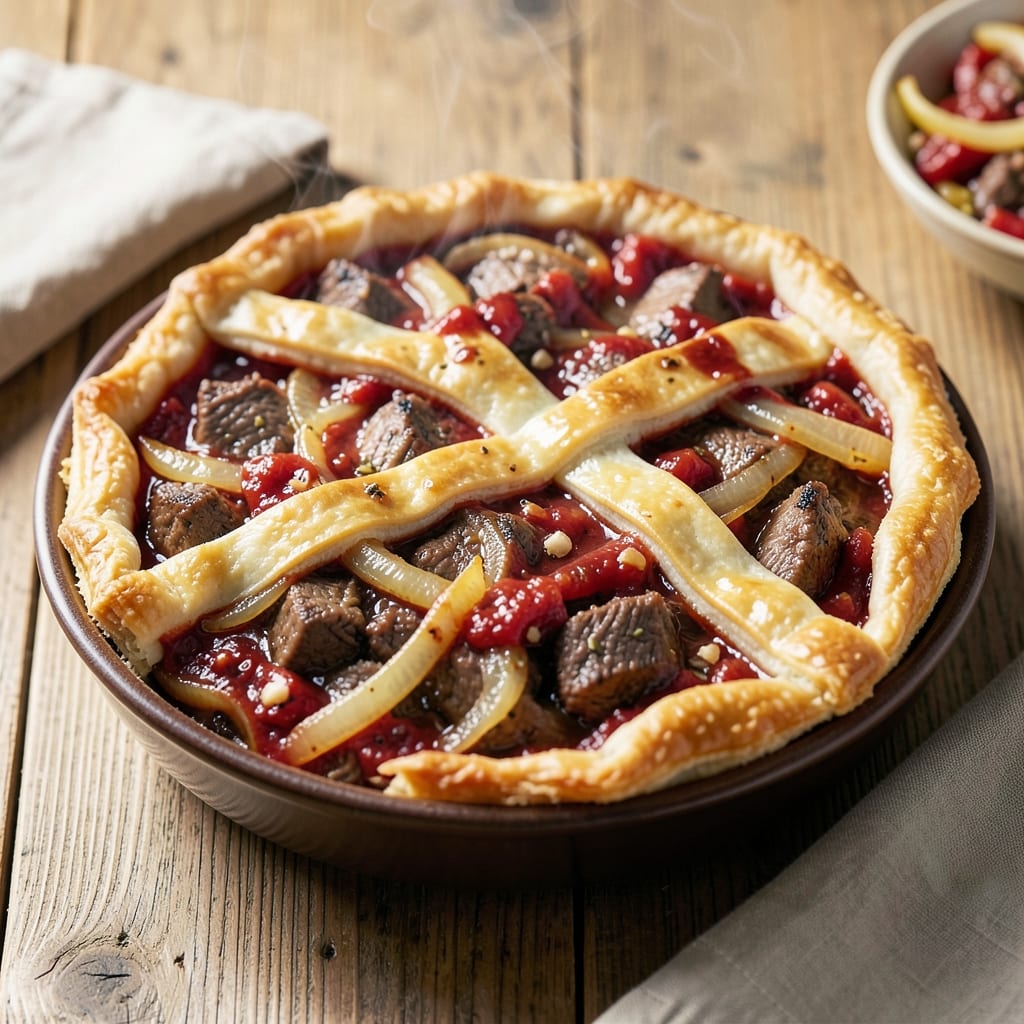
This beef and tomato pie delivers the perfect balance of flaky crust and rich, savory filling that tastes like a home-cooked masterpiece. 💛 The secret lies in tender beef braised with sweet tomatoes until the flavors meld into harmony, all encased in a golden, buttery crust that shatters at every bite. I developed this recipe after years of perfecting the art of pie-making, ensuring the filling stays moist while the crust achieves that signature crispness.
The beauty of this dish is in its layers—each component plays a crucial role. The beef, slow-cooked until fork-tender, absorbs the deep flavors of garlic, herbs, and tomatoes, while the crust remains light and airy. What makes this recipe stand out is the technique of pre-cooking the filling separately, allowing you to assemble the pie with confidence and avoid a soggy bottom.
By the time you pull this pie from the oven, you’ll have a dish that’s impossible to resist: a golden, bubbling crust that gives way to a filling so flavorful it disappears in minutes. The aroma alone will have everyone gathering around the table, and the first bite will confirm why this recipe is worth every moment of preparation.
Whether you're serving it for a family dinner or impressing guests, this beef and tomato pie is a showstopper that delivers restaurant-quality results at home. Let’s get started on creating your own perfect pie.
Ingredients for beef and tomato pie
Sixteen ingredients, three layers of flavor—this pie needs nothing more.
| Ingredient | Amount | Notes |
|---|---|---|
| Beef Chuck Roast 🥩 | 2 ½ lb | Pre-cubed, 1-inch pieces |
| Canned San Marzano Tomatoes 🍅 | 2 cups | Crushed, no sugar added |
| Yellow Onion 🧅 | 1 whole | Diced, medium size |
| Garlic Cloves 🧄 | 6 cloves | Minced, fresh preferred |
| All-Purpose Flour 🌾 | 3 cups | For filling thickener |
| Unsalted Butter 🧈 | ¾ cup | Cold, cubed for crust |
| All-Purpose Flour 🌾 | 2 ½ cups | Plus 1 tbsp for crust |
| Ice Water 💧 | ½ cup | For dough elasticity |
| Dried Thyme 🌿 | 1 tbsp | Or 1 tbsp fresh thyme |
| Dried Rosemary 🌿 | 1 tsp | Crushed between fingers |
| Salt 🧂 | 1 ½ tsp | Diamond Crystal preferred |
| Black Pepper 🌶️ | 1 tsp | Freshly cracked |
| Beef Broth 💧 | 1 ½ cups | Low-sodium preferred |
| Red Wine 🍷 | ½ cup | Dry, like Cabernet |
The beef is where magic happens. Chuck roast breaks down beautifully (sirloin stays tough), and Costco or Whole Foods have it pre-cubed for convenience. Look for pieces with good marbling—they'll stay juicy. I always grab San Marzano tomatoes at Trader Joe's—their sweetness makes this filling sing. Fresh thyme and rosemary? Penzeys Spices sells them in small jars, perfect for pie-making. The crust butter should be cold—stash it in the freezer 20 minutes before mixing—or it'll turn into a greasy mess.
No chuck roast? London broil or brisket works in a pinch, but cut it into 1-inch cubes. Subbing wine? Beef broth plus 1 tbsp balsamic vinegar mimics the depth. Fresh herbs? Dried works at one-third the amount, but the flavor won't be as bright. The crust flour needs to be all-purpose, not self-rising—that extra leavening will puff it too much. For the filling, cornstarch instead of flour if you're gluten-free (use 2 tbsp). And if you hate rolling dough? Use store-bought pie crust—just don't skimp on the butter content.
This pie tastes even better the next day—make it ahead and refrigerate overnight. The crust stays crisp for 3 days if wrapped tightly in foil. Freezing? Assemble unbaked, freeze solid, then bake straight from frozen—add 15 minutes to baking time. For reheating, 350°F for 20 minutes with foil over the crust to keep it flaky. The filling reheats beautifully, but the crust gets soggy if over-baked—watch closely those last 10 minutes.
Why You'll Love This Recipe
- One-Pot Magic: That beef chuck roast? It practically cooks itself while you prep the rest. Slice the onion, mince the garlic, dump in the tomatoes—done. The slow simmer means you’re not babysitting the stove.
- San Marzano Secret: Honestly, those canned tomatoes change everything. Their sweet, rich depth cuts through the beef’s richness, and that crusty pie top seals in all the juicy, garlicky goodness. You’ll taste the difference in the first bite.
- Leftovers That Win: This pie is better the next day—yes, really. The flavors meld into something even more satisfying, and it reheats beautifully. Pack it for lunch or freeze slices for those nights you’d rather eat than cook.
- Budget-Friendly Feast: A chuck roast stretches across meals, and San Marzano tomatoes are a splurge worth making. But here’s the kicker: this recipe feeds four for under $15, and the leftovers stretch it further. Frugal? Yes. Delicious? Absolutely.
Step-by-step instructions for beef and tomato pie
Here's how to build a pie with golden crust and tender beef in a sweet-tangy tomato sauce.
🍳 Step 1: Brown the Beef and Build the Filling Base
Heat 2 tablespoons olive oil in a large Dutch oven over medium-high heat. Add the 2.5 lb beef chuck roast in 1-inch cubes and brown on all sides for 8-10 minutes—this develops deep flavor. Remove the beef and set aside.
In the same pot, add the diced yellow onion and cook for 5 minutes until softened. Stir in the 6 cloves minced garlic and cook for 30 seconds until fragrant. Pour in the 0.5 cup red wine and let it simmer for 2 minutes to reduce slightly.
🥘 Step 2: Thicken the Tomato Sauce
Add the 2 cups crushed San Marzano tomatoes, 1.5 cups beef broth, 1 tbsp dried thyme, 1 tsp dried rosemary, 1.5 tsp salt, and 1 tsp black pepper. Return the beef to the pot and bring to a simmer. Cook uncovered for 45 minutes until the beef is tender and the sauce thickens slightly.
In a separate bowl, whisk together 3 cups all-purpose flour with 1 tbsp salt to make a slurry. Slowly stir this into the beef mixture while simmering for 5-7 minutes until thickened to a gravy-like consistency. The filling should coat the back of a spoon—this ensures a rich, cohesive pie filling.
👨🍳 Step 3: Make the Flaky Crust
Cut the 0.75 cup cold unsalted butter into small cubes and place in a large bowl. Add the 2.5 cups all-purpose flour plus 1 tbsp extra flour and mix with a fork until the mixture resembles coarse crumbs with pea-sized butter pieces. Gradually add the 0.5 cup ice water, one tablespoon at a time, mixing gently until the dough just comes together.
Turn the dough onto a lightly floured surface and knead briefly for 30 seconds—just until smooth. Divide into two equal discs, wrap in plastic, and chill for 30 minutes. This resting time prevents shrinking and ensures maximum flakiness when baked.
🔥 Step 4: Assemble and Bake the Pie
Preheat your oven to 375°F. Roll out one dough disc into a 12-inch circle and fit it into a 9-inch pie dish, trimming any excess. Pour the beef filling into the crust, spreading it evenly. Roll out the second dough disc and cut into strips for a lattice top.
Arrange the lattice strips in a crisscross pattern over the filling, sealing the edges by pinching them together. Brush the top with a beaten egg wash for golden color. Bake for 45-50 minutes until the crust is deep golden brown and the filling bubbles around the edges. Let it rest for 15 minutes before slicing—this lets the juices set and makes serving easier.
Pro Tips For Making Beef And Tomato Pie
- SEAR THE CHUCK FIRST: Brown that beef chuck in batches—don’t overcrowd the pan. The crust from the sear locks in flavor, and skipping this step means your filling will taste like stew instead of something special. Use medium-high heat and let those bits stick before adding onions.
- CRUSH TOMATOES RUGGEDLY: San Marzanos are sweet, but you need texture. Smash the whole canned tomatoes with your hands (no blender) to break up seeds and pulp—this thickens the sauce naturally as it cooks. I used to strain them, but this adds body and depth.
- DON’T SKIP THE REST: After baking, let the pie sit 15 minutes before slicing—yes, even if you’re starving. The filling will firm up, the crust won’t sog, and you’ll avoid a gravy-like mess. I learned this after serving a slice that collapsed like a pancake.
- SWAP FLOUR FOR CORNSTARCH: Toss the beef filling with 1 tablespoon cornstarch before baking—it thickens the sauce without gummy texture. Works like a slurry but with half the effort. (Save the flour for the crust where it belongs.)
Pro cooking tips for this recipe
Filling Thickness Secrets
The key to a perfect pie filling is achieving that gravy-like consistency—thick enough to hold its shape but still luscious. I start by simmering the beef and tomatoes for 45 minutes before adding the flour slurry. This slow cook reduces the liquid naturally, letting the flavors deepen. When you stir in the 3 cups flour, do it gradually while keeping the mixture at a gentle simmer—this prevents lumps and ensures even thickening. 💫
Crust Flakiness Hacks
Cold butter is your best friend for a flaky crust. Cut the 0.75 cup unsalted butter into pea-sized pieces and keep everything cold—even the mixing bowl. Work quickly when combining with flour and ice water, mixing just until the dough forms. Overworking the dough makes it tough, so handle it minimally. Chill the dough discs for 30 minutes before rolling to prevent shrinking and maintain that signature layering. ❄️
Beef Browning Matters
Never skip browning the beef—it builds deep, caramelized flavors that transform a good pie into a great one. Use a large Dutch oven and cook the 1-inch beef cubes over medium-high heat for 8-10 minutes, turning occasionally, until they develop a rich brown crust. This step creates the Maillard reaction, which adds complexity that raw beef simply can't match. 🔥
Lattice Top Mastery
A lattice crust lets steam escape while keeping the filling moist. Cut the second dough disc into 1-inch wide strips and arrange them in a crisscross pattern, overlapping slightly. Seal the edges by pinching the lattice strips together—this prevents filling from leaking out during baking. Brush the top with egg wash right before baking for that golden finish. 🌟
Resting Before Slicing
Patience here makes all the difference. Let the pie rest for 15 minutes after baking—this allows the filling to set and the juices to redistribute. Skipping this step means a runny filling and a soggy crust. Use a sharp knife and wipe it clean between slices to keep the pie looking fresh. Serve warm for the best texture and flavor experience. ✨
Oven Temperature Tips
Preheat your oven to 375°F and use an oven thermometer to confirm accuracy—many home ovens run hot or cold. Place a pie weight or dried beans on the bottom crust during the first 20 minutes of baking to prevent puffing. Rotate the pie halfway through for even browning. Watch closely in the last 10 minutes—the crust should be deep golden brown but not burnt. 🌡️
Nutrition facts
Frequently asked questions
Can I use ground beef instead of cubed chuck roast?
Ground beef works but won't give the same tender texture. For best results, stick with 1-inch beef cubes—they stay juicy and develop deeper flavor when browned. If you must use ground beef, brown it first over medium-high heat until fully cooked, then proceed with the recipe.
How do I prevent a soggy bottom crust?
Prevent sogginess by pre-cooking the filling completely before assembling. Use a pie weight or dried beans on the bottom crust during the first 20 minutes of baking. Also, chill the dough discs for 30 minutes before rolling to strengthen the gluten structure. This keeps the crust crisp while the filling stays moist.
Can I make this pie ahead of time?
Assemble the pie unbaked and refrigerate for up to 24 hours. For best results, bake it straight from the fridge—just add 10-15 minutes to the baking time. The crust will still turn golden and flaky. For freezing, assemble unbaked, freeze solid, then bake from frozen with an extra 15 minutes.
What's the best way to reheat leftovers?
Reheat slices at 350°F for 15-20 minutes covered with foil to keep the crust crisp. For microwave reheating, cover with a damp paper towel and heat for 30-45 seconds—this prevents drying. Leftovers keep well in the fridge for 3 days or frozen for 2 months.
How do I make a gluten-free version?
Replace the all-purpose flour in the crust with a 1:1 gluten-free flour blend (like Bob's Red Mill). For the filling, substitute 3 cups gluten-free flour or 2 tbsp cornstarch mixed with 1 tbsp gluten-free flour to thicken. The texture will be slightly different but still delicious. Always check labels for cross-contamination warnings.