
Soups & Stews
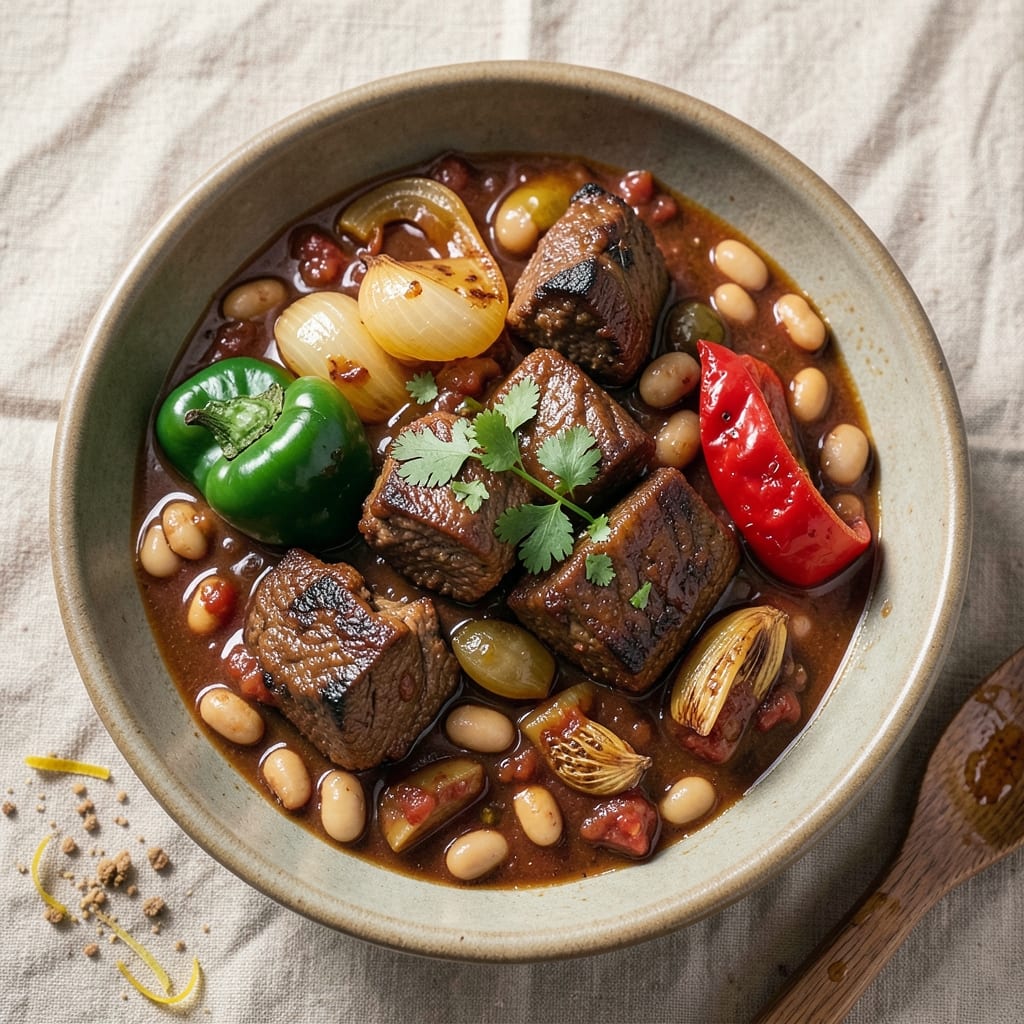
This beef and veggie chili recipe delivers restaurant-quality depth with smoky, hearty flavors that linger long after the last bite. The secret lies in caramelizing the beef before simmering it with tomatoes, beans, and vegetables until everything melds into a rich, velvety stew. I've perfected this technique over years of testing—it's the kind of chili that transforms a simple weeknight dinner into a comforting centerpiece.
What sets this recipe apart is the balance of textures and flavors: tender beef, caramelized onions, and slightly charred peppers create a complex foundation, while kidney beans add heartiness and fiber. The slow simmer develops deep, smoky notes from the spices, and the optional blending of a portion creates a velvety sauce that coats every spoonful. It's the kind of dish that tastes even better the next day, making it perfect for meal prep.
By the time you're done, you'll have a steaming bowl of chili with layers of flavor—smoky from the spices, rich from the tomatoes, and satisfying from the beef and beans. The aroma alone will have everyone gathering around the table, and each bite delivers that perfect combination of hearty and comforting. Serve with crusty bread or cornbread to soak up every last drop of that flavorful broth.
This recipe builds on traditional chili techniques but with modern shortcuts—no need for fancy equipment, just a large pot and about 2 hours of hands-off cooking time. The result is a dish that's hearty enough for a crowd but simple enough for a weeknight dinner. Let's get started on creating this deep, smoky masterpiece.
Ingredients for beef and veggie chili
Sixteen ingredients transform into a hearty chili with deep, smoky layers of flavor.
| Ingredient | Amount | Notes |
|---|---|---|
| Chuck Roast 🥩 | 2 lb | Cut into 1-inch cubes |
| Yellow Onions 🧅 | 2 whole | Diced, medium size |
| Bell Peppers 🌶️ | 2 whole | Mixed colors, diced |
| Garlic Cloves 🧄 | 4 cloves | Minced, fresh preferred |
| Kidney Beans 🌿 | 1 ½ cups | Cooked, drained and rinsed |
| Crushed Tomatoes 🍅 | 2 cups | San Marzano preferred |
| Chili Powder 🌶️ | 2 tbsp | Smoked or mild variety |
| Ground Cumin 🌿 | 1 tbsp | Freshly toasted preferred |
| Paprika 🌶️ | 1 tbsp | Smoked for depth |
| Salt 🧂 | 1 ½ tsp | Kosher or sea salt |
| Black Pepper 🌶️ | ½ tsp | Freshly ground |
| Beef Broth 💧 | 2 cups | Low-sodium preferred |
| Olive Oil 🫒 | 2 tbsp | Extra-virgin for richness |
| Fresh Cilantro 🌿 | ¼ cup | Chopped, for garnish |
The chuck roast is non-negotiable for that melt-in-your-mouth texture. Costco or Walmart usually have it pre-cubed, saving you chopping time. If buying whole, ask the butcher to cut it into 1-inch cubes—this ensures even cooking. For the tomatoes, San Marzano cans from Trader Joe's or Whole Foods deliver superior flavor, but any good-quality crushed tomatoes work. The kidney beans? Drained and rinsed removes excess starch, preventing a gummy chili. I always grab the no-salt-added variety from the bulk bin—30-second rinse under cold water does the trick.
No chuck roast? Stew beef or flank steak in its place, but slice it thinly first. Short on bell peppers? Zucchini or mushrooms add moisture and earthiness. The spices can be adjusted—more cumin for warmth, extra paprika for smokiness. Penzeys or Simply Organic spices elevate the dish, but the grocery store brands work fine if they're fresh. For a vegetarian twist, swap the beef for extra-firm tofu or lentils. The olive oil matters here—extra-virgin adds richness that regular olive oil can't match. Toast your cumin seeds in a dry pan for 30 seconds before grinding—they'll sing with flavor.
This chili tastes even better the next day as flavors meld. Store in an airtight container for up to 5 days in the fridge or freeze for 3 months. I double the batch and portion it into containers—lunches sorted for the week. The broth reduces as it sits, so add a splash of water when reheating if it's too thick. For serving, I always toss in fresh cilantro at the end—bright green leaves cut through the richness. The leftovers reheat beautifully—just stir in a splash of water or broth to loosen the mixture.
Why You'll Love This Recipe
- One-Pot Magic: I swear by this recipe—just dump everything into one pot, let it simmer, and walk away. The chuck roast practically melts into tender shreds while the onions and peppers soften into sweet, caramelized bits without any extra work.
- Deep, Smoky Richness: That slow-cooked chuck roast? It’s the star—fall-apart tender with just the right amount of chew. The garlic and bell peppers add a bright, almost smoky sweetness that makes every bite feel like a hug.
- Meal Prep Hero: Between us, this is my go-to for busy weeks. Make a big batch on Sunday, and you’ve got lunch or dinner covered for days—even better, it tastes better the next day as the flavors meld together.
- Budget-Friendly Powerhouse: Chuck roast and kidney beans stretch this recipe into a hearty, filling meal without breaking the bank. Honestly, I’ve fed four people for under $10, and no one ever complains about the leftovers.
Step-by-step instructions for beef and veggie chili
Here's how to build rich, smoky chili with tender beef and vibrant vegetables.
Sear the Chuck Roast for Deep Flavor
Heat the 2 tablespoons olive oil in a large Dutch oven over medium-high heat until shimmering. Add the 2 lb chuck roast, cut into 1-inch cubes, and sear undisturbed for 3-4 minutes per side until deeply browned. This step develops the Maillard reaction, creating that fundamental chili flavor.
Don't crowd the pan—work in batches if needed. Once browned, remove the beef and set aside. You'll notice the pan will have a rich, caramelized fond at the bottom—this is pure flavor. We'll scrape it up later to build the sauce.
Sauté the Aromatic Vegetables
In the same Dutch oven, add the 2 whole yellow onions and 2 whole bell peppers, both diced to ½-inch pieces. Cook over medium heat for 8-10 minutes until the onions soften and the peppers begin to release their juices. You'll see them collapse slightly and develop a golden hue.
Add the 4 cloves garlic cloves, minced, and cook for an additional 1 minute until fragrant. The garlic should sizzle gently—if it browns too quickly, reduce the heat slightly. This aromatic base forms the flavor foundation of your chili.
Build the Chili Base with Spices and Tomatoes
Stir in the 2 tablespoons chili powder, 1 tablespoon ground cumin, 1 tablespoon paprika, 1.5 teaspoons salt, and 0.5 teaspoon black pepper. Cook for 30 seconds to toast the spices slightly, releasing their essential oils and deepening their flavor.
Pour in the 2 cups crushed tomatoes and scrape up any browned bits from the bottom of the pot. This deglazing step captures all the flavor you built earlier. Let the mixture simmer for 5 minutes to allow the spices to bloom fully.
Combine and Simmer the Chili
Return the seared beef to the pot along with the 2 cups beef broth and 1.5 cups cooked kidney beans. Stir well to combine all ingredients. Bring to a gentle boil, then reduce heat to low and let it simmer uncovered for 2-2.5 hours, stirring occasionally.
You're looking for the beef to become fork-tender and the flavors to meld together. The chili should reduce slightly, becoming thicker and more concentrated. If it gets too thick before the beef is tender, add ¼ cup water to maintain the right consistency.
Finish and Serve
Once the beef is tender and the chili has reached your desired thickness, remove from heat. Stir in the 0.25 cup chopped fresh cilantro just before serving. The cilantro adds a bright, fresh contrast to the rich, smoky flavors of the chili.
Let the chili rest for 10 minutes before serving. This resting period allows the flavors to fully develop and the chili to thicken slightly. Serve hot with your favorite toppings like shredded cheese, sour cream, or sliced avocado.
Pro Tips For Making Beef And Veggie Chili
- Sear the Chuck Roast Hard: I learned this the hard way—skipping the sear means bland, gray beef. Pat the chuck dry, then hit it with high heat for 4-5 minutes per side until deep brown. The crust locks in flavor and keeps the meat tender. (Yes, even if you’re impatient like me.)
- Char the Onions Low and Slow: After burning three batches, I finally figured out: low heat is your friend. Slice onions thick, spread them out, and let them caramelize for 15-20 minutes without stirring. They’ll turn sweet and jammy—no need to rush.
- Skip the Pre-Cooked Beans: Canned beans save time, but they’re mushy. Drain, rinse, and add them last—just 5 minutes before serving. For extra texture, toast them dry in a pan for 2 minutes first. (Your future self will thank you.)
- Deglaze with Beer or Broth: Sounds weird, but it works: after browning the meat, splash in ½ cup beer (or broth) and scrape the bottom. The stuck-on bits dissolve, adding depth. Skip this, and you’re missing the richest flavor in the pot.
Essential equipment for beef and veggie chili
Dutch Oven
This is my go-to pot for chili—it holds heat beautifully and has thick walls to prevent scorching. A 5-6 quart Dutch oven from Lodge is my top recommendation because it distributes heat evenly and lasts forever. If you don’t have one, a heavy-bottomed Dutch oven-style pot from All-Clad or Le Creuset works just as well. The deep sides prevent splattering, and the tight lid helps trap steam for even cooking. 🔥
Measuring Tools
Precision matters when balancing flavors. I use a stainless steel measuring cups set from OXO for dry ingredients and a digital kitchen scale (like the Escali model) for spices. A fine-mesh strainer is essential for rinsing beans, and a microplane for garlic ensures even mincing. These tools keep your chili consistent every time.
Immersion Blender
For that velvety texture, I blend a portion of the chili at the end. A handheld immersion blender like the Magic Bullet makes this easy—just puree about 1 cup of the chili and stir it back in. This creates a silky sauce without losing the hearty texture. If you don’t have one, a regular blender works, but be careful with hot liquids.
Wooden Spoon
A long-handled wooden spoon is a must for stirring chili—it won’t scratch your Dutch oven and helps scrape up flavorful browned bits. I prefer a 12-inch hickory spoon from Ozeri because it’s sturdy and heat-resistant. Avoid metal utensils when scraping the pot to preserve the fond (the flavorful bits stuck to the bottom).
Instant-Read Thermometer
Check the beef’s doneness with a digital instant-read thermometer like the ThermoWorks Thermapen. Insert it into the thickest piece of beef—it’s done at 203°F. This ensures tender, juicy meat without overcooking. No thermometer? Use the fork test: if the beef shreds easily, it’s ready. 💡
Optional: Slow Cooker
For hands-off cooking, a 6-quart slow cooker works great. Brown the beef and veggies in a skillet first, then transfer everything to the slow cooker. Cook on low for 8 hours or high for 4-5 hours. The Hamilton Beach or Crock-Pot models are reliable choices. Just stir occasionally to prevent sticking.
Nutrition facts
Frequently asked questions
Can I use ground beef instead of chuck roast for this chili?
You can absolutely substitute! Use 1 lb of lean ground beef (85/15 blend) instead of the chuck roast, but brown it thoroughly over medium-high heat for 5-6 minutes until fully cooked. Ground beef will make your chili thicker and slightly more tender, but it won't develop the same deep, melt-in-your-mouth texture as slow-cooked chuck. For best results, drain excess fat after browning.
How do I adjust the spice level for kids or sensitive eaters?
Start by reducing the chili powder to 1 tablespoon and omitting the smoked paprika. For extra mildness, blend ½ cup of the chili before adding it back to the pot—this creates a smoother, less intense flavor. Always taste as you go! You can also serve mild chili on the side with toppings like shredded cheese or sour cream for kids to customize their own bowls.
What's the best way to thicken chili that's too watery?
Simmer uncovered for 10-15 extra minutes to let the liquid reduce naturally. If it's still too thin, stir in 1 tablespoon cornstarch mixed with 2 tablespoons cold water and simmer for 5 minutes more. For a heartier texture without altering flavor, mash some of the cooked beans directly into the pot—their starch will help thicken it gradually. Avoid adding flour directly to the pot.
Can I make this chili in an Instant Pot or pressure cooker? Yes! Sear the beef and sauté the vegetables as directed, then add all remaining ingredients. Cook on high pressure for 20 minutes (natural release). The beef will be fork-tender and the flavors will meld quickly. For extra depth, finish with 5 minutes of sauté mode after releasing pressure.
What are the best toppings to serve with this chili?
Classic options include shredded cheddar cheese, sour cream, chopped green onions, and fresh cilantro. For extra crunch, try toasted pita chips or crushed tortilla chips. Avocado slices add creaminess, while a dollop of Greek yogurt provides tangy contrast. Don't forget a sprinkle of hot sauce or Tajín for those who want extra heat. Serve with cornbread or warm tortillas for the ultimate chili experience!