
Soups & Stews
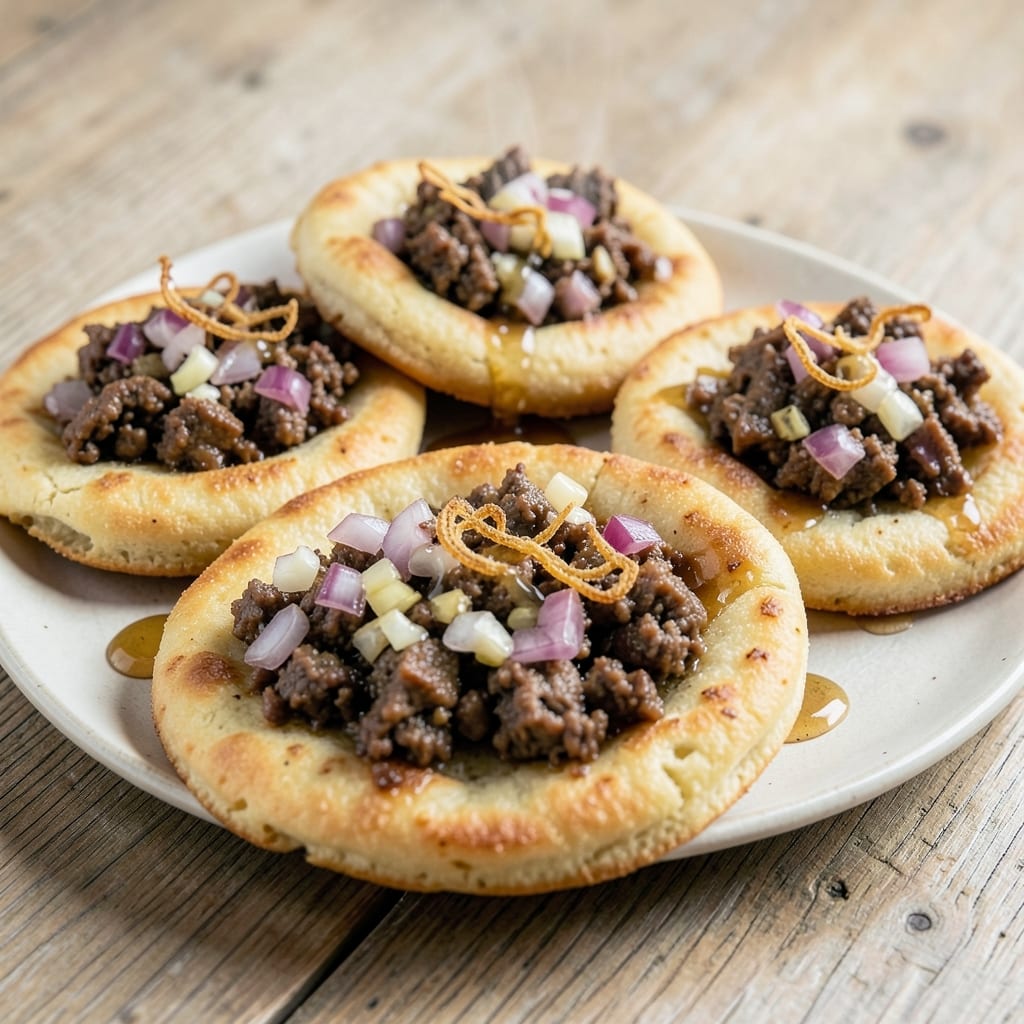
This beef arepas recipe delivers the perfect balance of fluffy corn cakes and savory ground beef filling that’s become a staple in my kitchen. 💛 The secret lies in the dough—made with masa harina for that signature texture—and the slow-cooked beef that absorbs bold spices like cumin and paprika. What makes this recipe stand out is how it transforms simple ingredients into a meal that feels both comforting and restaurant-worthy.
The process starts with preparing the dough, which should be soft but not sticky, ensuring each arepa holds its shape when stuffed. Meanwhile, the beef mixture simmers until tender, allowing the flavors to meld into a rich, aromatic filling. Once assembled and cooked—whether on a skillet or grill—the arepas develop a golden crust while staying pillowy inside, making every bite irresistible.
These arepas are incredibly versatile, serving as a hearty main dish or a satisfying side. Pair them with avocado slices, a cooling salsa, or a dollop of sour cream for the full experience. The combination of textures—crispy exterior, tender filling, and creamy toppings—makes this recipe a crowd-pleaser that’s easy to customize.
Ready in about 45 minutes, this recipe is perfect for weeknight dinners or weekend gatherings. The key is patience—letting the dough rest and the beef simmer ensures the best results. Once you try these, you’ll understand why they’re a beloved staple in Latin American cuisine.
Ingredients for beef arepas
These simple yet bold ingredients transform into restaurant-worthy arepas with golden crusts and tender beef filling.
| Ingredient | Amount | Notes |
|---|---|---|
| Masa Harina 🌾 | 2 cups | For authentic texture |
| Warm Water 💧 | 1 ¼ cups | 105°F-110°F preferred |
| Ground Beef 🥩 | 1 ½ lb | 80/20 fat ratio preferred |
| Yellow Onion 🧅 | 1 whole | Diced small for filling |
| Garlic Cloves 🧄 | 4 cloves | Minced for beef mixture |
| Ground Cumin 🌿 | 1 tbsp | Toasted for depth |
| Smoked Paprika 🌶️ | 1 tbsp | For smoky flavor |
| Salt 🧂 | 1 tsp | Adjust to taste |
| Black Pepper 🌶️ | ½ tsp | Freshly ground |
| Vegetable Oil 🫒 | ¼ cup | For cooking arepas |
| Avocado Oil 🫒 | 2 tbsp | For brushing tops |
| Fresh Cilantro 🌿 | ¼ cup | Chopped for garnish |
| Lime 🍋 | 1 whole | Juiced for serving |
The masa harina is everything here—Maseca is the gold standard, but Bob's Red Mill works too. Grab it in the Latin foods aisle or bulk section at Wegmans or Whole Foods. For the beef, 80/20 fat ratio keeps it juicy—skip leaner cuts unless you love drying out your filling. The onions and garlic should be fresh; yellow onions add sweetness while red onions bring brightness. Toast your cumin and paprika in a dry pan for 30 seconds before adding to the beef—that extra step makes all the difference.
No masa harina? Cornmeal mixed with baking powder works in a pinch, but texture won't be identical. Swap smoked paprika for regular paprika plus a pinch of cayenne if you're short. Want extra richness? Stir in 1 tbsp of beef broth with the spices. The avocado oil for brushing? Any neutral oil works, but avocado has a higher smoke point for that perfect sear. For the cilantro, stems are edible—chop them too for zero waste. Lime juice? Key lime juice if you can find it, but regular lime works just fine.
Masa dough keeps best in an airtight container for 2 days—cover it with a damp towel to prevent drying. The cooked beef filling freezes beautifully for 3 months; portion it into ice cube trays for easy reheating. Arepas reheat best in a skillet with a little oil—2 minutes per side over medium heat. Store finished arepas wrapped in a clean kitchen towel to keep them soft. Leftovers? Toast them in a toaster oven for crispy second-day results.
Why You'll Love This Recipe
- Five-Ingredient Magic: I swear by this combo—masa harina and warm water transform into pillowy dough faster than I can say "dinner’s ready." No yeast, no waiting, just mix and shape while the beef sizzles.
- Savory Crunch Factor: That crispy golden crust when you fry them? Chef’s kiss. The ground beef and caramelized onions inside melt into something rich, while the garlic clove minced into the filling adds a punch that lingers.
- Packable Crowd-Pleaser: Between us, these are my go-to for game days, potlucks, or lazy Sundays. Wrap them in foil, toss in a cooler, and they stay warm (and delicious) for hours—no reheating drama.
- Budget Breakfast Hack: Honestly, I make these for breakfast when I’m broke. A pound of ground beef stretches into filling for six arepas, and masa harina costs pennies compared to store-bought tortillas. Leftovers? Reheat in a skillet—crispy again in minutes.
Step-by-step instructions for beef arepas
Here's how to make fluffy, golden arepas stuffed with smoky, savory beef filling.
👨🍳 Step 1: Prepare the Beef Filling
In a large skillet, heat the 2 tablespoons avocado oil over medium-high heat. Add the 1.5 lb ground beef and cook until it loses its raw color, breaking it apart with a wooden spoon. You'll see the meat release fat as it cooks—this is normal and adds flavor.
Add the 1 whole yellow onion that you've diced small and cook for 5 minutes until softened. Stir in the 4 cloves garlic cloves that you've minced, along with the 1 tablespoon ground cumin, 1 tablespoon smoked paprika, 1 teaspoon salt, and 0.5 teaspoon black pepper. Cook for another 3-4 minutes until the spices are fragrant and the beef is fully cooked through. Remove from heat and let it cool slightly—this makes it easier to handle later.
👨🍳 Step 2: Make the Masa Dough
In a large mixing bowl, combine the 2 cups masa harina with the 1.25 cups warm water (around 105°F-110°F). Use your hands to knead the mixture until it forms a smooth, pliable dough. It should be soft but not sticky—if it feels too dry, add a splash more water; if too sticky, add a little more masa harina. The dough should hold together when pressed but still be easy to shape.
Cover the bowl with a damp towel and let the dough rest for 10 minutes. This resting time relaxes the gluten and makes the dough easier to work with. While it rests, preheat your oven to 350°F and line a baking sheet with parchment paper.
🥘 Step 3: Shape and Stuff the Arepas
Divide the dough into 8 equal portions (about 2 tablespoons each) and roll each into a ball. Then, flatten each ball into a 4-inch circle about ¼-inch thick. Place a heaping tablespoon of the beef filling in the center of each circle, then fold the edges over to completely enclose the filling. Press gently but firmly to seal the edges—this ensures the filling stays inside during cooking.
Place the stuffed arepas on the prepared baking sheet, seam-side down. Brush the tops with a little more of the avocado oil to help them brown beautifully. The oil will give them that crispy, golden finish we're after.
🔥 Step 4: Cook the Arepas to Golden Perfection
Heat 2 tablespoons vegetable oil in a clean skillet over medium heat. Cook the arepas for 3-4 minutes per side until they're golden brown and crispy. You'll know they're ready when the bottoms are deeply browned and the edges are slightly crispy to the touch. Don't rush this step—they need time to develop that perfect texture.
Transfer the cooked arepas to a clean plate and keep them warm in a 200°F oven while you finish cooking the rest. Once all arepas are cooked, brush the tops with a little more avocado oil if needed for extra shine and crispiness.
🍽️ Step 5: Serve with Fresh Garnishes
Cut each arepa in half and serve immediately while still warm. Squeeze the juice from the 1 whole lime over the top and sprinkle with the 0.25 cup chopped fresh cilantro. The bright lime juice cuts through the richness of the beef, while the cilantro adds a fresh, herby note that ties everything together.
For the best experience, serve these beef arepas with a side of your favorite salsa or a simple mixed greens salad. The contrast of warm, savory arepas with cool, fresh greens makes every bite even more satisfying. Enjoy them right away—they're best when fresh and warm!
Pro Tips For Making Beef Arepas
- Boil Your Onion First: I learned this the hard way—sautéing raw onion with garlic in the beef filling leads to a bitter, watery mess. Simmer the diced onion in a splash of water for 3 minutes before draining, then mix it into the beef. The texture stays smooth, and the flavor concentrates instead of turning mushy.
- Press the Masa Hard: Skimping on pressure when shaping the dough is how you end up with thick, uneven arepas that won’t cook through. Use the palm of your hand to press the masa into the pan with firm, even strokes—like you’re trying to flatten a pancake, not just patting it gently. The crust will be crisp, not doughy.
- Salt the Beef Early: After burning three batches of over-seasoned arepas, I finally realized: salt the ground beef before cooking. Toss it with 1 teaspoon of salt and let it sit for 10 minutes while you prep the onions. The flavor distributes evenly, and you won’t end up with a bland filling that needs rescuing with extra salt later.
- Use a Mixer for Dough: Sounds weird, but it works—I was skeptical until I tried it. Pulse the masa harina and warm water in a food processor for 30 seconds, then knead for another 30. The dough becomes uniform and less sticky, so you won’t waste time fighting clumps. (Pro tip: Add water 1 tablespoon at a time until it holds together.)
Essential equipment for this recipe
Masa Harina Essentials
You absolutely need masa harina for authentic arepas—Maseca is the gold standard, but Bob's Red Mill works in a pinch. Grab it in the Latin foods aisle at Wegmans or Whole Foods. For best results, use 2 cups—this gives you the perfect fluffy texture. If you can't find masa harina, mix 1.5 cups cornmeal with 0.5 tsp baking powder as a substitute, though the texture won't be identical. 🌾
Skillets for Crispy Arepas
A 10-inch cast-iron skillet is my go-to for cooking arepas—it retains heat perfectly and creates that signature crispy crust. Heat 2 tablespoons vegetable oil over medium heat before adding your arepas. If you don’t have cast iron, a nonstick skillet works too, but avoid high heat to prevent sticking. For extra crispiness, I like to use a Lodge cast iron—it’s durable and heats evenly. 🔥
Oil for Brushing and Cooking
Use avocado oil for brushing the tops of your arepas—it has a high smoke point (520°F) and adds a neutral flavor. Keep a small bowl of it nearby for easy brushing. For cooking, vegetable oil is ideal because it’s affordable and widely available. If you prefer a different oil, canola or sunflower oil work too, but avoid olive oil—its low smoke point can make the arepas taste bitter. 🫒
Tools for Shaping
You’ll need a rolling pin to flatten your dough into even circles, but a clean wine bottle or even a mason jar works in a pinch. For stuffing, a small spoon or ice cream scoop helps portion the beef filling evenly. If you’re making a big batch, a pastry brush makes brushing oil on the tops much easier than your fingers. Keep everything within reach—you’ll be working fast once the dough is ready! 🍳
Grill for Outdoor Cooking
If you’re cooking outdoors, a grill with a flat top (like a Weber Flat Top Grill) is perfect for arepas. Preheat it to medium heat and brush with avocado oil before placing the arepas on the grates. The indirect heat helps them cook evenly without burning. For charcoal grills, spread the coals evenly and let them burn down to medium heat before adding your arepas. This method adds a smoky flavor that pairs perfectly with the beef filling. 🔥
Storage Containers
Store leftover arepas in an airtight container to keep them soft and fresh for up to 2 days. I like using glass containers with snap-on lids—they’re easy to clean and won’t absorb odors. For longer storage, freeze the cooked arepas (without toppings) in a single layer on a tray, then transfer to a freezer bag for up to 3 months. To reheat, warm them in a skillet over medium heat for 2-3 minutes per side until crispy again. 🧊
Nutrition facts
Frequently asked questions
Can I make arepas ahead of time?
The dough can be prepped 2 days ahead and stored in an airtight container with a damp towel. Cooked arepas keep well for 2 days in the fridge, wrapped in a clean kitchen towel to maintain softness. For longer storage, freeze them (without toppings) for up to 3 months—just reheat in a skillet over medium heat for 2-3 minutes per side until crispy again.
What's the best way to keep arepas soft?
Store them in an airtight container with a damp paper towel to prevent drying. For extra moisture, place a second towel on top of the arepas. If they cool completely, reheat in a skillet with a little oil for 1-2 minutes per side—this restores crispiness while keeping the inside tender. The key is avoiding plastic wrap, which traps moisture and makes them soggy.
Can I use a different protein instead of beef?
Yes! Swap beef for chicken, pork, or even black beans for a vegetarian option. For chicken, use 1.5 lb ground chicken and reduce cooking time by 2-3 minutes. For beans, mix 2 cups cooked black beans with 1 tbsp cumin and 1 tbsp smoked paprika. The dough and cooking method stay exactly the same—just adjust seasoning to match your protein.
Why did my arepas fall apart when cooking?
This usually happens if the dough was too wet or not sealed properly. For the dough, test consistency by pressing a small piece—it should hold together but not stick to your fingers. When stuffing, press the edges firmly to create a tight seal. If using a skillet, ensure it's hot enough (medium heat) and don't overcrowd—cook 2-3 arepas at a time for even browning.
How do I make these arepas gluten-free?
Replace the masa harina with a 1:1 gluten-free cornmeal blend (like Bob's Red Mill) plus 0.5 tsp xanthan gum per cup to improve binding. The dough may need slightly more water (1.5 cups instead of 1.25 cups) for flexibility. Keep all other steps identical—gluten-free arepas will still be tender inside with a crispy exterior.