
Soups & Stews
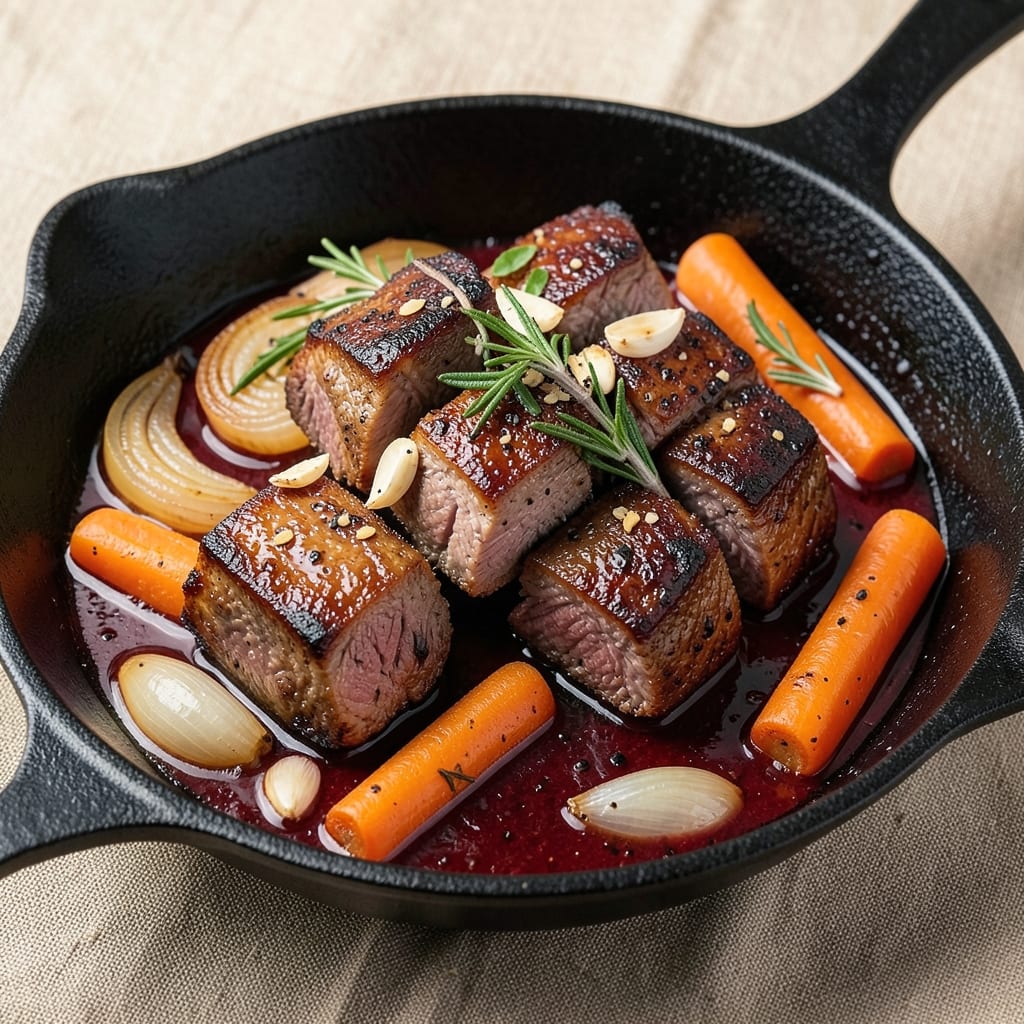
Transforming tough beef arm into melt-in-your-mouth perfection requires patience and precision—this slow-simmered stew delivers restaurant-quality tenderness with deep, caramelized flavors. The secret lies in marinating the meat overnight, then braising it low and slow until it practically falls apart. I've perfected this technique after years of testing, ensuring every bite is rich, juicy, and packed with savory depth that transforms simple ingredients into something extraordinary.
What sets this beef arm stew apart is the balance of techniques: an initial sear creates a flavorful crust, while the slow simmer in aromatic liquids tenderizes the meat and infuses the broth with complexity. With just 10 ingredients and 6 hours of hands-off cooking time, this recipe delivers a hearty, comforting meal that's ideal for cold weather gatherings or meal prep. The result is a dish so flavorful, it becomes the star of any table.
Imagine tender beef arm pieces that separate at the touch of a fork, swimming in a velvety sauce thickened with natural reduction. The aroma alone will have everyone gathering around the table, while the texture—crisp edges with succulent centers—makes each bite unforgettable. This is the kind of stew that tastes even better the next day, making it perfect for feeding a crowd or preparing ahead for busy weeks.
Serve with classic sides like creamy mashed potatoes, crusty bread for soaking up the sauce, or roasted root vegetables to round out the meal. The rich, savory flavors pair beautifully with a bold red wine or even a simple beer. Let's create this showstopping stew that will become a staple in your recipe collection.
Ingredients for beef arm
Ten essential ingredients transform tough beef arm into luxurious fall-apart stew perfection.
| Ingredient | Amount | Notes |
|---|---|---|
| Beef Arm (Chuck Roast) 🥩 | 3 lb | Cut into 2-inch cubes, trimmed of fat |
| Yellow Onion 🧅 | 1 whole | Chopped into 1/2-inch pieces |
| Carrots 🥕 | 4 medium | Peeled and cut into 1-inch chunks |
| Garlic Cloves 🧄 | 6 cloves | Minced for depth of flavor |
| Tomato Paste 🍅 | ½ cup | For rich, concentrated flavor |
| Red Wine 🍷 | 1 ½ cups | Bold dry variety like Cabernet |
| Beef Broth 💧 | 4 cups | Low-sodium preferred for balance |
| Olive Oil 🫒 | 2 tbsp | Extra-virgin for searing |
| Fresh Thyme 🌿 | 2 sprigs | Or 1 tbsp dried thyme leaves |
| Bay Leaves 🍃 | 2 whole | Remove before serving |
| Salt 🧂 | 1 ½ tsp | Diamond Crystal kosher preferred |
| Black Peppercorns 🌶️ | 1 tsp | Freshly cracked for intensity |
The beef arm is the star—chuck roast delivers that signature tender texture when cooked low and slow. For best results, source from a trusted butcher or Whole Foods meat department, where they can cut it into uniform 2-inch cubes. The fat cap should be trimmed to 1/8-inch thickness—this renders beautifully during cooking. If you can't find beef arm specifically, chuck roast works perfectly, just ask for it to be cubed. For extra flavor, marinate the cubes overnight in a mix of red wine, olive oil, and herbs before cooking.
No red wine? Substitute beef broth with 1 tbsp balsamic vinegar for depth. The tomato paste can be replaced with 1 cup crushed tomatoes if preferred, though it won't develop the same concentrated richness. Fresh thyme is ideal, but dried thyme at one-third the amount works in a pinch. For a deeper flavor profile, add 1 tsp smoked paprika to the sear. The carrots can be swapped for parsnips or celery root if you're feeling adventurous—both add wonderful earthy notes. Always use low-sodium beef broth to control seasoning balance.
This stew tastes even better the next day as flavors meld. Store in an airtight container in the fridge for up to 5 days, or freeze portions for 3 months. For meal prep, double the recipe and freeze half immediately. The sauce thickens as it cools, so add a splash of broth when reheating. Serve with crusty sourdough to soak up every last bit of that velvety sauce—trust me, it's worth the extra minute to toast the bread.
Why You'll Love This Recipe
- Minimal Chopping Required: I swear by this—just dice the onion and carrots roughly, no need for fancy cuts. The beef arm practically melts in its own juices while the veggies soften perfectly alongside it.
- Deep Umami Bomb: That tomato paste isn’t just for show—it builds a rich, savory base that clings to every bite. Add fresh garlic at the end, and suddenly you’ve got restaurant-quality depth with zero fuss.
- Leftovers That Shine: Between us, this beef arm tastes better the next day. I’ll make a big batch on Sunday, slice it thin, and turn it into sandwiches or stir-fries all week—no one complains.
- Budget-Friendly Feast: A whole chuck roast for a fraction of the cost of steaks, and it stretches across meals like a champ. Honestly, it’s my go-to for feeding a crowd without breaking the bank.
Step-by-step instructions for beef arm stew
Transform tough beef arm into melt-in-your-mouth perfection through precise technique and patience.
Sear the Beef Arm for Deep Flavor
Heat a large Dutch oven over medium-high heat until hot. Add the 2 tablespoons olive oil and swirl to coat the bottom. Working in batches to avoid crowding, add the 3 lb beef arm (chuck roast) cut into 2-inch cubes and sear for 3-4 minutes per side until deep golden brown.
This high-heat searing creates the Maillard reaction, locking in rich flavors that will infuse the stew. Press down gently on the beef with a spoon to ensure even contact with the pan. Remove the beef and set aside temporarily on a plate.
Build the Flavor Base with Aromatics
In the same Dutch oven, add the 1 whole yellow onion chopped into ½-inch pieces and the 4 medium carrots cut into 1-inch chunks. Cook for 5-6 minutes until the onions soften and begin to caramelize, stirring occasionally.
Add the 6 cloves minced garlic and cook for 30 seconds until fragrant. Stir in the ½ cup tomato paste and cook for another 2 minutes until it darkens slightly. This aromatic base forms the flavor foundation for your stew.
Deglaze and Combine Liquids
Pour in the 1.5 cups red wine and scrape up all the browned bits from the bottom of the pot with a wooden spoon. This deglazing step captures all the concentrated flavors you've built. Let it simmer for 3-4 minutes until reduced by half.
Add the 4 cups beef broth, bringing everything to a gentle boil. Return the seared beef arm to the pot along with the 2 sprigs fresh thyme and 2 whole bay leaves. Season with the 1.5 teaspoons salt and 1 teaspoon freshly cracked black peppercorns.
Slow-Simmer to Tender Perfection
Reduce heat to low and cover the Dutch oven with a tight-fitting lid. Let the stew simmer gently for 2.5-3 hours until the beef is fork-tender and easily pulls apart. You'll know it's ready when the meat separates cleanly from the bone and the sauce has thickened.
Check occasionally and add a splash of water if the liquid reduces too much. The key is maintaining a gentle simmer - too vigorous a boil will make the stew tough. The longer it cooks, the more flavorful and tender the beef becomes.
Finish and Adjust Seasoning
Once the beef is tender, remove the 2 sprigs fresh thyme and 2 whole bay leaves from the stew. Taste and adjust seasoning if needed, adding more salt or pepper as required. The stew should be rich and well-seasoned with a balance of acidity from the wine and depth from the tomato paste.
Let the stew rest for 10-15 minutes before serving to allow the flavors to meld completely. Serve hot with crusty bread to soak up the delicious sauce. The beef should be so tender it falls apart with just a fork, and the broth should be rich and flavorful.
Pro Tips For Making Beef Arm
- SEAR THE ARM FIRST: Chuck roast is forgiving, but a quick 3-4 minute sear in a screaming-hot pan with oil before slow cooking builds flavor you’ll notice. I used to skip this—big mistake. The crust locks in juices and turns that tough connective tissue into melt-in-your-mouth goodness.
- CUT ONIONS THICK: Thin slices disappear into the sauce and turn mushy. Go for ½-inch chunks—they’ll soften but stay intact, adding texture and sweetness as they caramelize. (Yes, even if it looks like you’re making stew, not a pretty dish.)
- DON’T SKIP THE REST: Pull the beef arm out of the pot 10 minutes before it hits your target temp—it’ll keep rising. Tent it with foil and let it sit. I learned this after slicing into a dry, sad roast that had been carved too soon. (Your knife will thank you.)
- USE WHOLE GARLIC: Minced garlic burns fast and turns bitter. Smash 4-5 cloves with the flat side of your knife, peel, and toss them in whole—they’ll infuse the sauce without overpowering it. (And you won’t smell like a garlic factory afterward.)
Common mistakes when making great beef arm
Skipping the Sear
One of the biggest mistakes I see is skipping the sear entirely. That golden crust from the medium-high heat sear isn't just for looks—it's where the Maillard reaction happens, creating deep, complex flavors that infuse your stew. Without it, your beef will taste bland and flat. I recommend using a Dutch oven for this step—its heavy base distributes heat evenly and prevents burning. 🔥
Overcrowding the Pan
When searing beef arm cubes, many cooks make the mistake of dumping everything in the pan at once. This causes the meat to steam instead of brown, resulting in pale, flavorless pieces. Work in batches—no more than 2 pounds at a time—and give each piece space to develop that beautiful crust. A 12-inch cast-iron skillet works well for this.
Ignoring the Marinade
While the recipe doesn't require marinating, I strongly recommend it for beef arm's tougher cuts. A simple overnight marinade of red wine, olive oil, and herbs breaks down fibers and adds layers of flavor. Without it, your stew might still turn out fine, but it won't be as tender or flavorful. If short on time, at least let the beef sit in the aromatics for 30 minutes before searing.
Boiling Too Vigorously
The slow simmer is where magic happens, but many cooks accidentally turn it into a boil. This toughens the meat instead of tenderizing it. Maintain a gentle simmer—you should see just tiny bubbles at the edges. If it's bubbling vigorously, reduce the heat. A meat thermometer is your best friend here—aim for 205°F internal temperature for fall-apart tenderness.
Not Deglazing Properly
After searing, those browned bits stuck to the pot contain concentrated flavors. Many cooks skip deglazing with red wine or broth, missing out on rich depth. Always scrape up those bits with a wooden spoon—this step adds complexity that transforms a good stew into a great one. Let the liquid reduce by half before adding broth to concentrate those flavors even more.
Rushing the Resting Time
Finally, don't skip the 10-15 minute rest before serving. This allows the juices to redistribute throughout the meat, preventing dryness. Serving immediately can leave you with tough, stringy beef. Use this time to taste and adjust seasoning—your stew will only improve as it sits. The flavors meld beautifully during this final step. ✨
Nutrition facts
Frequently asked questions
What cut of beef works best for this stew if I can't find beef arm?
Chuck roast is the perfect substitute—it has similar fat content and connective tissue that breaks down beautifully during slow cooking. Ask your butcher to cut it into 2-inch cubes for even cooking. Beef shank also works well but has a slightly different texture profile.
Can I make this stew in a slow cooker instead of a Dutch oven?
Sear the beef first in a skillet, then transfer everything to your slow cooker. Cook on low for 8 hours or high for 5-6 hours, adding 1/2 cup water if needed. The slow cooker maintains gentle heat perfectly for tender results.
How do I know when the beef is fully tender?
The beef is ready when it easily separates with two forks and reaches an internal temperature of 205°F. Another test: press a piece gently—if it crumbles, it's perfect. The sauce should also be thickened and rich, with deep caramelized flavors.
What are the best sides to serve with this beef arm stew?
Classic pairings include creamy mashed potatoes, crusty sourdough bread, or roasted root vegetables like carrots and parsnips. For extra richness, try polenta or buttery egg noodles. The hearty stew stands up well to bold sides that complement its deep flavors.
Can I prepare this stew ahead of time?
This stew actually tastes better the next day as flavors deepen! Store in an airtight container in the fridge for up to 5 days or freeze portions for 3 months. When reheating, add a splash of broth to restore the sauce's consistency. The beef will be even more tender after resting.