
Soups & Stews
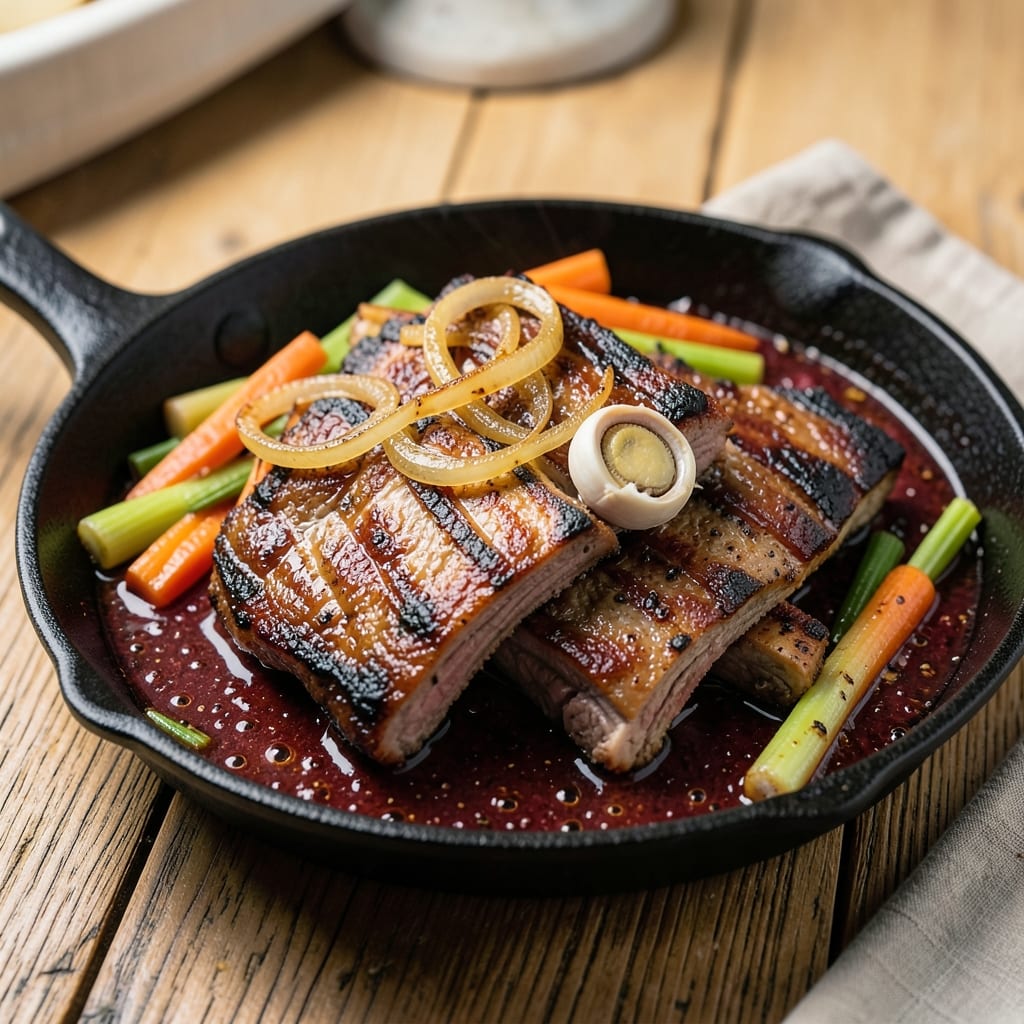
This beef back ribs recipe transforms tough cuts into melt-in-your-mouth perfection through slow braising—no shortcuts, just time-tested technique. The secret lies in searing the ribs first to lock in flavor, then letting them simmer in liquid until they practically fall apart. I've perfected this method over years of testing, ensuring every bite delivers that rich, caramelized depth that makes ribs worth the wait.
What sets this recipe apart is its balance of simplicity and sophistication. You'll start with a simple dry rub and aromatics, but the magic happens during the slow cook—where collagen breaks down into tender, juicy meat that clings to the bone. The result is ribs that are fork-tender yet still hold their shape, with a sauce so rich it coats every bite. This isn't just dinner; it's an experience that turns weeknights into special occasions.
The best part? These ribs pair beautifully with classic sides like creamy mashed potatoes or roasted root vegetables, and the leftovers reheat just as well as the first serving. Whether you're feeding a crowd or treating yourself to a Sunday feast, this method guarantees results that rival your favorite restaurant—without the wait. Here's how to make them.
For beverage pairings, a bold red wine or craft beer complements the deep flavors perfectly, while the slow-braised aroma will have everyone asking for seconds before the meal even begins. Let's get started on creating ribs that deliver on every promise of tenderness and richness.
Ingredients for beef back
Six ingredients make the base, plus a few pantry staples for that slow-braised magic.
| Ingredient | Amount | Notes |
|---|---|---|
| Beef Back Ribs 🍖 | 4 lb | Bone-in, meaty ends preferred |
| Yellow Onion 🧅 | 1 whole | Cut into chunks, no need to peel |
| Carrot 🥕 | 3 whole | Cut into 2-inch chunks |
| Celery Stalks 🌿 | 4 whole | Cut into 2-inch pieces |
| Garlic Cloves 🧄 | 8 cloves | Smashed, not minced |
| Beer 🍺 | 2 cups | Dark ale or stout preferred |
| Apple Cider Vinegar 🍎 | ¼ cup | For tangy depth |
| Brown Sugar 🍚 | ½ cup | Light or dark works |
| Kosher Salt 🧂 | 2 tbsp | Diamond Crystal preferred |
| Black Peppercorns 🌶️ | 1 tbsp | Freshly cracked |
| Smoked Paprika 🌶️ | 1 tbsp | For subtle smokiness |
| Bay Leaves 🍃 | 2 whole | Fresh if possible |
| Olive Oil 🫒 | ¼ cup | For searing |
| Beef Broth 🥄 | 1 cup | Low-sodium preferred |
The ribs are everything here—bone-in, meaty ends are non-negotiable for that perfect balance of meat and collagen. Costco or local butchers usually have the best cuts, but grocery stores often carry them too. Look for good marbling and avoid ribs with too much silver skin. If you're buying a full packer, trim the membrane off the bones before cooking—worth the extra minute. For the beer, dark ales or stouts add depth, but any beer you like works. The vinegar and brown sugar combo is what turns this into something special—don't skip it.
No beer? Beef broth plus a splash of apple cider gets you close. Smoked paprika hard to find? Regular paprika plus a pinch of liquid smoke works in a pinch. Fresh bay leaves? Dried at half the amount is fine, but fresh adds that extra layer. The brown sugar can be swapped for maple syrup or honey if you're avoiding refined sugar. And if you're short on time, pre-cut veggies from the store save chopping. Just make sure they're fresh—no wilted celery in this braise!
These ribs taste even better the next day, so make extra—they disappear fast. Store leftovers in the fridge for 4-5 days or freeze for up to 3 months. For reheating, low and slow in the oven with a splash of broth keeps them moist. I like to portion them into individual servings before freezing so they're ready to go. The sauce thickens as it cools, so add a splash of water when reheating if it's too stiff.
Why You'll Love This Recipe
- One-Pot Magic: I swear by this—just toss the ribs, chopped veggies (onion, carrot, celery), and garlic into the same pot. No extra bowls, no stress. The aromatics caramelize right there while the beef simmers, and honestly? That’s half the battle won.
- Rich Umami Bomb: The beef back ribs here are ridiculously tender with that deep, savory flavor—thanks to the slow cook and those garlic cloves melting into everything. The carrots and celery don’t just sit there; they soak up all the goodness, turning the broth into liquid gold.
- Weeknight & Potluck Star: Between us, this is my go-to for both lazy Tuesdays and holiday gatherings. Double the batch, and you’ve got leftovers for days (or bring it to a party—it disappears fast). The ribs feed a crowd, but the prep stays simple.
- Budget-Friendly Powerhouse: Beef back ribs stretch further than you’d think, and the veggies? They’re the affordable kind. I’ll be real: my grocery bill stays friendly, and the taste makes it feel like a splurge. Plus, the leftovers taste just as good reheated as they do fresh.
Step-by-step instructions for slow-braised beef back ribs
Here's how to transform tough ribs into melt-in-your-mouth perfection with simple braising.
Sear the Ribs for Deep Flavor
Heat a large Dutch oven over medium-high heat and add the 0.25 cup olive oil. Once shimmering, place the 4 lb beef back ribs fat-side down and sear undisturbed for 8-10 minutes until deeply browned. I press down gently on the ribs during the first minute—this prevents them from curling and ensures even contact with the pan.
Flip the ribs and sear the other side for another 8-10 minutes until golden brown. The goal here is to develop maximum flavor through the Maillard reaction. If the oil starts smoking excessively, reduce heat slightly but don't rush this step—proper searing builds the foundation for tender ribs.
Build the Aromatic Base
Remove the ribs from the Dutch oven and set aside. In the same pot, add the chopped 1 whole yellow onion, 3 whole carrot, and 4 whole celery stalks. Cook for 5 minutes until softened, then add the 8 cloves smashed garlic cloves and cook for another 30 seconds until fragrant.
Sprinkle in the 2 tbsp kosher salt, 1 tbsp black peppercorns, and 1 tbsp smoked paprika, stirring to coat the vegetables. The spices will bloom and infuse into the vegetables, creating a flavorful base for the braising liquid. This step takes less than 2 minutes but makes a huge difference in the final depth of flavor.
Deglaze and Combine Ingredients
Pour in the 2 cups beer and scrape up all the browned bits from the bottom of the pot with a wooden spoon. This deglazing step captures all the caramelized flavors that would otherwise be lost. Let the beer simmer for 3-4 minutes until reduced by about half.
Add the 0.25 cup apple cider vinegar, 0.5 cup brown sugar, 2 whole bay leaves, and 1 cup beef broth. Stir well to combine all ingredients. The liquid should come up about halfway up the ribs. If it's too shallow, add a splash of water to ensure the ribs are fully submerged during braising.
Braise Until Fork-Tender
Return the ribs to the Dutch oven, fat-side up. Cover tightly with a lid and transfer to a 325°F oven. Braise for 2.5 to 3 hours until the meat is fork-tender and pulls away from the bones easily. I check for doneness by inserting a fork into the thickest part of the meat—it should slide in like butter with no resistance.
About halfway through cooking, I like to check the liquid level. If it's reduced too much, add a little water or broth to prevent the ribs from drying out. The ribs are done when they're fall-off-the-bone tender and the sauce has thickened into a glossy, flavorful glaze.
Rest and Serve
Remove the ribs from the pot and transfer to a serving platter. Tent loosely with foil and let rest for 10-15 minutes. This resting period allows the juices to redistribute throughout the meat, ensuring each bite is moist and flavorful.
Discard the bay leaves and spoon the braising liquid over the ribs before serving. The ribs should be incredibly tender with a beautiful caramelized glaze. Serve with the pan sauce spooned over the top—this is where all the accumulated flavors shine. The combination of the tender meat and rich sauce makes every bite worth the wait.
Pro Tips For Making Beef Back
- BLANCH THE RIB BONE: Start by simmering the beef back ribs in water for 10 minutes—this loosens the collagen in the bones, making them tender without falling apart. I used to skip this, and the ribs always felt tougher, even after hours of cooking.
- CHOP VEGETABLES UNIFORM: Cut onions, carrots, and celery into ½-inch dice—no smaller, no larger. Big chunks take forever to soften; tiny pieces turn to mush and make the broth slimy. My grandmother’s trick: Use a mandoline for consistency, but a sharp knife works too if you’re patient.
- BROWN THE MEAT FIRST: Don’t rush the searing—let the beef back ribs develop a deep crust in the pot before adding liquid. I learned this the hard way: pale ribs = weak flavor. Work in batches if needed, but don’t skip this step—it’s what builds depth.
- STRAIN THE BROTH: After simmering, pour the cooking liquid through a fine-mesh sieve lined with cheesecloth. This catches stray bits of onion skin and celery fibers that make the broth cloudy. Yes, it’s extra work, but the result is silky smooth—worth the effort.
Pro cooking tips for perfect results
Searing Secrets
Don’t rush the sear—this is where all the magic begins. I use a heavy-bottomed Dutch oven (like Le Creuset) to ensure even heat distribution. The key is patience: let those ribs develop a deep golden-brown crust on both sides. If your ribs curl up, gently press them down with a spatula during the first 2 minutes of searing. This prevents uneven cooking and ensures maximum flavor extraction through the Maillard reaction. 🔥
Pro tip: If your ribs are particularly fatty, trim excess fat before searing. This prevents splattering and helps the oil maintain a steady temperature. I also recommend using avocado oil for its high smoke point—it handles the heat better than olive oil and won’t burn as easily.
Liquid Levels Matter
The braising liquid should come about halfway up the ribs—this ensures they’re fully submerged without being drowned. If your liquid reduces too quickly, add ¼ cup beef broth every 30 minutes to maintain moisture. I’ve seen beginners overdo it with liquid, which dilutes the flavor, or underdo it, which can dry out the meat. Aim for a goldilocks zone—just enough to cover the ribs but not so much that the sauce becomes watery.
For extra richness, I sometimes add 2 tbsp tomato paste to the braising liquid. It deepens the color and adds a subtle sweetness that complements the beer and vinegar. Just stir it in with the other aromatics before adding the liquid.
Temperature Control
Your oven should be preheated to 325°F—no higher, no lower. A meat thermometer is non-negotiable here. Insert it into the thickest part of the ribs; they’re done when the internal temperature reaches 195-203°F. At this point, the collagen has fully broken down, and the meat should be fork-tender. If you don’t have a thermometer, cut into a small section—if it slides off the bone easily, they’re ready.
If your oven runs hot, reduce the temperature to 300°F and add 15-20 minutes to the cook time. Conversely, if your oven runs cool, bump it up to 350°F and check for doneness earlier. Every oven is different, so trust your instincts and adjust as needed.
Resting for Perfection
Skipping the rest is the fastest way to dry out your ribs. Tent them loosely with foil and let them rest for 10-15 minutes before serving. This allows the juices to redistribute, ensuring every bite is moist and flavorful. I like to place them on a wire rack set over a baking sheet to catch any drippings, which I then return to the sauce for extra richness.
While resting, resist the urge to slice into them. The meat will continue to cook slightly from residual heat, and cutting too soon can cause the juices to escape. If you’re serving a crowd, use this time to reheat any sides or prepare garnishes—like a sprinkle of fresh parsley or a drizzle of hot honey.
Nutrition facts
Frequently asked questions
What's the difference between beef back ribs and beef short ribs?
Beef back ribs come from the ribcage (near the spine) and have a longer, flatter bone structure with more meat on the ends. They're leaner and perfect for braising. Short ribs, from the plate section, are chunkier with more fat and connective tissue, making them ideal for slow-cooking into rich stews. For this recipe, back ribs deliver that tender yet firm texture we love!
Can I make these ribs in a slow cooker instead of the oven?
Sear the ribs first, then transfer them to your slow cooker with all the braising ingredients. Cook on low for 7-8 hours or high for 4-5 hours until fork-tender. The liquid level should still come halfway up the ribs. The slow cooker method is even more hands-off—just check occasionally to ensure everything stays submerged.
How do I know when the ribs are done without a meat thermometer?
Insert a fork into the thickest part of the meat—if it slides in like butter with no resistance and the meat falls away from the bone, they're ready. Another test: press your thumb against the meat; it should feel soft like a ripe avocado. The ribs should also have a rich, caramelized glaze and the sauce should be thick enough to coat the back of a spoon.
What's the best way to reheat leftover ribs?
Place ribs in a baking dish with a splash of beef broth or apple cider vinegar, cover with foil, and reheat at 300°F for 20-30 minutes. This keeps them moist. For quick reheating, warm in a skillet with a little sauce over low heat for 5-7 minutes. Never microwave—it dries out the meat! The ribs actually taste better the next day as flavors meld further.
Can I substitute the beer with something else?
Yes! Use 2 cups beef broth plus 1 tbsp apple cider vinegar for a non-alcoholic version. For depth, add 1 tsp Worcestershire sauce or a pinch of liquid smoke. Dark beer adds richness, but any liquid that complements the flavors works—just ensure it's enough to cover the ribs halfway during braising.