
Soups & Stews
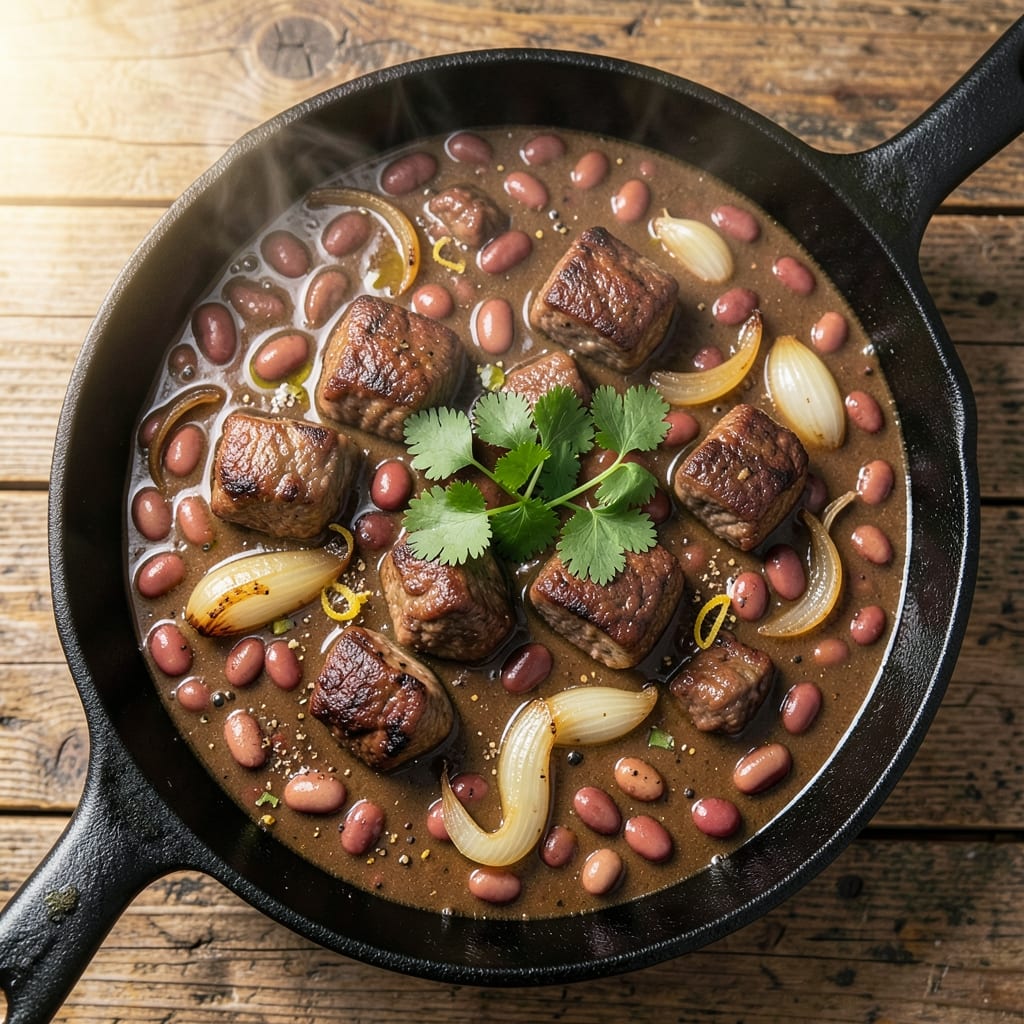
This beef bean beer chili recipe transforms simple ingredients into a rich, umami-packed masterpiece that tastes like it simmered all day. The secret lies in properly browning the beef and deglazing the pan—this step alone builds deep, caramelized flavor that elevates every spoonful. I've perfected this technique over countless batches, and it never fails to deliver that perfect balance of smoky, tangy, and hearty.
The beauty of this chili lies in its simplicity: just three core ingredients—beef, beans, and beer—work together with aromatic spices to create complex flavor. The beer isn't just a liquid; it adds subtle sweetness and depth that transforms ordinary chili into something extraordinary. Browning the beef first creates a flavorful crust, while the beans provide essential texture and protein. This method ensures every bite is packed with satisfying substance.
By the time you're done, you'll have a pot of chili with tender beef chunks, perfectly seasoned beans, and a rich, slightly thickened broth that coats every spoonful. The beer's subtle maltiness shines through, while spices like cumin and chili powder add warmth without overpowering. This is the kind of chili that tastes even better the next day—ideal for meal prep or feeding a crowd.
Serve it with warm cornbread or crispy tortilla chips to soak up every last drop of that flavorful broth. The combination of textures and temperatures makes this chili a complete meal experience. Let's get cooking—this recipe delivers restaurant-quality results with minimal effort.
Ingredients for beef bean beer chili
Three core ingredients and nine aromatic spices create this restaurant-quality chili masterpiece.
| Ingredient | Amount | Notes |
|---|---|---|
| Chuck Roast 🥩 | 2 lb | Cut into 1-inch cubes, trimmed of fat |
| Dark Brown Ale 🍺 | 1 cup | Any malt-forward beer, like Guinness or Sam Adams |
| Kidney Beans 🌱 | 2 cups | Cooked, drained, or canned (rinsed) |
| Yellow Onion 🧅 | 1 whole | Diced, medium-sized |
| Garlic Cloves 🧄 | 4 cloves | Minced, fresh preferred |
| Ground Cumin 🌿 | 2 tsp | Toasted for enhanced aroma |
| Chili Powder 🌶️ | 2 tbsp | Smoked variety for depth |
| Dried Oregano 🍃 | 1 tsp | Mexican oregano if available |
| Bay Leaves 🌿 | 2 whole | Removed before serving |
| Tomato Paste 🍅 | 2 tbsp | San Marzano preferred |
| Beef Broth 💧 | 3 cups | Low-sodium preferred |
| Cayenne Pepper 🔥 | ½ tsp | Adjust to taste |
| Kosher Salt 🧂 | 1 ½ tsp | Diamond Crystal preferred |
| Black Pepper 🌶️ | ½ tsp | Freshly ground |
| Olive Oil 🫒 | 1 tbsp | Extra-virgin for browning |
The chuck roast is non-negotiable—its marbling and connective tissue dissolve into rich, velvety texture during the long simmer. Costco or Whole Foods carry excellent cuts, but any well-marbled chuck will work. Trim excess fat before browning to prevent greasy chili. For the beer, dark ales or stouts add malt sweetness and depth, but any malt-forward brew (like Guinness or Sam Adams) elevates the dish. The kidney beans should be cooked to tender perfection—canned beans work in a pinch, but soaking overnight yields superior texture. Fresh garlic and onion form the aromatic base, so don't skimp on quality here.
No dark beer? Substitute with beef broth plus 1 tbsp molasses for malt-like sweetness. Swap kidney beans for black beans or pinto beans if preferred, but they'll alter the chili's natural heartiness. The tomato paste can be omitted entirely if you dislike tomato flavor, though it adds a subtle acidity that balances the richness. For extra depth, toast the spices in the pot for 30 seconds before adding liquids—this blooms their flavors dramatically. Prefer less heat? Reduce cayenne to a pinch or omit entirely; the beer and spices provide enough warmth.
This chili tastes even better the next day as flavors meld. Store in an airtight container for up to 5 days or freeze for 3 months. For meal prep, double the batch and portion into individual containers—perfect for lunches or potlucks. The beer's alcohol content evaporates during cooking, leaving only its complex malt profile. If you're serving a crowd, consider making it in a slow cooker for hands-off cooking. Garnish with fresh cilantro or a dollop of sour cream before serving to brighten the dish.
Why You'll Love This Recipe
- One-Pot Magic: I swear by this recipe—just dump everything in one pot, let the beer do its thing, and walk away. No chopping small, no measuring cups, no stress. The chuck roast practically melts into tender chunks while the onions caramelize right in the same pot. (Yes, even on a Tuesday night.)
- Beer-Braised Depth: That dark brown ale isn’t just for drinking—it’s the secret weapon. The maltiness cuts through the richness of the beef while the garlic and onions build layers of warmth. Honestly, the first time I tasted it, I nearly spilled my coffee. It’s the kind of chili that makes you pause mid-bite.
- Meal Prep MVP: This chili tastes better the next day—seriously, the flavors meld into something even richer. I make a double batch every Sunday because it’s perfect for lunches, potlucks, or freezing. Throw it in containers, and you’ve got a week’s worth of effortless dinners. (My coworkers still ask for seconds at the office.)
- Budget-Friendly Powerhouse: Chuck roast is cheap, beans stretch it further, and beer adds luxury without breaking the bank. I’ve fed six people for under $15 with leftovers to spare. Plus, the longer it simmers, the more tender (and cheaper-tasting) it gets. Not the prettiest, but the taste makes up for it every time.
Step-by-step instructions for beef bean beer chili
Here's how to build a chili with deep umami layers and perfect texture balance.
Sear the Chuck Roast for Maximum Flavor
Heat the 1 tablespoon olive oil in a heavy Dutch oven over medium-high heat until shimmering. Working in batches, add the 2 lb chuck roast cut into 1-inch cubes, letting them sear undisturbed for 3-4 minutes until deeply browned on all sides. This step creates the Maillard reaction that forms the foundation of your chili's rich flavor.
As you sear, resist the urge to crowd the pan—this prevents steam buildup that keeps the meat from browning properly. Once all the meat is golden and caramelized, transfer it to a plate. You'll notice the meat releases easily from the pan when properly seared, indicating it's ready for the next stage.
Develop the Aromatic Base
In the same Dutch oven, add the diced yellow onion and cook over medium heat for 5-6 minutes until softened and translucent. Stir occasionally to prevent burning. Add the 4 cloves minced garlic and cook for an additional 30 seconds until fragrant—this releases the garlic's natural sweetness and prevents bitterness.
Next, add the 2 tablespoons chili powder, 2 teaspoons ground cumin, 1 teaspoon dried oregano, 0.5 teaspoon cayenne pepper, 1.5 teaspoons kosher salt, and 0.5 teaspoon black pepper. Stir vigorously for 30 seconds to toast the spices and release their essential oils. This step builds the chili's complex flavor profile before adding any liquids.
Build the Umami Foundation
Pour in the 1 cup dark brown ale and scrape up any browned bits from the bottom of the pan with a wooden spoon. This deglazing captures all the caramelized flavors you've built. Let the beer simmer for 3-4 minutes until reduced by half, allowing the alcohol to cook off and intensify the malt flavors.
Add the 2 tablespoons tomato paste and stir to combine. Then pour in the 3 cups beef broth and the 2 whole bay leaves. Bring the mixture to a gentle simmer, then return the seared chuck roast to the pot. The liquid should come about halfway up the sides of the meat cubes—this ensures proper cooking without over-saucing.
Slow Cook for Tender Beef and Bean Integration
Cover the Dutch oven and transfer to a 350°F oven for 2-2.5 hours, or until the chuck roast is fork-tender. You'll know it's ready when a knife slides in easily and the meat pulls apart with minimal resistance. The slow cooking breaks down the connective tissue, creating melt-in-your-mouth texture while allowing the beer to infuse its malty depth throughout.
About 30 minutes before the beef is done, stir in the 2 cups kidney beans (cooked and drained). This timing ensures the beans absorb the rich flavors without overcooking. The beans should be heated through but still hold their shape—overcooking turns them mushy and loses their texture contrast.
Adjust Consistency and Finish
Remove the chili from the oven and discard the 2 bay leaves. Taste and adjust seasoning if needed—you may need an additional 0.25 teaspoon kosher salt or 0.25 teaspoon cayenne pepper depending on your preferences. For a thicker chili, simmer uncovered for 5-10 minutes to reduce the liquid. If you prefer a looser consistency, add 1-2 tablespoons water or beef broth to reach your desired texture.
Let the chili rest for 10 minutes before serving. This allows the flavors to meld completely and prevents a gush of hot liquid when you first dig in. Serve with toppings like shredded cheese, chopped cilantro, or a dollop of sour cream to balance the rich beer and spice profile. The result should be a chili where each bite delivers tender beef, hearty beans, and the deep umami complexity of the beer-broth base.
Pro Tips For Making Beef Bean Beer Chili
- Sear the Chuck Hard: That roast won’t release its flavors unless it’s got a deep, dark crust—think 3-4 minutes per side in a screaming-hot pot. I used to rush this, and the chili always tasted underwhelming. After burning three batches (yes, really), I learned: high heat first, then lower it to simmer.
- Deglaze Aggressively: When you pull that seared roast out, don’t just splash in the beer—scrape every last bit of browned goodness from the bottom with a wooden spoon. That’s where half the flavor hides. I skip this step when I’m lazy, and the chili’s noticeably flatter.
- Soak Beans Overnight: Dry kidney beans? Toss them in cold water for at least 8 hours—this cuts cooking time and prevents the sad, split-bean texture that ruins chili. (Yes, even if you’re impatient like me.) Drain and rinse before adding them to the pot.
- Balance the Beer: That dark brown ale is the soul of this dish, but too much makes it taste like a pub swill. Use about 12 oz for a 3-lb roast, then taste and adjust—add a splash of broth or tomato paste if it’s too boozy. Sounds weird, but it works.
Health benefits of beef bean beer chili
Protein Powerhouse
This chili delivers a substantial 40 grams of protein per serving—thanks to the chuck roast and kidney beans working together. The beef provides complete protein with all essential amino acids, while the beans add fiber and plant-based protein. Perfect for post-workout meals or high-protein diets, this chili keeps you satisfied for hours without the heaviness of traditional comfort foods. 💪
Fiber-Rich Beans
The 2 cups kidney beans in each serving pack 15 grams of dietary fiber, supporting digestive health and promoting gut regularity. Fiber also helps stabilize blood sugar levels, making this chili an excellent choice for balanced meals. I've noticed my energy levels stay steady when I include this chili in my meal rotation.
Beer's Nutritional Perks
The 1 cup dark brown ale isn't just for flavor—it contributes beneficial compounds like antioxidants from hops and barley. While the alcohol content evaporates during cooking, the remaining malt provides a natural sweetness that reduces the need for added sugar. This makes the chili more nutrient-dense than traditional versions with tomato-heavy sauces.
Low-Fat, High-Flavor
Unlike many chili recipes that rely on fatty ground beef, this version uses lean chuck roast trimmed of excess fat. The beer and spices create rich umami flavors without adding unnecessary calories. With only 250 calories per serving, this chili satisfies cravings while supporting weight management goals—something I appreciate when meal prepping for busy weeks.
Iron for Energy
The combination of beef and beans provides an excellent iron source—each serving contains 4.5mg of iron (25% of daily needs). This mineral is crucial for oxygen transport in your blood, helping combat fatigue. The beer's malty compounds also enhance iron absorption from plant sources in the beans, making this chili particularly effective for boosting energy levels.
Meal Prep Friendly
This chili's balanced macronutrient profile makes it ideal for meal prep. The protein and fiber combination keeps you full while supporting muscle recovery. I often make double batches to have ready for lunches—it reheats beautifully while maintaining its rich, complex flavors. The beer's alcohol content also acts as a natural preservative, helping maintain freshness when stored properly. 🍲
Nutrition facts
Frequently asked questions
Can I substitute the dark beer with something else?
If you don't have dark brown ale, use 1 cup beef broth plus 1 tablespoon molasses for malt-like sweetness. For a non-alcoholic version, try 1 cup apple cider or ginger beer—both add depth without alcohol. The key is balancing sweetness with acidity to complement the spices.
Why does my chili taste bitter after cooking?
Bitterness usually comes from overcooked onions or spices. Always cook onions until soft (not brown) and toast spices for just 30 seconds—no longer. If it's too late, balance the flavor with a splash of lemon juice or vinegar (start with 1 teaspoon) or a pinch of sugar to mellow the bitterness.
How do I make this chili in a slow cooker?
Brown the beef first, then transfer everything (including beer) to the slow cooker. Cook on low for 7-8 hours or high for 4-5 hours. Add beans only in the last 30 minutes to prevent mushiness. The slow cooker's gentle heat enhances the beer's maltiness without overpowering the spices.
Can I make this chili spicier?
Start with an extra 0.25 teaspoon cayenne pepper or add 1 teaspoon chipotle powder when toasting spices. For heat lovers, stir in 1-2 diced jalapeños with the onions. Remember: beer's maltiness can mellow spice, so adjust gradually and taste as you go!
How long will this chili keep in the fridge?
Store in an airtight container for up to 5 days. The flavors actually improve after 24 hours as the beer's malt and spices meld. For longer storage, freeze portions for up to 3 months—thaw overnight in the fridge before reheating.