
Main Courses
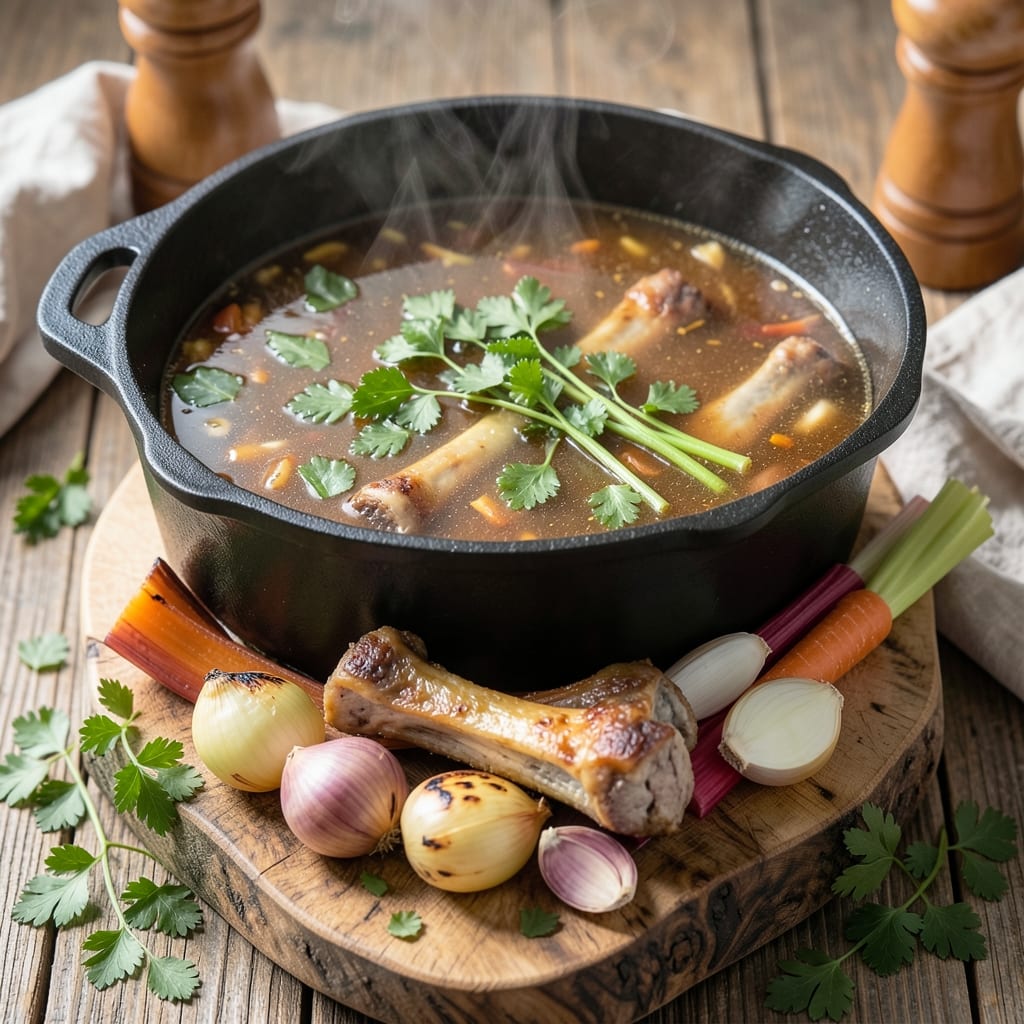
This basic beef stock recipe transforms simple ingredients into liquid gold for your cooking repertoire—rich, aromatic, and packed with umami depth that elevates everything from soups to sauces. The secret lies in patience: simmering beef bones and aromatics for hours extracts maximum flavor without bitterness, creating a foundation that turns ordinary dishes into extraordinary ones.
What sets this recipe apart is its foolproof technique—skimming foam, using cold water, and maintaining a gentle simmer—all critical steps that ensure a clear, flavorful stock. Unlike store-bought versions, homemade stock develops layers of complexity from scratch, with no additives or preservatives. The result is a versatile, restaurant-quality base that freezes beautifully for future use.
By the time you strain the finished stock, you’ll have a golden, aromatic liquid that’s ready to transform braises, risottos, or even gravies. The process may take time, but the reward is a pantry staple that makes every meal taste more sophisticated. Here’s how to create it from start to finish.
Whether you’re a home cook building foundational skills or a seasoned chef refining techniques, this beef stock recipe delivers unmatched depth with minimal effort. The key is attention to detail—from selecting bones to controlling the simmer—each step ensures a result that’s both professional and approachable. Let’s begin.
Ingredients for basic beef stock
Twelve ingredients, hours of simmering, restaurant-quality depth in every cup.
| Ingredient | Amount | Notes |
|---|---|---|
| Beef Bones (Knuckle or Marrow) 🦴 | 4 lb | Raw, uncooked, with some meat |
| Yellow Onions 🧅 | 2 whole | Peeled, halved, root end intact |
| Carrots 🥕 | 4 whole | Scrubbed, cut into 2-inch chunks |
| Celery Stalk 🌿 | 4 whole | Cleaned, cut into 2-inch pieces |
| Garlic Cloves 🧄 | 8 cloves | Peeled, smashed with side of knife |
| Fresh Parsley Stems 🌿 | 4 whole | Tough stems only, chopped |
| Fresh Thyme Sprigs 🌿 | 4 whole | Stems included, tied with twine |
| Fresh Bay Leaves 🌿 | 2 whole | Dried leaves work in pinch |
| Black Peppercorns 🌶️ | 1 tbsp | Crushed lightly in mortar |
| Kosher Salt 🧂 | 1 tbsp | Diamond Crystal preferred |
| Cold Water 💧 | 12 cups | Filtered preferred for clarity |
| Apple Cider Vinegar 🍏 | 1 tbsp | Brightens flavor profile |
The bones are non-negotiable—knuckle or marrow bones deliver the richest gelatin and flavor. Local butchers often have them at a fraction of grocery store prices, and they'll even cut them for you. Avoid bones with meat already cooked on them, as this can make the stock cloudy. For maximum depth, roast the bones at 375°F for 20 minutes before simmering to develop a deeper caramelized flavor. The aromatics—onions, carrots, celery—form the classic 'mirepoix' base; organic produce reduces dirt particles that can cloud your stock. Fresh herbs like thyme and parsley add complexity, but if you're short on time, dried herbs at half the quantity work in a pinch.
No fresh bay leaves? Dried bay leaves are fine, though they're more potent. Substituting vinegar? Lemon juice works too, though apple cider vinegar has a more nuanced flavor. For a lighter stock, reduce the salt to ½ teaspoon—this recipe assumes you'll season dishes later. The water should be cold when added; hot water can cause the stock to cloud. If you're making a large batch, consider using a stockpot with a lid—this helps retain moisture and reduces evaporation. For a clearer stock, skim foam aggressively during the first 30 minutes of simmering, as this removes impurities before they break down.
Store finished stock in airtight containers—glass jars or freezer-safe bags work best. It keeps 5-7 days refrigerated or up to 6 months frozen. For freezing, leave 1-inch headspace to prevent ice crystals from bursting containers. Label with date and contents—beef stock, 4 quarts. When reheating, bring to a gentle simmer (never boil) to preserve clarity. This stock forms a gelatinous consistency when chilled, which is normal and indicates high collagen content. Reserve the last cup for gravies or sauces—it's the most flavorful portion.
Why You'll Love This Recipe
- I swear by this combo: just bones, onion, carrots, celery, and garlic—no fancy herbs or weird spices. The bones alone give that deep, rich flavor, while the veggies add sweetness that balances everything out. Honestly, it’s the kind of recipe where you can’t mess it up.
- No-Fuss Ingredients: I swear by this combo: just bones, onion, carrots, celery, and garlic—no fancy herbs or weird spices. The bones alone give that deep, rich flavor, while the veggies add sweetness that balances everything out. Honestly, it’s the kind of recipe where you can’t mess it up.
- Rich Umami Bomb: That first sip? Pure satisfaction. The marrow bones melt into the broth, releasing fat that turns the stock into something velvety and deeply savory. Even my picky husband takes seconds—no joke.
- Freezer-Friendly Gold: Make a big batch on Sunday, freeze it in ice cube trays, and boom—you’ve got instant flavor for weeks. I toss these cubes into pasta, risottos, or even soups without a second thought. It’s my secret weapon for lazy nights.
Step-by-step instructions for crafting rich beef stock
Transform humble bones into a velvety foundation for countless dishes with this precise method.
Prepare the Bones for Maximum Flavor Extraction
Begin by examining the 4 lb beef bones (knuckle or marrow) for any remaining meat scraps. Use a sharp knife to scrape off any attached connective tissue or muscle—this releases additional gelatin during simmering. Place the bones in a large stockpot and add the 12 cups cold water. The cold water helps extract more collagen from the bones.
Add the 1 tbsp apple cider vinegar to the pot. This acid not only brightens the final flavor but also helps break down proteins in the bones, enhancing gelatin release. Bring the mixture to a boil over medium-high heat, then immediately reduce to a gentle simmer. Skim off any foam or impurities that rise to the surface during the first 10 minutes—this ensures clarity in your finished stock.
Build the Vegetable Base for Depth
While the bones simmer, prepare the aromatic vegetables. Peel and halve the 2 whole yellow onions, leaving the root end intact to prevent them from falling apart. Cut the 4 whole carrots into 2-inch chunks and the 4 whole celery stalks into similar pieces. These vegetables will form the "soffrito" that infuses the stock with sweetness and earthiness.
Add the onion halves, carrot chunks, and celery pieces to the simmering pot. Let everything cook together for 15 minutes, stirring occasionally. This allows the vegetables to soften slightly and release their natural sugars, which caramelize and deepen the stock's flavor profile. The bones should remain submerged—add a little more cold water if needed.
Incorporate Aromatics and Seasonings
Peel and smash the 8 cloves garlic with the side of your knife to release their oils without turning to paste. Add them to the pot along with the 4 whole fresh thyme sprigs (tied together with twine), 2 whole fresh bay leaves, 1 tbsp crushed black peppercorns, and 1 tbsp kosher salt. These seasonings will create a complex flavor matrix—thyme adds herbal notes, bay leaves contribute piney depth, and peppercorns bring subtle heat.
Simmer the entire mixture gently for 2 hours. Maintain a low, steady simmer—never a rolling boil—to prevent the stock from becoming cloudy. The bones should remain mostly submerged; if they rise, add more cold water as needed. This long simmering time is critical—it allows collagen to break down into gelatin, creating that signature velvety texture in your finished stock.
Strain and Finish for Clarity
After 2 hours, remove the pot from heat and let the contents settle for 10 minutes. This resting period allows any remaining sediment to drop to the bottom. Line a fine-mesh strainer with cheesecloth or a coffee filter if you desire extra clarity, then carefully strain the stock into a clean bowl or pitcher.
Discard the solids in the strainer. For maximum flavor concentration, you can press the vegetables and bones gently with a wooden spoon to extract every last drop of liquid. The resulting stock should be rich, amber-colored, and deeply aromatic. If you're not using it immediately, let it cool to room temperature before refrigerating or freezing. This stock forms the backbone of countless soups, sauces, and braises—its depth of flavor will elevate any dish it graces.
Pro Tips For Making Basic Beef Stock
- BLISTER THE BONES FIRST: I learned this the hard way—skipping the sear means your stock will taste like a sad, watery broth. Get those beef bones deep brown in a hot pot (no oil needed) before adding liquid. The crust locks in flavor, and that’s where the depth comes from.
- CHOP VEGETABLES UNEVENLY: No need for perfect dice—roughly chop onions, carrots, and celery into 1-inch chunks. Smaller bits release flavor faster, but bigger pieces won’t burn. Think "jagged" over "precise," and your stock will be richer by the end.
- SKIP THE GARLIC UNTIL LATER: Tossing garlic in at the start? You’ll end up with bitter, burnt cloves. Add whole cloves (peeled) only in the last 30 minutes—just enough time to perfume the stock without turning it acrid.
- STRAIN TWICE, BUT NOT TOO FINE: First pass with a coarse strainer removes big bits. Second pass through a cheesecloth catches finer particles—this makes a difference. But don’t go overboard; a little collagen in your stock is what gives it body. (Yes, even if it looks cloudy.)
Make-ahead tips for this dish
Batch Prep Strategy
Make a double batch of beef stock whenever you have time—it’s the perfect make-ahead project for weekends or holidays. I like to prep 8 quarts at once using an 8-quart stockpot and store it in quart-sized glass jars. This way, you’ll always have stock on hand for soups, braises, or quick sauces without last-minute prep. The extra effort pays off when you’re mid-recipe and realize you’re low on liquid. 💫
Freezer-Friendly Containers
Use silicone ice cube trays for single-use portions—freeze stock in 1-cup cubes to thaw quickly for gravies or sauces. For larger quantities, opt for freezer-safe glass jars or Mason jars with 1-inch headspace to prevent cracking. Label each container with the date and contents—beef stock, 4 quarts, date—so you can track freshness. I store mine in a dedicated freezer bin for easy access. ❄️
Slow Cooker Adaptation
Transform your 6-quart slow cooker into a stock-making machine by adding all ingredients and simmering on low for 8-10 hours. This hands-off method is perfect for busy days—just dump in the bones, aromatics, and water, then let it work its magic. The slow cooker’s gentle heat ensures even flavor extraction without constant monitoring. I often use this method when I’m prepping for a week of meals ahead. 🔥
Flavor Boosters for Storage
Add a splash of white wine (about ¼ cup) or 1 tsp Worcestershire sauce to the stock before freezing for an extra layer of umami. These additions enhance depth without altering the stock’s fundamental flavor profile. For a lighter stock, reduce the salt to ½ teaspoon before freezing—you can always add more later. I like to keep a small batch with these boosters reserved for risottos or pan sauces.
Thawing and Reusing
Thaw frozen stock in the refrigerator overnight for best results—this preserves clarity and prevents bacterial growth. For a quick thaw, place the sealed container in cold water and change the water every 30 minutes until fully thawed. Once thawed, reheat gently on the stovetop to 165°F and use immediately. I often save the last cup of stock from a batch for gravies or pan deglazing—it’s the most flavorful portion. 💡
Nutrition facts
Frequently asked questions about beef stock
Can I use beef bones with meat still attached?
Yes, but it's best to remove any large pieces of meat first. Small scraps will dissolve during simmering, but large chunks can make the stock cloudy. For maximum clarity, scrape off any visible meat before starting. The gelatin-rich bones are what create that velvety texture we all love!
Why does my stock taste bitter?
Bitterness usually comes from either boiling too hard (which releases bitter compounds) or leaving the bones too long (especially if they're small). Maintain a gentle simmer and don't exceed 3-4 hours for most beef bones. Skimming foam in the first 10 minutes also helps remove impurities before they develop bitter flavors.
How do I make a lighter-colored stock?
For a lighter stock, use cold water instead of hot, and skim aggressively during the first 30 minutes. Avoid roasting the bones first (which darkens the stock) and use only the toughest cuts of meat. The classic 2:1 ratio of water to bones helps maintain clarity while still extracting maximum flavor.
Can I substitute chicken stock ingredients?
You can use the same vegetable base (onions, carrots, celery), but replace beef bones with chicken bones or frames and adjust simmering time to 1.5-2 hours. The flavor profile will be lighter, but the technique remains identical. For a beefy flavor, add 1 tsp Worcestershire sauce or a splash of red wine to the finished stock.
What's the best way to store homemade beef stock?
Store in airtight containers—glass jars or freezer bags work best. It keeps 5-7 days refrigerated or up to 6 months frozen. For freezing, leave 1-inch headspace to prevent ice crystals. Label with date and contents—this stock forms a gelatinous consistency when chilled, which is normal and indicates high collagen content!