
Soups & Stews
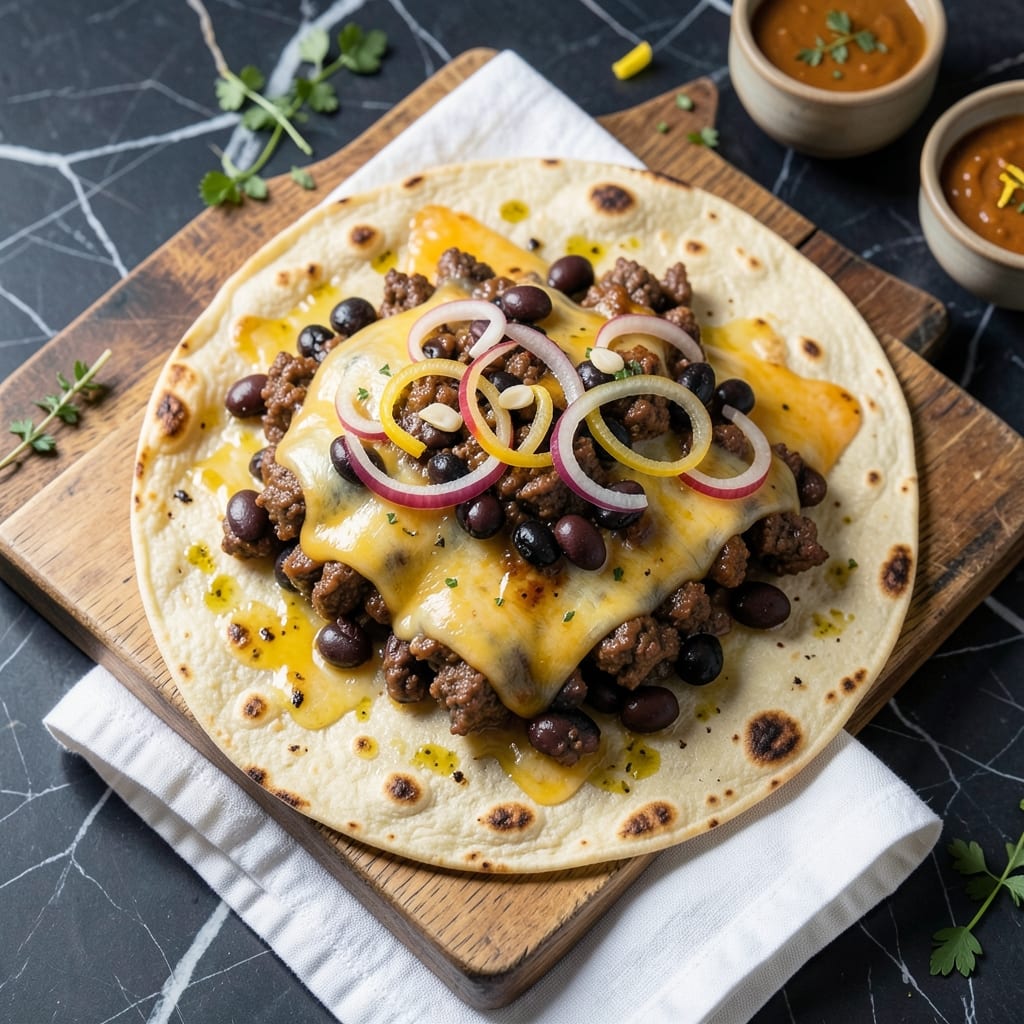
This beef and bean quesadilla recipe delivers restaurant-quality crunch with every bite—smoky black beans, tender seared beef, and perfectly melted cheese between crispy tortillas. The secret lies in properly seasoning the beef and beans before assembling, ensuring maximum flavor in every layer. I've perfected this technique to create a dish that's hearty enough for dinner but quick enough for a weeknight.
What sets these quesadillas apart is the textural contrast—crispy tortillas on the outside, gooey cheese on the inside, and the satisfying bite of black beans and beef. Using corn tortillas gives that authentic Mexican crunch, while flour tortillas offer a softer option. The beef gets a quick sear in the pan for added flavor, while the black beans soak up all the smoky spices.
By the time you're done, you'll have golden, crispy quesadillas that practically fold in half with each bite. The cheese melts into a creamy blanket around the beef and beans, creating a satisfying pull-apart texture. Serve with your favorite toppings—sour cream, salsa, or guacamole—to complete the meal.
This recipe is foolproof and ready in 20 minutes, making it perfect for busy evenings. The combination of protein-rich beef and fiber-packed beans ensures a balanced meal that everyone will love. Let's get cooking!
Ingredients for beef and bean quesadilla
Eight essential ingredients transform into golden, crispy quesadillas with smoky depth and satisfying texture.
| Ingredient | Amount | Notes |
|---|---|---|
| Ground Beef (Chuck or Sirloin) 🥩 | 1 lb | 80% lean, finely chopped |
| Black Beans (Canned or Cooked) 🌿 | 1 ½ cups | Drained and rinsed |
| Corn Tortillas (Medium Size) 🌽 | 8 whole | For 4 quesadillas, 2 per side |
| Shredded Monterey Jack Cheese 🧀 | 2 cups | Or Mexican blend cheese |
| Yellow Onion 🧅 | ½ cup | Finely diced |
| Garlic Cloves 🧄 | 3 cloves | Minced |
| Ground Cumin 🌿 | 1 tsp | Toasted for deeper flavor |
| Smoked Paprika 🌶️ | 1 tsp | For smoky flavor |
| Chili Powder 🌶️ | ½ tsp | Adjust for heat preference |
| Salt 🧂 | ½ tsp | Diamond Crystal preferred |
| Black Pepper 🌶️ | ¼ tsp | Freshly ground |
| Olive Oil 🫒 | 1 tbsp | For searing beef |
| Vegetable Oil (for frying) 🫒 | ¼ cup | Or lard for extra crispiness |
The beef is the foundation—chuck or sirloin gives the best texture, but ground beef works too. Trader Joe's and Costco often have pre-chopped options that save time. Look for 80% lean or less for richer flavor. Black beans should be low-sodium if using canned, or cooked from dry for maximum texture. The corn tortillas are non-negotiable for that authentic crunch—Mission brand is my go-to, but any medium-sized corn tortillas work. For the cheese, Monterey Jack or a Mexican blend melts beautifully and stays gooey.
No ground beef? Lentils or extra black beans work in a pinch, though texture will differ. Short on black beans? Diced bell peppers or zucchini add moisture. The spices are key—smoked paprika and cumin create that signature Mexican flavor. If you don’t have smoked paprika, regular paprika plus a pinch of liquid smoke gets you close. For extra crispiness, vegetable oil or lard beats butter every time. The onions and garlic can be swapped for asafetida powder if you're avoiding alliums, though I don’t recommend it—fresh is best.
Prep the beef and beans first—they’ll keep in the fridge for 3 days if stored in airtight containers. The cheese should stay in its original packaging until ready to use, or wrapped tightly in parchment. Tortillas last 1 week in a cool, dry place, but once opened, use within 3 days. For leftovers, wrap quesadillas in foil and reheat in a skillet for 2-3 minutes per side—they taste even better the next day with all flavors melded.
Why You'll Love This Recipe
- Five-Ingredient Magic: I swear by this combo—ground beef, black beans, and cheese alone make it hearty, but that crispy onion caramelizing in the pan? It turns a simple meal into something that tastes like it took hours.
- Crispy-Creamy Crunch: The moment the tortilla hits the skillet, that golden edge forms while the inside stays soft and melty. Between us, it’s the kind of texture that makes you pause mid-bite just to enjoy it.
- Lunchbox Hero: Make a double batch, slice them up, and you’ve got packed lunches for the week. My kids actually eat their leftovers—honestly, that’s the real win right there.
- Budget-Friendly Powerhouse: Ground chuck and canned beans stretch this recipe to feed four for under $10. I’ll be real: it’s my go-to when groceries feel tight, but no one ever guesses it’s budget-friendly.
Step-by-step instructions for smoky black bean and cheese quesadillas
Here's how to build quesadillas with perfectly crispy tortillas and rich, smoky filling.
Sear the Ground Beef with Aromatics
Heat the 1 tablespoon olive oil in a large skillet over medium-high heat until shimmering. Add the 1 lb ground beef (chuck or sirloin) and cook, breaking it apart with a wooden spoon, until it loses its raw color and begins to brown—about 5-6 minutes. This is where the meat develops deep flavor through the Maillard reaction.
Push the beef to one side of the pan and add the 0.5 cup finely diced yellow onion and 3 minced garlic cloves. Sauté for 2-3 minutes until the onions soften and become translucent. Stir the beef back into the pan, then add the 1 teaspoon ground cumin, 1 teaspoon smoked paprika, 0.5 teaspoon chili powder, 0.5 teaspoon salt, and 0.25 teaspoon black pepper. Cook for another 1-2 minutes until the spices are fragrant and evenly distributed. The mixture should be richly colored and aromatic.
Warm and Season the Black Beans
Transfer the cooked beef mixture to a medium bowl and let it cool slightly. Stir in the 1.5 cups drained and rinsed black beans, mixing well to combine. The beans should absorb the smoky flavors from the spices and beef. If the mixture seems too dry, add 1-2 tablespoons of water to help bind everything together. This step ensures your filling stays cohesive when assembling the quesadillas.
Taste the mixture and adjust seasoning if needed—another pinch of salt or a dash of chili powder can elevate the flavor. The filling should be hearty, flavorful, and ready to be sandwiched between crispy tortillas. Let it sit at room temperature while you prepare the next components.
Assemble and Cook the Quesadillas
Heat 0.25 cup vegetable oil in a clean skillet over medium heat until the oil is hot but not smoking. Working with 2 tortillas at a time, place one tortilla in the skillet and let it warm for 30 seconds until slightly softened. Spread ½ cup of the beef-bean mixture evenly over one half of the tortilla, leaving a ½-inch border uncovered. Sprinkle ½ cup of the shredded Monterey Jack cheese over the filling, then fold the tortilla in half to encase the filling.
Press down gently on the quesadilla with a spatula to help it hold together. Cook for 2-3 minutes per side, or until the tortilla is golden brown and crispy and the cheese is fully melted. Transfer the cooked quesadilla to a plate and tent loosely with aluminum foil to keep it warm while you assemble the remaining ones. The key here is patience—rushing will result in soggy tortillas instead of crispy, golden perfection.
Serve with Confidence
Once all 4 quesadillas are cooked, slice each one into 4 wedges and serve immediately. The tortillas should be crispy on the outside with a gooey, melted cheese center, while the smoky beef and bean filling adds hearty texture and flavor. Pair with sour cream, salsa, or guacamole for a complete meal.
Here's the thing—these quesadillas are best enjoyed fresh out of the pan. The crispy tortillas soften quickly, so don't wait too long before serving. If you're making them ahead, assemble the quesadillas without cheese, wrap them in plastic, and refrigerate. Cook directly from the fridge over slightly lower heat, adding an extra 30 seconds per side to ensure even cooking.
Pro Tips For Making Beef And Bean Quesadilla
- Sear the Beef First: I used to mix everything together in one pan, but searing the ground beef until it’s deeply browned—think 5-6 minutes on medium-high—adds a flavor punch that canned beans and tortillas can’t compete with. Just don’t overcrowd the pan or it’ll steam instead of brown.
- Drain and Toast the Beans: Skip the soggy quesadilla by draining your black beans and giving them a quick toast in the same pan you seared the beef. A couple minutes with a splash of oil and a pinch of salt turns them crispy at the edges—no mushy fillings here.
- Layer Cheese Evenly: I learned this after watching my first quesadilla turn into a cheese avalanche. Sprinkle the Monterey Jack lightly on the tortilla first, then add the beef-bean mix, then top with more cheese. Pressing it down flattens the layers so it cooks evenly—no cheese escape artists.
- Use a Splatter Screen: Corn tortillas release a lot of moisture when they hit the pan. A splatter screen (or even foil crumpled loosely over the pan) keeps your stove clean and prevents the quesadilla from steaming instead of browning. Trust me, your future kitchen will thank you.
Flavor customization for this dish
Spicy Kick Options
For those who love heat, add ½ teaspoon cayenne pepper or 1 teaspoon chipotle powder directly to the beef mixture. The smoky depth from the chipotle pairs beautifully with the black beans, while cayenne delivers a sharp, immediate burn. I like to toast the chipotle powder in the pan for 30 seconds before adding it to the beef to intensify its flavor. 🌶️
Creamy Variations
Add a dollop of ½ cup sour cream or ¼ cup Greek yogurt to the beef-bean mixture for a tangy contrast. This works especially well with Monterey Jack cheese—the creaminess balances the smoky spices and adds a luxurious texture. For extra richness, stir in 2 tablespoons cream cheese while the quesadillas cook.
Cheesy Upgrades
Swap out Monterey Jack for Oaxaca cheese or queso fresco for a more authentic Mexican flavor. Oaxaca melts beautifully and stretches deliciously, while queso fresco adds a crumbly, salty finish. If you can't find these, Colby Jack cheese is a great alternative. For a gooey surprise, sprinkle ¼ cup shredded pepper jack on top before folding the tortilla.
Veggie Boosts
Add ½ cup diced bell peppers or ½ cup corn kernels to the beef mixture for extra texture and sweetness. Bell peppers add a crisp bite, while corn brings natural sweetness that pairs perfectly with the smoky spices. Sauté the veggies with the onions for 2-3 minutes before adding the beef to ensure they're tender but still hold their shape. 🥕
Breakfast Twist
Transform these into a breakfast dish by adding 2 scrambled eggs to the beef-bean mixture. Cook the eggs separately and fold them into the filling just before assembling the quesadillas. Top with salsa verde and crumbled bacon for a hearty morning meal. The eggs add protein and creaminess, making this a satisfying brunch option.
Nutrition facts
Frequently asked questions
Can I use flour tortillas instead of corn?
Yes, you can! Flour tortillas will give you a softer, more pliable texture rather than the crispy crunch of corn. For best results, use medium-sized flour tortillas and press them gently with a spatula while cooking to help them crisp up. The filling will still be delicious, but the overall texture will be different.
How do I prevent the quesadillas from getting soggy?
Soggy quesadillas happen when too much moisture gets trapped inside. To avoid this, drain and rinse your black beans thoroughly before using them, and make sure your beef mixture isn't too wet. Also, cook the quesadillas over medium heat rather than high heat—this helps the tortillas crisp up without steaming. Press gently with a spatula while cooking to help release any excess moisture.
What's the best way to reheat leftover quesadillas?
Reheat leftover quesadillas in a clean skillet over medium heat for 2-3 minutes per side, adding a tiny bit of oil if needed. Microwaving works in a pinch, but it won't give you that crispy texture. For extra crispiness, wrap the quesadillas in foil and warm them in a 350°F oven for 5-7 minutes—this helps restore some of that pan-fried crunch.
Can I make these quesadillas ahead of time?
Assemble the quesadillas without the cheese, wrap them tightly in plastic wrap, and refrigerate for up to 24 hours. When ready to cook, add the cheese and fry as directed. For freezing, assemble the quesadillas completely (including cheese), wrap them individually in foil, and freeze for up to 1 month. Thaw in the fridge overnight before cooking.
What's the best cheese for maximum melt?
For the gooiest, most meltable cheese, use a blend of Monterey Jack and cheddar—this combo melts beautifully and creates that perfect pull-apart texture. If you want extra stretchiness, add Oaxaca cheese (it melts like a dream!). Avoid pre-shredded cheese with anti-caking agents, as these can prevent proper melting. Freshly shredded cheese always works best.